
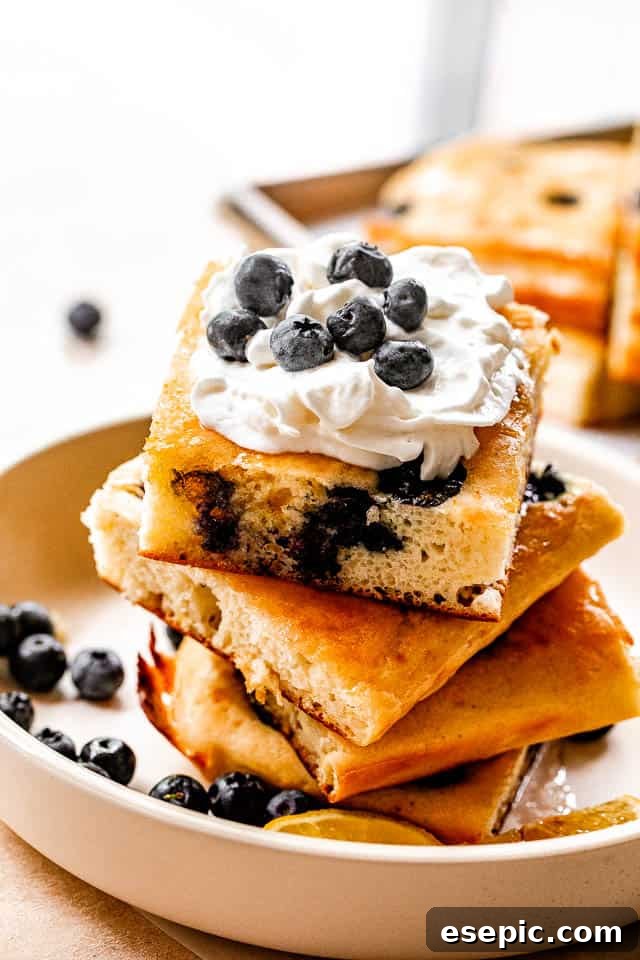
Transform your breakfast routine with these incredibly tall, wonderfully fluffy Sheet Pan Pancakes! Say goodbye to the endless flipping over a hot stove; this revolutionary method bakes your homemade buttermilk pancakes to golden perfection right in the oven. The result is a breakfast masterpiece that’s not only easier to make but tastes absolutely phenomenal. Whether you’re feeding a hungry family or preparing for a leisurely brunch, these no-flip pancakes are about to become your new favorite way to start the day.
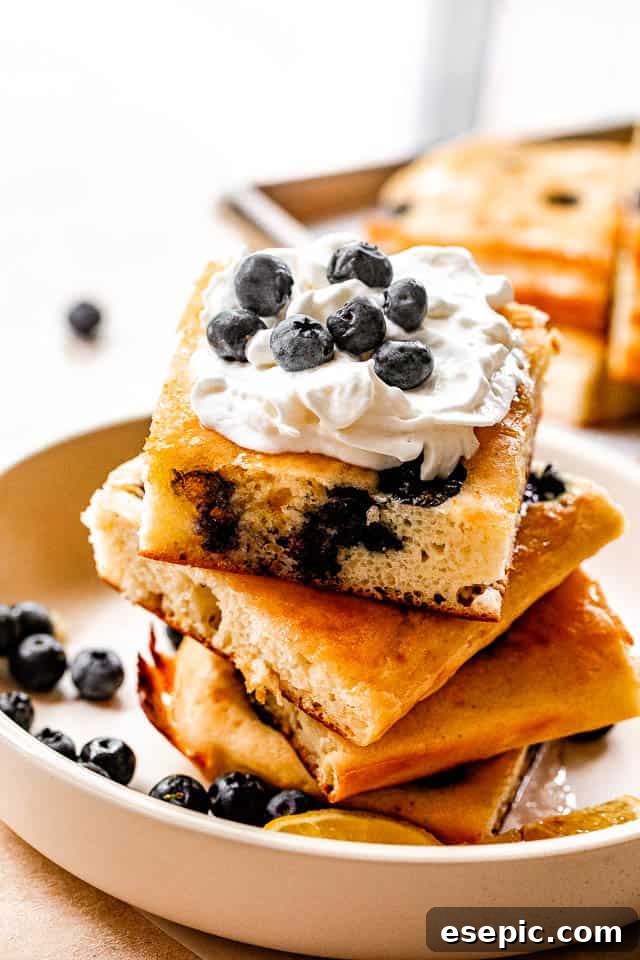
Discover the Easiest Way to Make Fluffy Homemade Pancakes
Imagine a world where making a batch of delicious, golden-brown pancakes doesn’t involve standing guard over a griddle, flipping each one individually. That world is here with sheet pan pancakes! This ingenious approach allows you to bake a large, single pancake that you can then slice into perfect servings. These fluffy buttermilk pancakes boast an unbeatable texture—crispy edges and a tender, airy interior—all cooked uniformly in your oven. It’s a game-changer for anyone who loves pancakes but dreads the traditional cooking process.
With just a handful of pantry staples and a mere 15 minutes of baking time, you can whip up a fantastic breakfast or brunch. This recipe is an absolute dream for busy mornings, family gatherings, or even a delightful “breakfast for dinner” treat. Prepare to impress everyone with minimal effort!
Why Sheet Pan Pancakes Will Revolutionize Your Breakfast
The primary advantage of baking pancakes in a sheet pan is pure convenience. No more standing over the stove, meticulously flipping individual pancakes one by one. This method streamlines the entire cooking process, transforming a typically labor-intensive task into an effortless endeavor. Here’s why you’ll love it:
- Time-Saving: Cook an entire batch of pancakes simultaneously, freeing up your hands and time to prepare other breakfast items or simply relax.
- Even Cooking: The oven’s consistent heat ensures every part of your pancake bakes evenly, resulting in a uniformly golden and fluffy texture throughout.
- Less Mess: Confine your pancake batter to a single sheet pan, significantly reducing splatter and cleanup compared to multiple rounds of griddle cooking.
- Perfect for Crowds: Easily scale up the recipe to feed a large family or a brunch party without breaking a sweat. Everyone gets a fresh, hot serving at the same time.
- No Flipping Required: The ultimate hands-off cooking method. Just pour, bake, slice, and serve!
Embrace the simplicity and efficiency of sheet pan pancakes, and you’ll wonder why you ever cooked them any other way!
Essential Ingredients for Fluffy Sheet Pan Pancakes
Crafting these delectable oven-baked pancakes requires a straightforward list of common pantry ingredients. Each component plays a vital role in achieving that perfect fluffy texture and rich flavor profile:
- Buttermilk: The star ingredient for tender, tangy pancakes. Buttermilk reacts with baking soda to create a light, airy crumb. If you don’t have any on hand, you can easily make your own by combining milk with a touch of lemon juice or vinegar and letting it sit for 5-10 minutes.
- Large Eggs: Essential for binding the ingredients together, adding moisture, and contributing to the pancake’s structure and richness.
- Melted Butter: Provides a rich, buttery flavor and helps create a tender crumb. Ensure your butter is melted but slightly cooled before adding to the wet ingredients.
- All-Purpose Flour: The primary dry ingredient, giving structure to the pancakes. For best results, measure accurately by spooning flour into a measuring cup and leveling it off.
- Granulated Sugar: Adds a touch of sweetness and helps with browning.
- Baking Powder & Baking Soda: These leavening agents are crucial for making the pancakes rise and become wonderfully fluffy. The baking soda specifically reacts with the acidity in the buttermilk.
- Salt: A pinch of salt balances the flavors and enhances the sweetness.
Optional Flavor Enhancements & Add-Ins
While delicious on their own, sheet pan pancakes are incredibly versatile and welcome a variety of delightful additions:
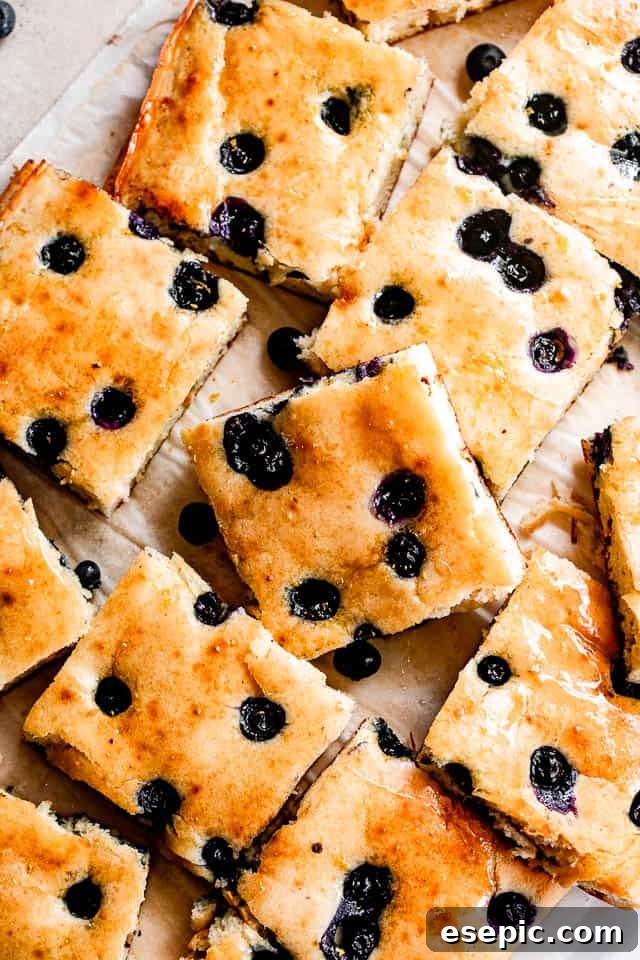
- Fresh Blueberries: Scatter these juicy gems over the batter before baking for bursts of sweet-tart flavor. Frozen blueberries can also be used; no need to thaw them first.
- Lemon Zest: Finely grated lemon zest adds a bright, fresh aroma and subtle citrus note that perfectly complements the buttermilk and berries.
- Pure Vanilla Extract: A touch of vanilla enhances the overall sweetness and aroma of the pancakes, adding a classic depth of flavor.
Step-by-Step Guide: How to Make Perfect Sheet Pan Pancakes
Follow these simple instructions to create a batch of irresistibly fluffy sheet pan pancakes:
- Prepare for Baking: Begin by preheating your oven to 450˚F (230˚C). Generously grease an 18×13 inch baking sheet with cooking spray or butter. For an even taller, thicker pancake, opt for a smaller 15×11 inch baking sheet. Set the prepared pan aside.
- Combine Wet Ingredients: In a large mixing bowl, thoroughly whisk together the buttermilk, eggs, and vanilla extract until well combined and smooth.
- Incorporate Butter: Gently whisk the slightly cooled melted butter into the buttermilk and egg mixture. Ensure the butter isn’t too hot to avoid scrambling the eggs. Set the bowl aside.
- Mix Dry Ingredients: In a separate, medium-sized mixing bowl, combine the all-purpose flour, granulated sugar, baking powder, baking soda, and salt. Whisk these dry ingredients together thoroughly until no lumps remain. If you’re using lemon zest, whisk it into the dry ingredients now as well.
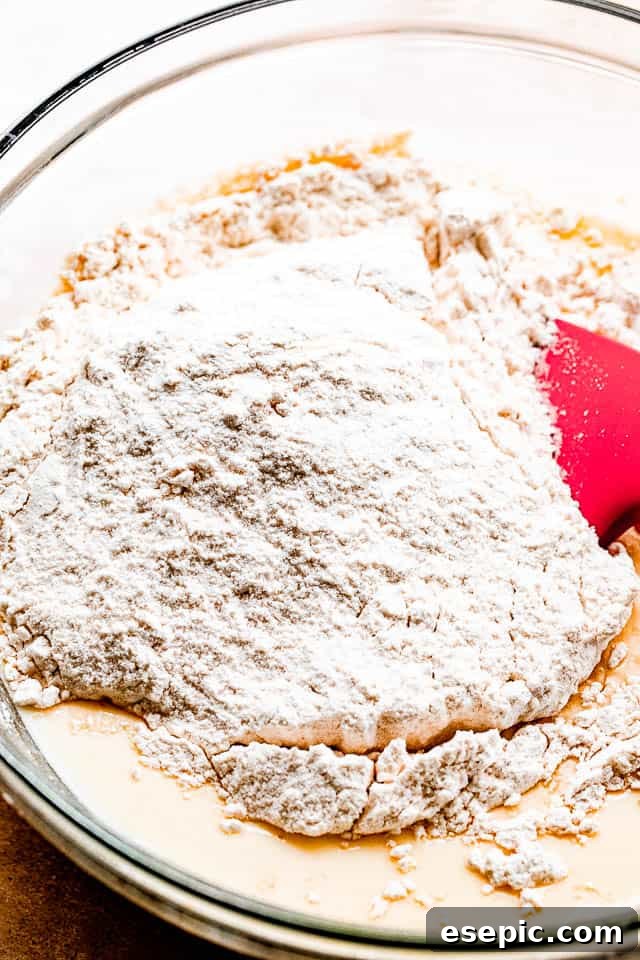
- Combine Wet & Dry: Gradually add the dry ingredient mixture to the buttermilk mixture. Using a spatula or whisk, fold the ingredients together until just incorporated. Be careful not to overmix the batter; a few small lumps are perfectly fine and will lead to more tender pancakes.
- Pour into Pan & Add Toppings: Carefully transfer the pancake batter to your previously prepared baking sheet. Use a spatula to gently spread the batter out into an even layer across the pan. If you’re using fresh blueberries or other mix-ins, scatter them evenly over the top of the batter at this stage.
- Bake to Perfection: Place the baking sheet in the preheated oven and bake for 15 to 18 minutes. The pancake is ready when it’s beautifully puffed up, the top is golden brown, and the edges pull away slightly from the sides of the pan. A wooden skewer or toothpick inserted into the center should come out clean.
- Cool & Serve: Remove your golden-brown pancake from the oven and allow it to cool for a few minutes on the sheet pan. This cooling period helps it set. Then, using a pizza cutter or a sharp knife, slice the large pancake into individual servings. Drizzle generously with maple syrup and enjoy immediately!
Pro Tips for the Ultimate Fluffy Sheet Pan Pancakes
Achieving consistently perfect sheet pan pancakes is easy with a few simple tricks:
- Generously Grease Your Baking Sheet: This is paramount! Whether using cooking spray or softened butter, ensure every corner of your baking sheet is well-greased. This prevents sticking and allows for easy removal and serving. While parchment paper is an option, a direct greased pan often yields crispier edges. If using parchment, still lightly grease the paper for best results.
- Cool Melted Butter Slightly: When adding melted butter to your wet ingredients (especially eggs), ensure it’s not piping hot. Allow it to cool for a few minutes to a warm, rather than scorching, temperature. This prevents the eggs from cooking prematurely and ensures a smooth batter.
- Do Not Overmix the Batter: Overmixing develops the gluten in the flour, leading to tough, chewy pancakes instead of light and fluffy ones. Mix until the wet and dry ingredients are just combined. A few small lumps are completely normal and desired.
- Spread Batter Evenly: After pouring the batter onto the prepared pan, use a spatula to gently spread it into an even layer. This ensures uniform thickness and consistent baking, so every piece is cooked through at the same time.
- Don’t Peek Too Often: Resist the urge to open the oven door frequently, as this can cause the pancake to deflate. Trust your oven and the recommended baking time.
- Adjust Pan Size for Desired Thickness: Remember that a smaller baking sheet (like 15×11 inches) will yield a thicker, taller pancake, while a larger one (18×13 inches) will produce a slightly thinner but still wonderfully fluffy result. Choose your pan based on your preference.
Get Creative: Delicious Mix-In & Flavor Variations
The beauty of sheet pan pancakes lies in their adaptability. Customize your batch with these exciting mix-in ideas:
- Nuts: Add a delightful crunch and nutty flavor by folding in chopped walnuts, pecans, or almonds directly into the batter before spreading, or simply sprinkle them over the top.
- Spices: Introduce warmth and complexity with spices. A teaspoon of ground cinnamon, nutmeg, or a pumpkin pie spice blend can transform your pancakes into a cozy treat.
- Chocolate Chips: Indulge your sweet tooth! Milk chocolate, dark chocolate, or white chocolate chips can be mixed into the batter or sprinkled generously on top for gooey pockets of chocolatey goodness.
- Other Fruits: Beyond blueberries, consider sliced bananas, diced apples (perhaps with a sprinkle of cinnamon), raspberries, or sliced strawberries for different fruity profiles.
- Citrus Zest: Orange zest or lime zest can offer a vibrant, aromatic twist, especially when paired with corresponding fruits.
Elevate Your Meal: Serving Suggestions & Topping Ideas
Sheet pan pancakes are fantastic on their own, but they truly shine when paired with complementary toppings and side dishes:
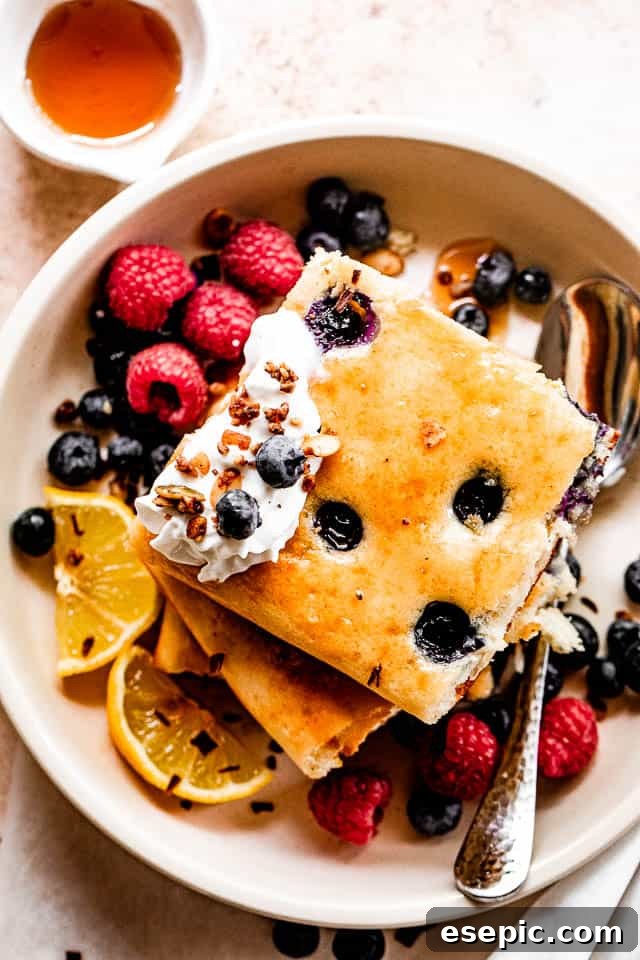
- Classic Syrup & Cream: A generous pour of pure maple syrup and a dollop of freshly whipped cream is a timeless combination that highlights the pancakes’ fluffy texture.
- Fresh Berries: Brighten your breakfast with an assortment of fresh berries like strawberries, raspberries, and blackberries for a pop of color and natural sweetness.
- Savory Bacon or Sausage: For a delightful sweet and savory contrast, serve your pancakes alongside crispy bacon or savory breakfast sausage. You can even crumble cooked bacon over the batter before baking for a smoky twist!
- Cream Cheese & Fruit Swirl: For a decadent “pancake cheesecake” effect, dollop small spoonfuls of softened cream cheese over the batter, then swirl it lightly with a knife. Add your favorite berries before baking.
- Nut Butters & Bananas: Spread a layer of peanut butter, almond butter, or cashew butter, then top with sliced bananas for a protein-packed and satisfying meal.
- Yogurt & Granola: A healthier option involves a dollop of Greek yogurt and a sprinkle of crunchy granola for added texture.
- Fruit Compote: Make a quick berry or apple compote by simmering fruit with a little sugar and water for a warm, comforting topping.
- Side Dishes: Pair your pancakes with Crispy Zucchini Fritters for a unique savory complement, or a simple fruit salad for a lighter touch.
Storing & Reheating Sheet Pan Pancake Leftovers
One of the many advantages of sheet pan pancakes is how well they store and reheat, making them perfect for meal prep!
- Refrigerator Storage: Allow any leftover pancakes to cool completely to room temperature. Then, transfer them to an airtight container or a resealable plastic bag. They will keep fresh in the refrigerator for up to 5 days.
- Freezing for Longer Storage: To enjoy pancakes beyond a few days, freezing is an excellent option.
- Flash Freeze: Cut the pancake into individual servings. Arrange these pieces in a single layer on a baking sheet lined with parchment paper, ensuring none of them are touching. Place the baking sheet in the freezer for about 1 hour, or until the pancakes are completely solid. This step prevents them from sticking together in the freezer bag.
- Transfer to Bag: Once frozen solid, transfer the individual pancakes to a heavy-duty freezer bag or an airtight freezer-safe container. Remove as much air as possible from the bag to prevent freezer burn.
- Storage Duration: Frozen sheet pan pancakes can be stored for up to 3 months.
- Thawing Frozen Pancakes: For best results, thaw frozen pancakes overnight in the refrigerator before reheating. If you’re in a hurry, you can often reheat them directly from frozen, but they might require a bit more time.
- Reheating Instructions:
- Microwave: The quickest method. Place a few pancakes on a microwave-safe plate and heat in 10 to 20-second intervals until warmed through.
- Oven/Toaster Oven: For a crisper result, place thawed pancakes on a baking sheet and reheat in a preheated oven (around 350°F / 175°C) for 5-10 minutes, or until warm and slightly crispy. Alternatively, pop them into a toaster oven.
- Toaster: Individual slices can be reheated in a toaster, much like frozen waffles, for a quick and crisp finish.
Sheet Pan Pancakes
Katerina | Easy Weeknight Recipes
These fluffy and spongey Sheet Pan Pancakes are easy to make in your oven! Homemade buttermilk pancakes have never tasted better.
10 minutes
15 minutes
30 minutes
12 slices
Ingredients
- 2 cups buttermilk
- 2 large eggs
- 1/2 tablespoon pure vanilla extract (optionally, you can also use lemon juice instead of vanilla)
- 4 tablespoons butter, melted
- 2 1/4 cups all-purpose flour
- ¼ cup granulated sugar
- 2 teaspoons baking powder
- 1/2 teaspoon baking soda
- 1/2 teaspoon salt
Optional Add-Ins
- fresh blueberries
- 1/2 teaspoon finely grated lemon zest
Instructions
- Preheat oven to 450˚F (230°C).
- Grease an 18×13 inch baking sheet with cooking spray and set aside. For a taller pancake, use a 15×11 inch baking sheet.
- In a mixing bowl, whisk together buttermilk, eggs, and vanilla.
- Whisk in the slightly cooled melted butter; set aside.
- In a separate mixing bowl, combine flour, sugar, baking powder, baking soda, and salt; whisk until well combined. If using lemon zest, whisk that in, too.
- Add the flour mixture to the buttermilk mixture and fold until thoroughly incorporated.
- Transfer batter to previously prepared baking sheet and spread it out into an even layer. Top with blueberries, if using.
- Bake for 15 to 18 minutes, or until the pancake is puffed up, the top is golden brown, and pulls from the edges of the pan.
- Remove from oven and allow to cool slightly.
- Cut, serve, and enjoy!
Equipment
- Oven
- Large Mixing Bowl
- Whisk
- 18×13 inch (or 15×11 inch) Baking Sheet
- Spatula
- Pizza Cutter (optional, for easy slicing)
Nutrition
Nutritional Information (per serving, estimate):
- Calories: 171kcal
- Carbohydrates: 24g
- Protein: 5g
- Fat: 6g
- Saturated Fat: 3g
- Cholesterol: 42mg
- Sodium: 299mg
- Potassium: 89mg
- Fiber: 1g
- Sugar: 6g
- Vitamin A: 222IU
- Vitamin C: 1mg
- Calcium: 94mg
- Iron: 1mg
Nutritional info is an estimate and provided as a courtesy. Values may vary according to the ingredients and tools used. Please use your preferred nutritional calculator for more detailed info.
Frequently Asked Questions About Sheet Pan Pancakes
Here are answers to some common questions about making these easy oven-baked pancakes:
- Can I use regular milk instead of buttermilk?
While buttermilk is highly recommended for its unique tang and tenderizing properties, you can create a substitute. For every cup of milk, stir in 1 tablespoon of white vinegar or lemon juice. Let it sit for 5-10 minutes until it slightly curdles. Whole milk works best for this substitute, but you can use lower-fat milk if that’s all you have. The texture might be slightly less fluffy, but it will still be delicious.
- Can I make these pancakes gluten-free?
Yes, you can! Substitute the all-purpose flour with a 1:1 gluten-free baking blend that contains xanthan gum. Ensure the blend is designed for baking. Follow the rest of the recipe as instructed, and you should achieve a great gluten-free version.
- Can I prepare the batter ahead of time?
You can mix the dry ingredients and store them in an airtight container for several weeks. The wet ingredients (buttermilk, eggs, vanilla, melted butter) can be combined and stored in the fridge for up to 24 hours. When ready to bake, simply combine the wet and dry mixtures, pour onto the sheet pan, and bake. This makes morning prep even faster!
- What size sheet pan is best?
An 18×13 inch (half sheet) pan will yield a thinner, yet still fluffy, pancake, perfect for more servings. A 15×11 inch pan (quarter sheet) will produce a noticeably taller and thicker pancake, offering a more traditional “stack” feel in each slice. Choose based on your preference for pancake thickness and how many servings you need.
- How do I know when the pancakes are fully cooked?
Look for a beautifully golden-brown top and edges that are pulling away from the sides of the pan. The pancake should also feel puffed up and firm to the touch in the center. A wooden skewer or toothpick inserted into the middle should come out clean, indicating it’s cooked through.
Conclusion: Embrace the Effortless Joy of Sheet Pan Pancakes
These Sheet Pan Pancakes aren’t just a recipe; they’re a revelation for breakfast lovers everywhere. By moving the cooking process from the stovetop to the oven, you unlock a world of convenience, consistent results, and less cleanup. Imagine waking up to the aroma of perfectly golden, fluffy pancakes without the hassle of individual flipping. This recipe delivers a delightful meal that’s perfect for any occasion, from a quick weekday breakfast to a leisurely weekend brunch. So, gather your ingredients, preheat your oven, and prepare to enjoy the easiest, most delicious pancakes you’ve ever made!