
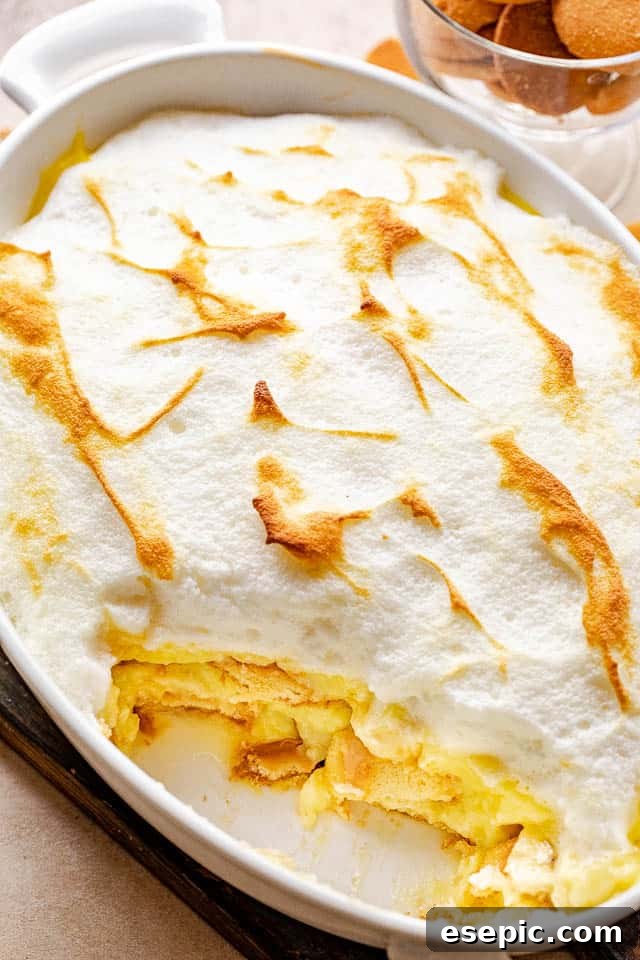
Welcome to the ultimate guide for creating the most luscious and satisfying Homemade Banana Pudding. This creamy, dreamy dessert is a beloved Southern classic, celebrated for its exquisite layers of velvety vanilla pudding, sweet, tender banana slices, and delightful crisp vanilla wafers. Far from a complicated affair, this recipe is surprisingly easy to master, requiring just a handful of staple ingredients and a little love. Prepare to indulge in a timeless treat that brings comfort and joy with every spoonful.
Crafting the Perfect Banana Pudding from Scratch: A Southern Tradition
There’s an undeniable charm and immense satisfaction that comes with a cool, creamy pudding, especially when it’s crafted right in your own kitchen. While store-bought options exist, nothing quite compares to the rich, authentic flavor and perfect texture of homemade vanilla pudding. This particular recipe ensures a quick and straightforward preparation of the pudding base, which then beautifully complements the delicate sweetness of fresh banana slices and the satisfying crunch of vanilla wafers.
Banana pudding stands as a quintessential Southern comfort food, embodying sweetness, decadence, robust flavor, and an irresistibly creamy texture. It’s more than just a dessert; it’s a culinary hug, perfect for grand celebrations, intimate family gatherings, or simply elevating an ordinary weeknight into something special. If you’re a fan of bananas, you absolutely must experience this easy, mostly no-bake delight. Its simplicity belies its profound deliciousness, making it a go-to for many home cooks. For those seeking an even more indulgent twist, consider exploring recipes like Banana Pudding Cupcakes, which take this classic flavor to new heights.
The beauty of making banana pudding from scratch lies in the control you have over each ingredient, ensuring the freshest flavors and a truly bespoke dessert. No artificial flavors or preservatives here – just pure, wholesome goodness. This recipe guides you through creating a rich, custard-like pudding that forms the heart of this layered masterpiece, promising a dessert that tastes genuinely homemade because it is.
Essential Ingredients for Your Homemade Banana Pudding
Creating this delightful banana pudding requires a few basic ingredients, each playing a crucial role in achieving that perfect balance of sweetness, creaminess, and texture. Here’s a detailed look at what you’ll need:
- Granulated Sugar: Provides the foundational sweetness for our creamy pudding. Adjust to your preference, though the given amount strikes a perfect balance.
- All-Purpose Flour: Acts as the thickening agent for the pudding, giving it that luxurious, smooth consistency. Ensure it’s measured accurately for the best results.
- Salt: A pinch of salt is vital for enhancing all the other flavors, preventing the pudding from tasting flat and bringing out the natural sweetness of the bananas and vanilla.
- Milk: For the richest, creamiest pudding, use whole milk or at least 2% milk. The higher fat content contributes significantly to the pudding’s luxurious mouthfeel.
- Large Eggs: Eggs are crucial for the custard-like texture of the pudding. They add richness and help with thickening. Using fresh, large eggs will yield the best results.
- Pure Vanilla Extract: The soul of vanilla pudding! Opt for pure vanilla extract for an authentic, aromatic flavor that truly elevates the dessert. Avoid imitation vanilla if possible.
- Vanilla Wafers: These classic, crisp cookies are an integral part of banana pudding, providing a delightful textural contrast to the soft bananas and creamy pudding. They soften slightly as they absorb the pudding, creating an irresistible bite.
- Bananas: The star of the show! Choose ripe, but not overly ripe, bananas. They should be sweet with a few brown flecks but still firm enough to hold their shape when sliced. Slice them into approximately 1/4-inch pieces for optimal layering and texture in each spoonful.
Step-by-Step Guide: Crafting Your Homemade Banana Pudding
Making banana pudding from scratch is a rewarding process that results in a dessert far superior to any store-bought version. Follow these detailed steps to create your own delightful culinary masterpiece:
- Prepare the Dry Mixture and Milk: Begin by combining the sugar, all-purpose flour, and salt in a large nonstick saucepan or a heavy-bottomed pot. This ensures even cooking and prevents sticking. Gradually whisk in the milk until the dry ingredients are fully incorporated and the mixture is smooth. Place the saucepan over medium heat.
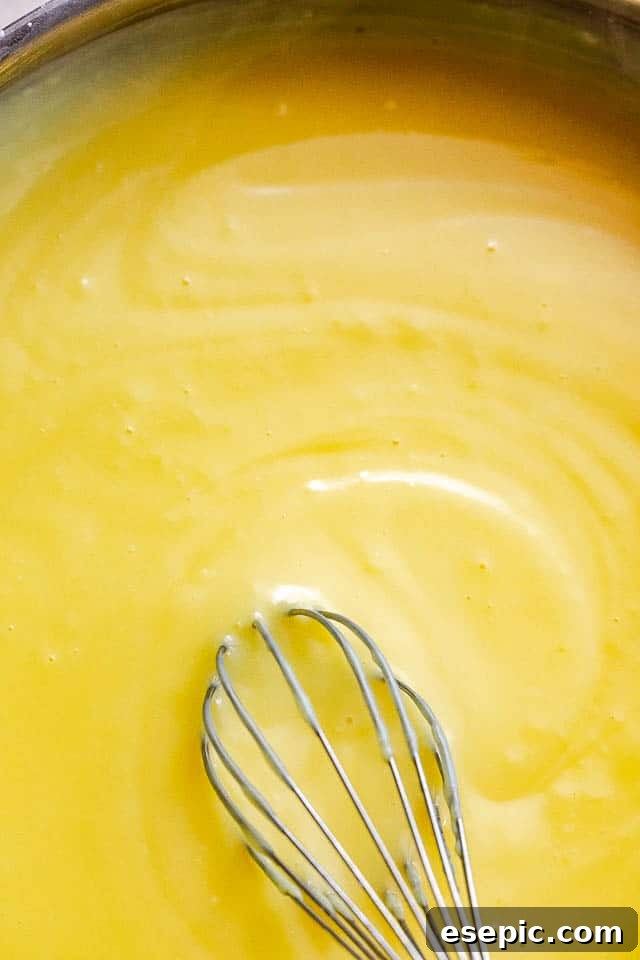
- Cook the Pudding Base: Continue to cook the mixture, stirring constantly with a whisk. Constant stirring is key to prevent lumps and ensure even thickening. The pudding will begin to thicken and become bubbly. This process usually takes about 5-7 minutes.
- Simmer to Perfection: Once the mixture has thickened and is bubbling, reduce the heat to low. Continue to stir and cook for an additional 2 minutes. This step helps to cook out the flour taste and ensures a stable pudding consistency. Remove the saucepan from the heat and set it aside momentarily.
- Temper the Eggs: In a separate bowl, whisk the eggs until they are well beaten. To prevent the eggs from scrambling when added to the hot pudding mixture, you must temper them. Slowly pour a small amount (about half a cup) of the hot milk mixture into the whisked eggs while continuously whisking the eggs. This gradually raises the temperature of the eggs.
- Incorporate the Eggs: Once the eggs are tempered, slowly pour the entire egg mixture back into the remaining hot milk mixture in the saucepan, whisking vigorously the entire time. This ensures the eggs are fully integrated and contribute to the pudding’s rich texture without clumping.
- Final Cook for Thickening: Return the saucepan to the stovetop over medium heat. Bring the mixture to a gentle boil, stirring constantly. Cook and stir for another 2 minutes until the pudding reaches its final desired thickness. It should be rich, smooth, and coat the back of a spoon.
- Add Vanilla and Cool: Remove the pudding from the heat. Whisk in the pure vanilla extract. Allow the pudding to cool for about 15 minutes, stirring occasionally during this time to prevent a skin from forming on top.
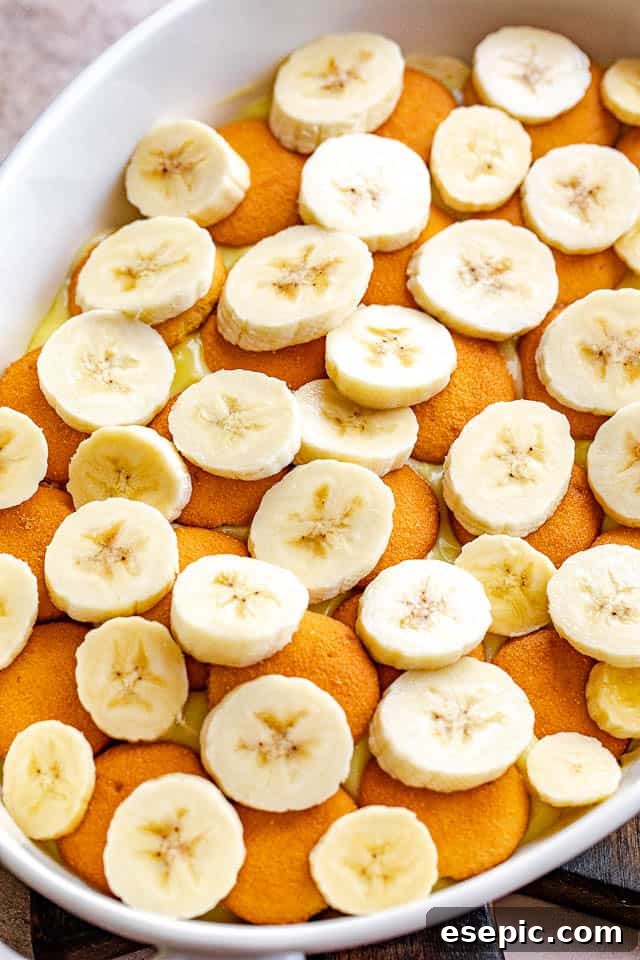
- Assemble Your Layered Dessert: Begin the assembly process by arranging a single layer of vanilla wafers in the bottom of an 8-inch baking dish or brownie pan. Next, layer half of your thinly sliced bananas over the wafers. Carefully pour half of the warm, creamy pudding over the banana slices. Repeat these layers: another layer of vanilla wafers, the remaining banana slices, and finally, pour the rest of the luscious pudding over the top, ensuring it’s evenly spread.
- Chill for Optimal Flavor and Texture: To prevent a skin from forming and to keep the bananas from browning excessively, place a piece of plastic wrap directly onto the surface of the pudding, pressing it gently to ensure full contact. Refrigerate the banana pudding for a minimum of 6 hours, or ideally, overnight. Chilling allows the flavors to meld beautifully and the pudding to set perfectly, resulting in the best possible texture and taste.
Expert Tips for the Best Homemade Banana Pudding
Achieving banana pudding perfection is simple with a few insider tips. These pointers will help ensure your dessert is nothing short of spectacular:
- The Art of Tempering Eggs: This step is critical. Before introducing your whisked eggs to the hot milk mixture, slowly drizzle a small amount of the hot mixture into the eggs while continuously whisking. This gradual temperature increase prevents the eggs from scrambling and instead allows them to seamlessly integrate into the pudding, creating that silky, smooth texture.
- Stirring is Non-Negotiable: This pudding recipe is hands-on, and constant stirring is essential. Whether you’re cooking the milk mixture or incorporating the eggs, continuous whisking prevents lumps, scorching on the bottom of the pan, and ensures a consistently smooth and thick pudding. Don’t step away from the stovetop during the cooking phases!
- The Magic of Overnight Chilling: While 6 hours is the minimum for the pudding to set, refrigerating it overnight truly makes a difference. The extended chilling time allows all the flavors to deepen and meld together, intensifying the rich banana and vanilla notes. Furthermore, the wafers have more time to soften to a cake-like consistency, making each bite even more delightful. Patience truly is a virtue here.
- Choosing the Right Bananas: The ideal bananas for this pudding are ripe but not overly soft or bruised. Look for bananas with a few brown speckles, indicating sweetness, but still firm enough to hold their shape when sliced. Overripe bananas can become mushy in the pudding, while underripe ones lack sweetness and flavor.
- Covering is Key for Freshness: Always press plastic wrap directly onto the surface of the pudding during chilling. This simple act prevents the formation of a rubbery skin on top and helps slow down the browning of the banana slices, keeping your pudding looking and tasting fresh.
- Don’t Rush the Cooling Process: After cooking, allowing the pudding to cool for about 15 minutes before assembly helps prevent the wafers from becoming soggy too quickly and ensures the bananas don’t overheat.
Preventing Banana Browning in Your Pudding
One common concern with banana pudding is the inevitable browning of the banana slices, which can affect the dessert’s visual appeal. While some browning is natural, there are effective steps you can take to minimize it and keep your pudding looking fresh longer:
- Start with the Right Bananas: As mentioned, avoiding overly ripe bananas is the simplest first line of defense. Bananas that are just ripe, with slight yellow and minimal brown spots, will oxidize slower than very ripe ones.
- The Lemon Juice Trick: If you’re particularly concerned about browning, a quick and effective method is to gently toss your banana slices in a very small amount of lemon juice (or even pineapple juice) before layering them into the baking dish. The acidity in the lemon juice acts as a natural antioxidant, significantly slowing down the enzymatic browning process. Be careful not to use too much, as it can impart a noticeable tart flavor. A mere squeeze and a gentle toss are sufficient.
- Immediate Covering: As soon as your pudding is assembled, place plastic wrap directly onto the surface of the pudding. This creates an airtight seal that limits exposure to oxygen, which is a primary catalyst for browning.
- Chill Promptly: Refrigerating the pudding immediately after assembly helps to slow down the ripening process of the bananas and further inhibits browning.
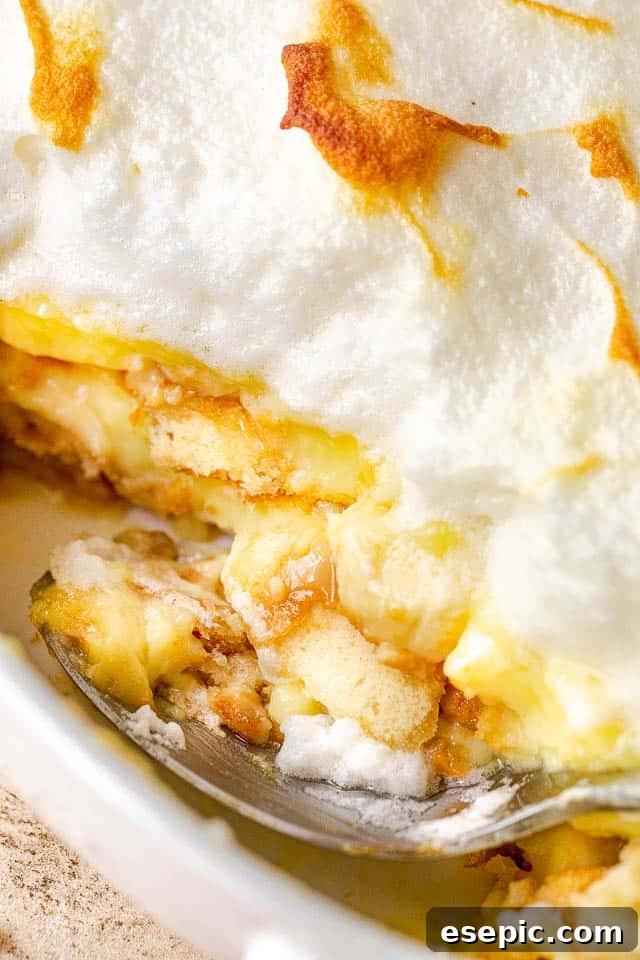
Serving Suggestions & Creative Variations
Once perfectly chilled, your homemade banana pudding is ready to be served. Scoop generous portions into individual bowls or serve directly from the baking dish. It’s fantastic on its own, but here are some ideas to elevate your serving:
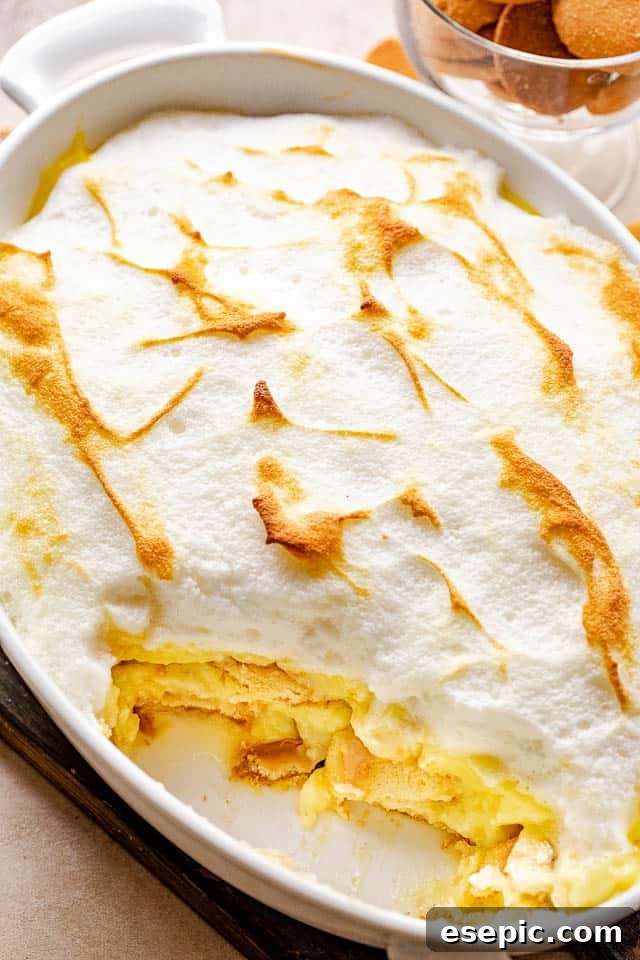
- Meringue Topping (Optional): For a classic Southern touch, a light and airy meringue topping can be added and lightly browned in the oven. The contrast of the sweet, crisp meringue with the creamy pudding is heavenly. (See recipe card for instructions.)
- Whipped Cream: A dollop of freshly whipped cream adds another layer of creaminess and elegance. You can sweeten it lightly with sugar and a dash of vanilla.
- Caramel Drizzle: A light drizzle of warm caramel sauce can complement the banana and vanilla flavors beautifully.
- Chocolate Shavings: A sprinkle of dark or milk chocolate shavings can add a sophisticated touch and a hint of bitterness to cut through the sweetness.
- Different Cookies: While vanilla wafers are traditional, feel free to experiment with other plain cookies like shortbread, Biscoff, or even graham crackers for a different flavor profile.
Proper Storage for Leftover Banana Pudding
If you happen to have any leftover banana pudding – a rare occurrence, we’re told! – proper storage is key to maintaining its deliciousness:
- Store any remaining banana pudding in a tightly sealed, covered container in the refrigerator. This will help keep it fresh and prevent it from absorbing other odors from the fridge.
- It will typically stay fresh for 2-3 days when stored correctly. However, keep in mind that the longer your pudding sits in the refrigerator, the more likely the banana slices are to continue browning, and the vanilla wafers will become progressively softer. While still delicious, the texture will evolve.
- For best quality, aim to consume it within 2 days of making it to enjoy the optimal texture and appearance.
Freezing Homemade Banana Pudding: Tips for Make-Ahead
Planning ahead can save time and effort, and with a few considerations, you can prepare aspects of your banana pudding in advance, or even freeze the pudding itself:
- Make Ahead (Refrigerated): The assembled banana pudding can be prepared 1 to 2 days in advance if kept properly covered in the refrigerator. This allows the flavors to meld and the wafers to soften perfectly for serving. Remember to press plastic wrap directly onto the pudding surface.
- Freezing the Pudding Base: If you wish to make the vanilla pudding component ahead of time for future use, you can freeze it separately. Allow the cooked pudding to cool completely at room temperature, then transfer it to a freezer-safe, resealable bag or an airtight container. Ensure there’s minimal air inside to prevent freezer burn. It can be stored in the freezer for up to 3 months.
- Thawing Frozen Pudding: When you’re ready to use the frozen pudding, transfer it to the refrigerator to thaw overnight. Once thawed, you may need to give it a good whisk to restore its smooth consistency before assembling the banana pudding layers. Note that the texture of frozen and thawed pudding might be slightly different from freshly made, but it will still be delicious for assembling your dessert. Freezing the fully assembled pudding with bananas and wafers is generally not recommended as the bananas can become mushy and discolored upon thawing, and the wafers might turn overly soft.
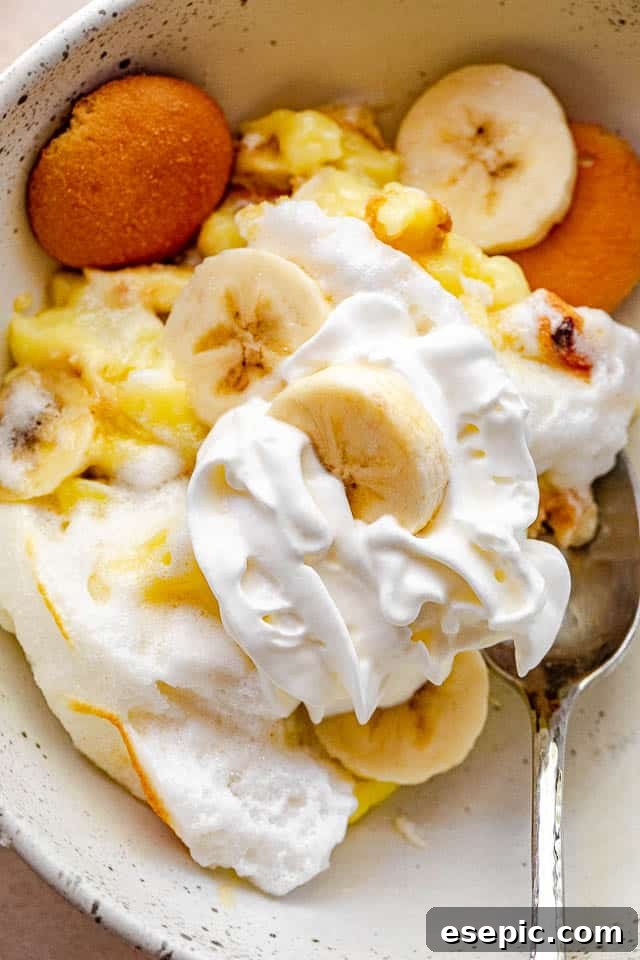
Homemade Banana Pudding
Ingredients
- 3/4 cup sugar
- 1/4 cup all purpose flour
- 1/4 teaspoon salt
- 3 cups milk, 2% or higher
- 3 large eggs
- 2 teaspoons pure vanilla extract
- 8 ounces vanilla wafers, divided
- 4 large bananas, cut into 1/4 inch slices
FOR THE MERINGUE TOPPING (OPTIONAL)
- 4 egg whites
- pinch of salt
- ¼ cup granulated sugar
Instructions
-
In a large saucepan, combine sugar, flour and salt; whisk in the milk until smooth and set the saucepan over medium heat.
-
Cook and stir constantly with a whisk until the mixture is thickened and bubbly.
-
Reduce heat to low and continue to stir and cook for 2 more minutes; remove from heat and set aside.
-
Whisk the eggs in a separate bowl. To temper the eggs, slowly add a small amount of the hot milk mixture into the eggs while continuously whisking.
-
Whisk the entire tempered egg mixture into the milk mixture in the saucepan.
-
Set the saucepan back on the stovetop over medium heat; bring to a boil and cook and stir with the whisk for 2 more minutes until it reaches desired thickness.
-
Whisk in the pure vanilla extract and remove from heat; set aside to cool for 15 minutes, stirring occasionally to prevent a skin from forming.
-
Arrange a layer of vanilla wafers in an 8-inch or 9-inch baking dish or brownie pan.
-
Layer half of the sliced bananas evenly over the wafers.
-
Pour half of the warm pudding over the bananas, spreading it gently.
-
Repeat layers with the remaining cookies, banana slices, and finish by pouring the rest of the pudding evenly over the top.
-
Add plastic wrap over the top, pressing it gently onto the surface of the pudding to prevent a skin and slow banana browning.
SKIP THIS PART IF ADDING THE MERINGUE TOPPING. -
Refrigerate for a minimum of 6 hours, or ideally, overnight, to allow flavors to meld and pudding to set.
-
Serve chilled and enjoy your homemade delight!
FOR THE MERINGUE TOPPING (OPTIONAL)
-
Preheat oven to 425˚F (220˚C).
-
In a mixer’s bowl, beat the 4 egg whites with a pinch of salt until they form stiff peaks.
-
Gradually beat in the ¼ cup of granulated sugar and continue beating until the meringue is glossy and holds firm peaks that will not slide out of the mixing bowl.
-
Evenly spread the meringue topping over the assembled banana pudding.
-
Bake for 5 minutes, or until the meringue begins to turn a beautiful golden brown on top.
Equipment
-
Stovetop
-
Large Nonstick Saucepan
-
Whisk
-
8-inch or 9-inch Baking Dish
Nutrition
Nutritional info is an estimate and provided as courtesy. Values may vary according to the ingredients and tools used. Please use your preferred nutritional calculator for more detailed info.
Did you make a recipe? Leave a rating
There’s truly nothing quite like a slice of homemade banana pudding to bring warmth, comfort, and a touch of Southern hospitality to any table. This timeless dessert, with its layers of creamy custard, fresh bananas, and tender vanilla wafers, is a testament to simple ingredients coming together to create something extraordinary. Whether you’re making it for a special occasion or simply to treat yourself, this recipe promises a delightful experience from start to finish. Enjoy the process, and savor every indulgent bite!