
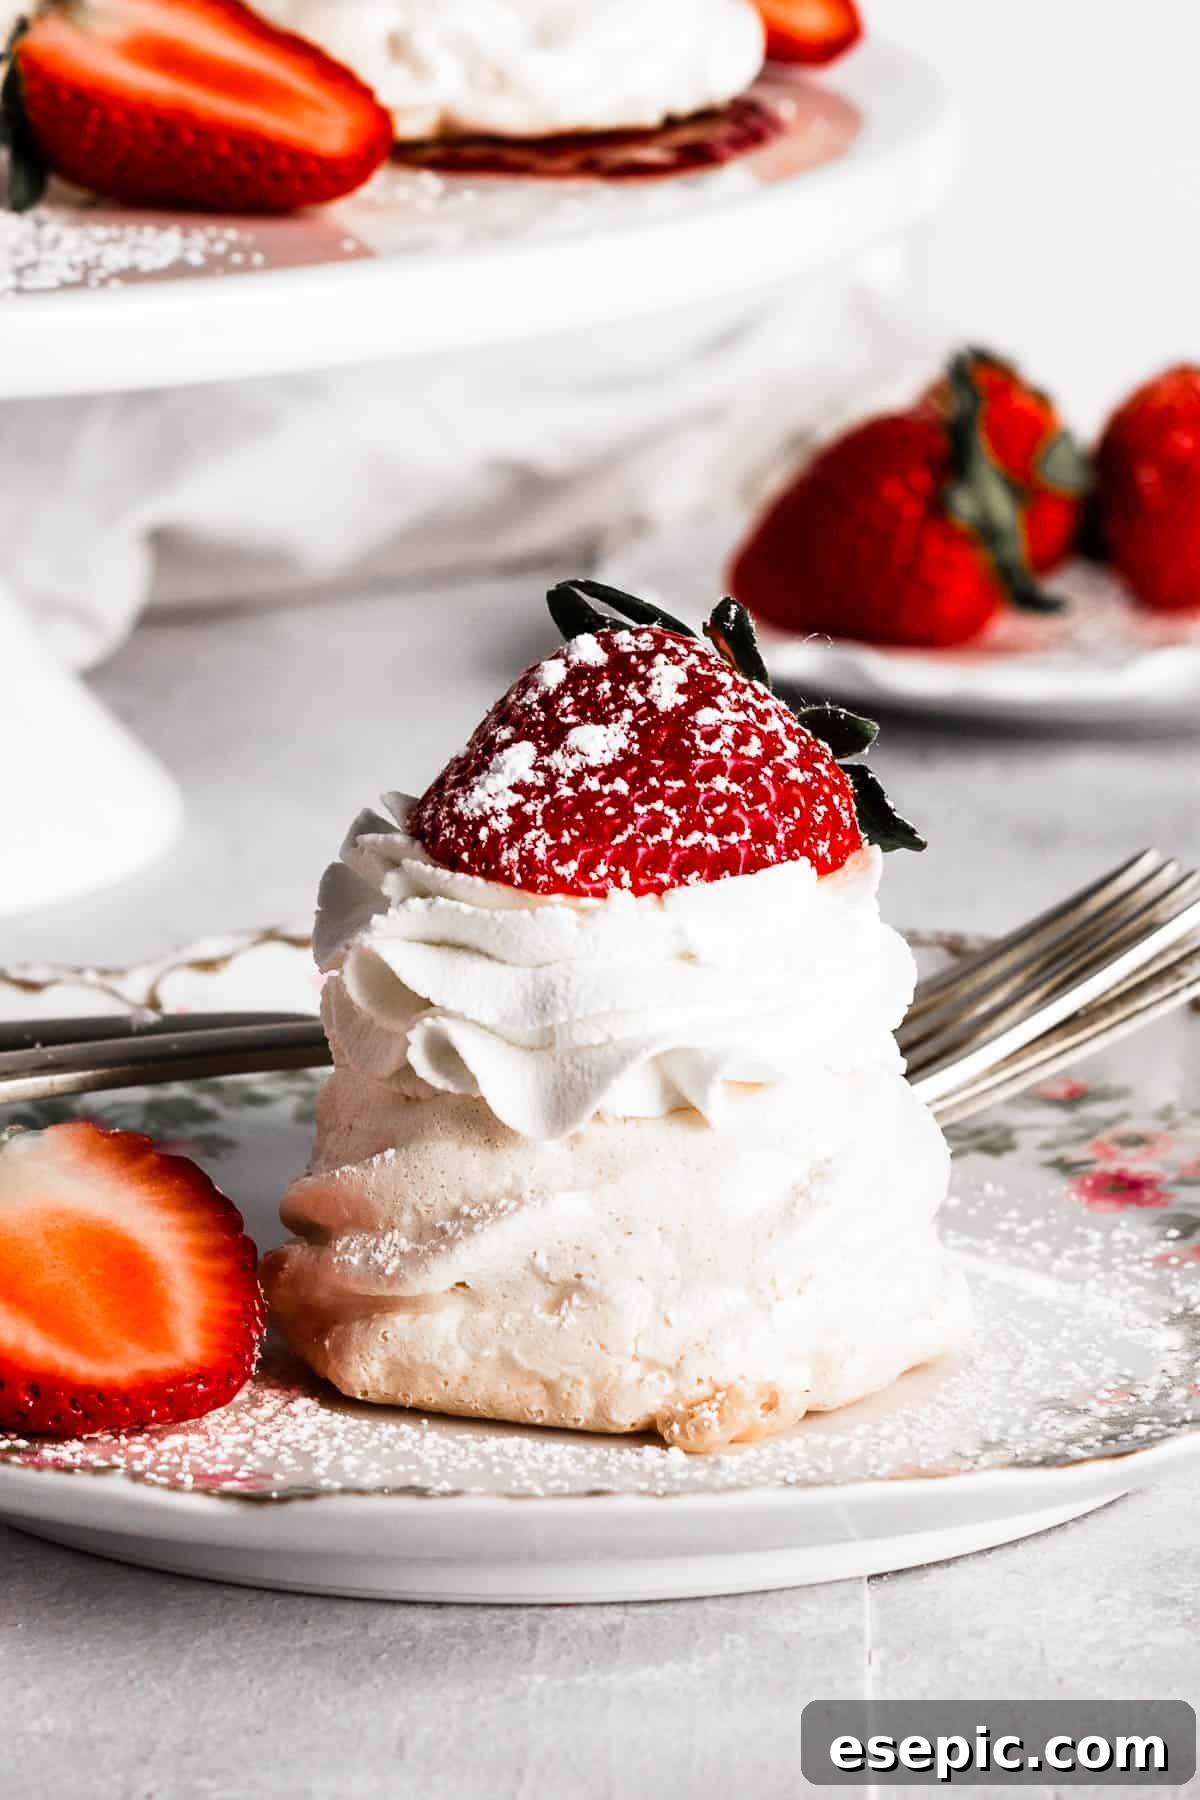
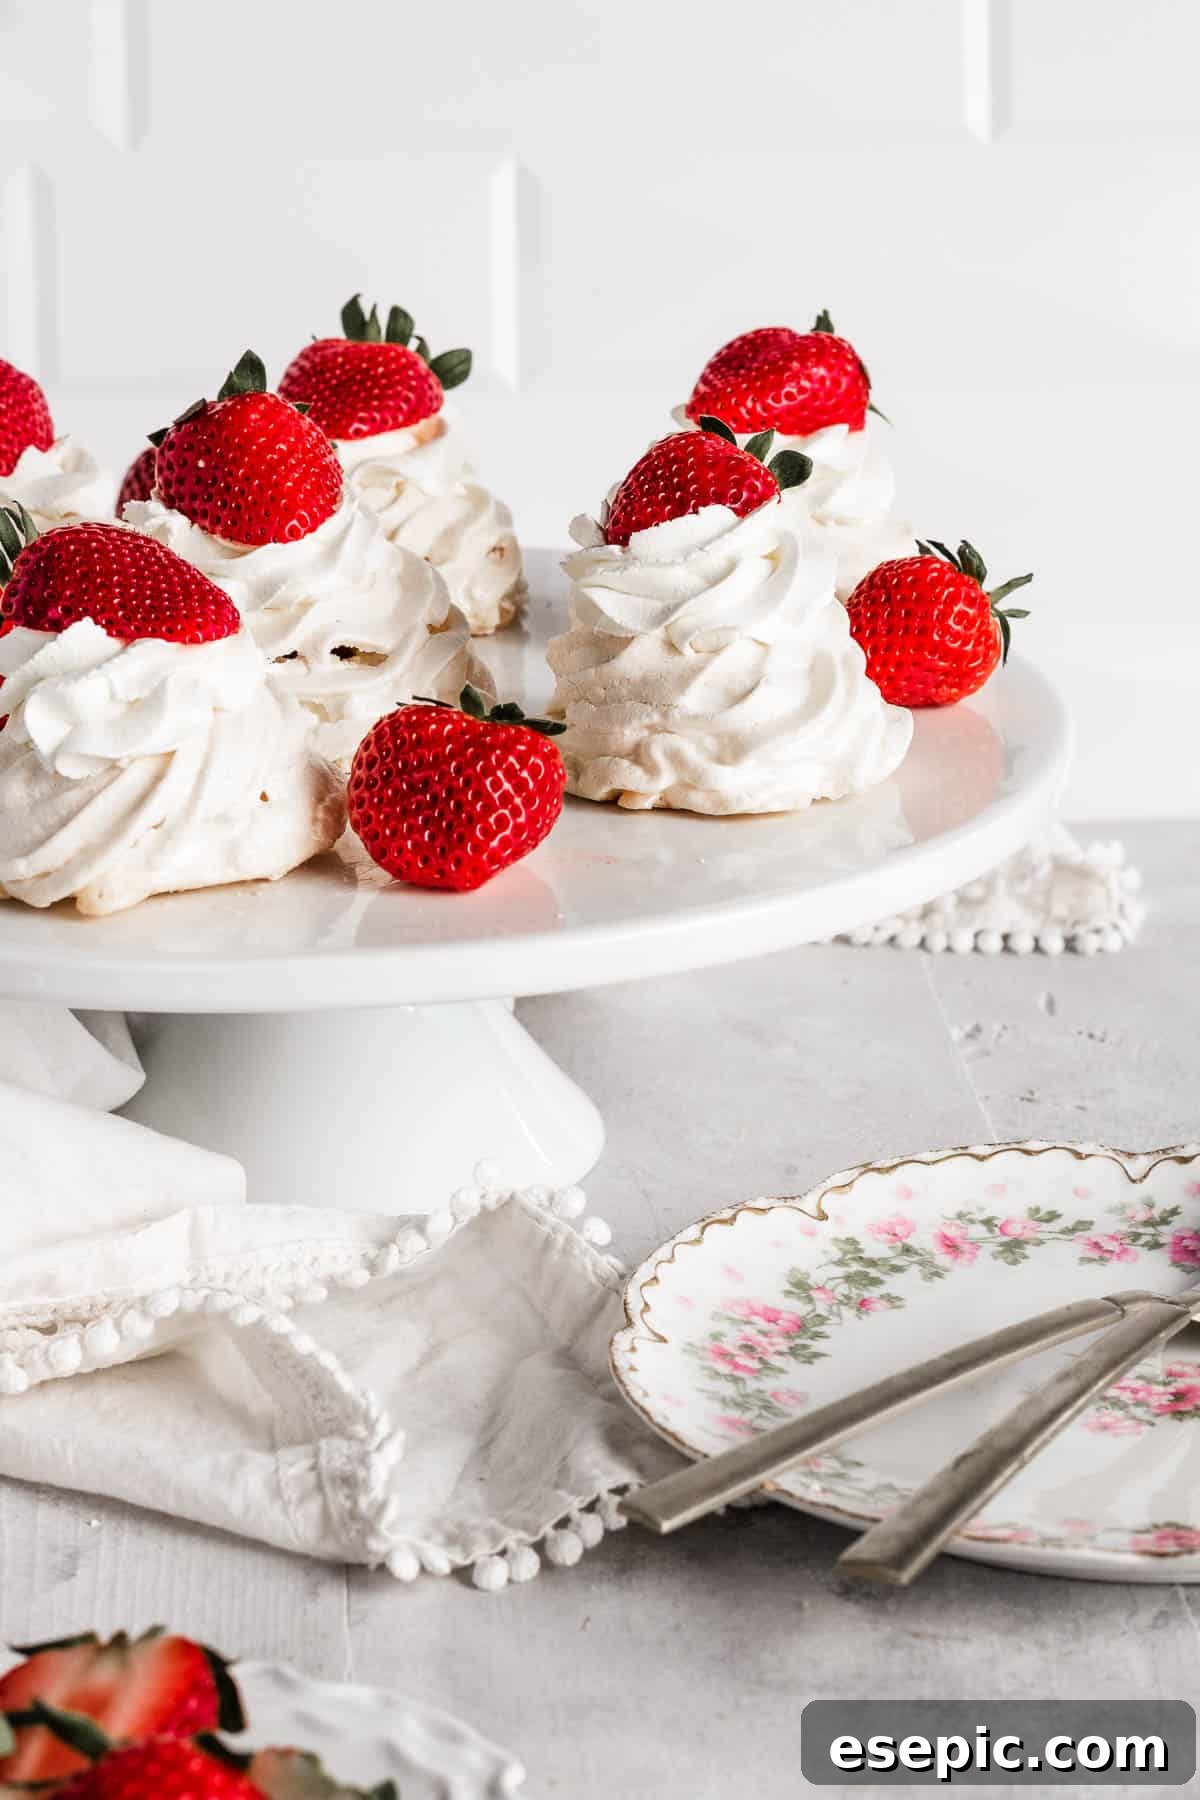
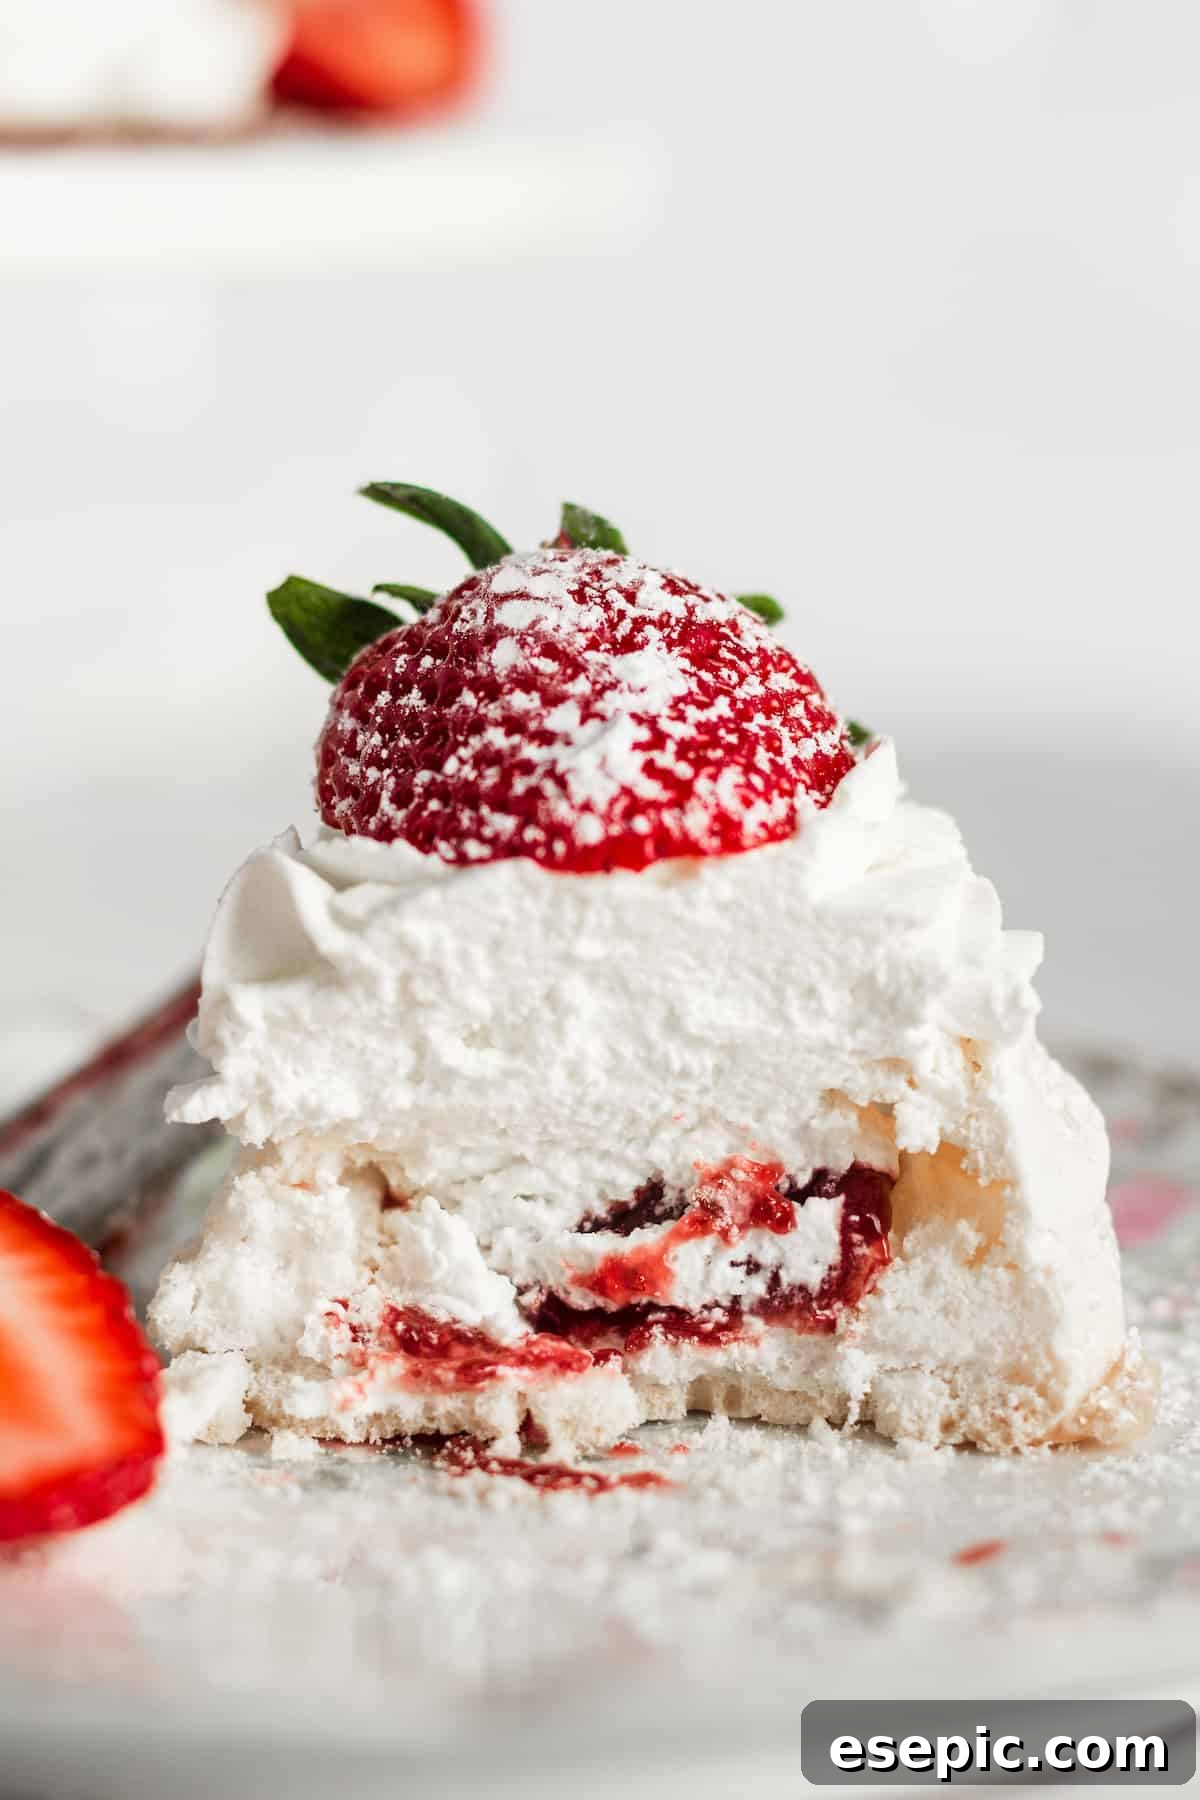
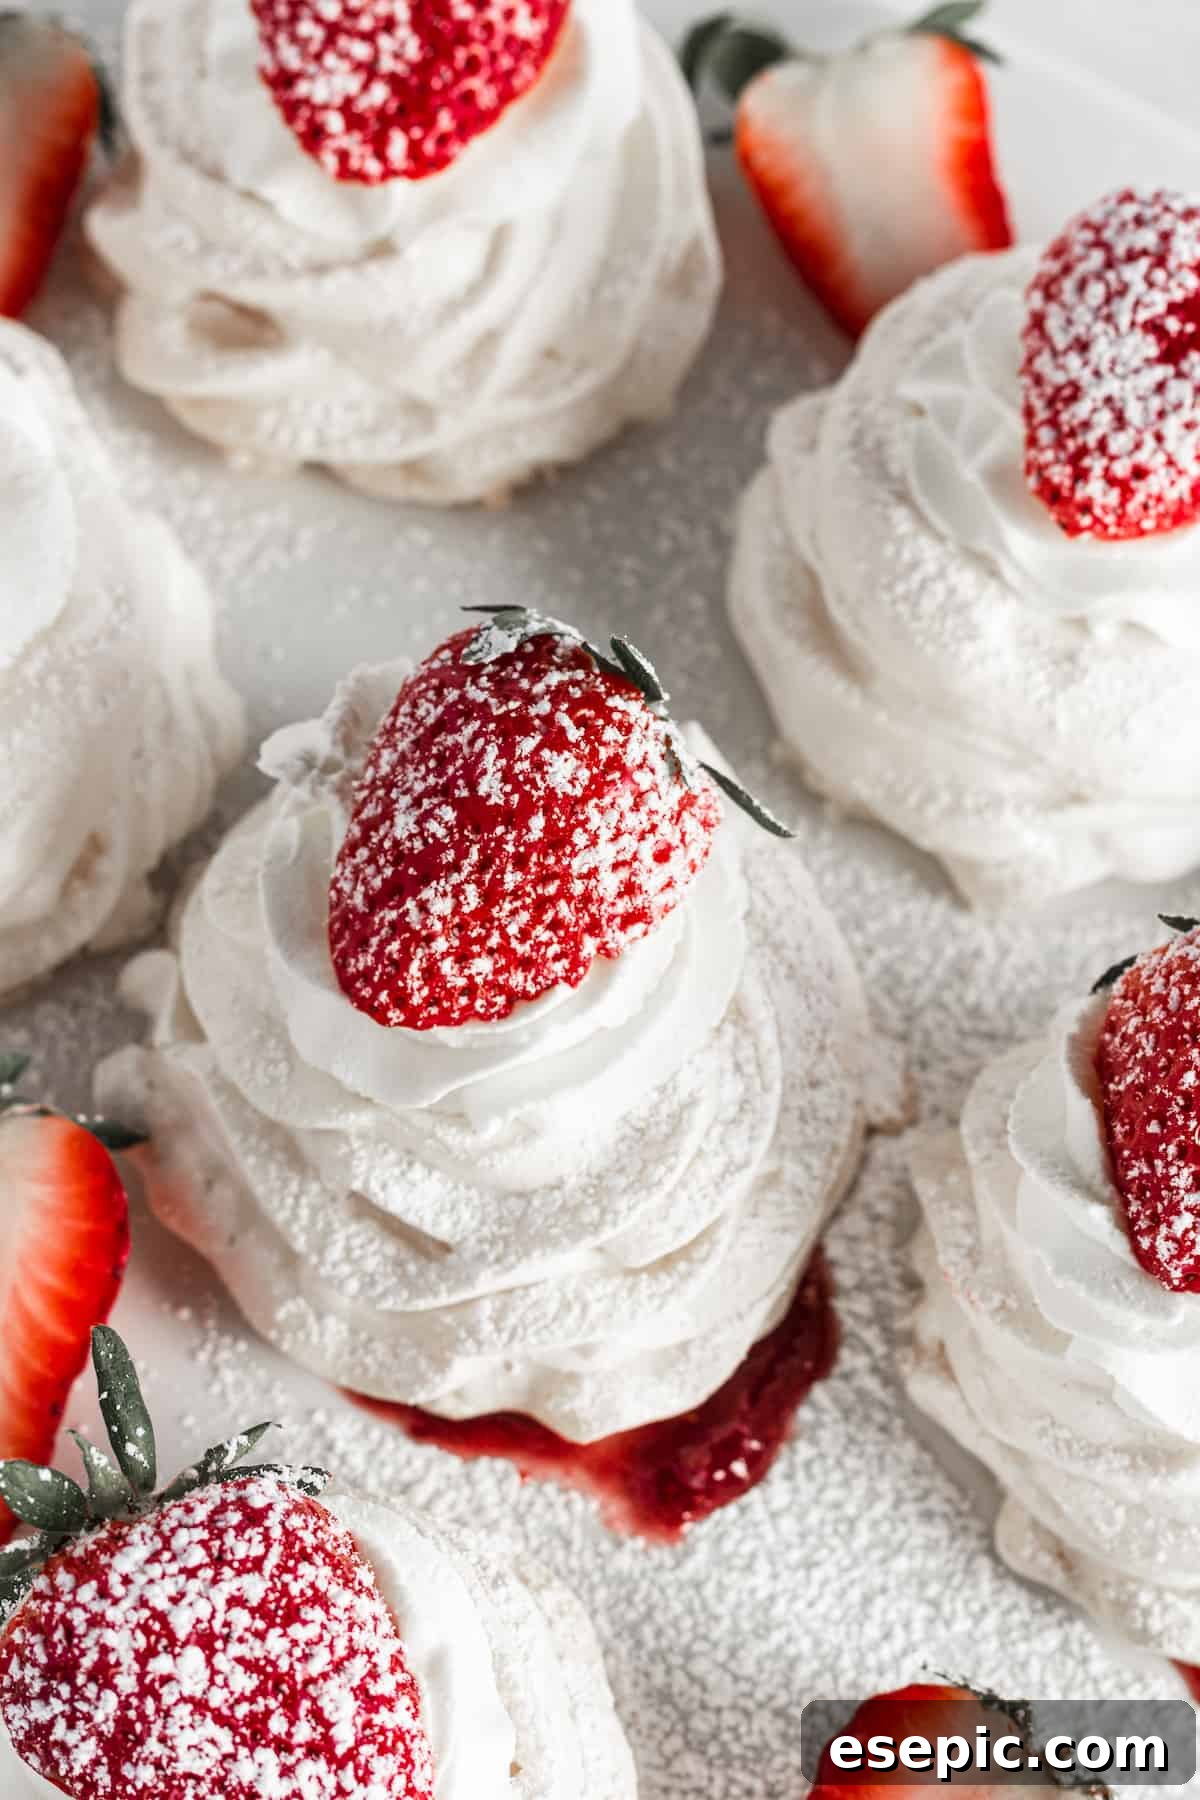
Indulge in a truly delightful treat with these exquisite Strawberry Pavlova Nests. Imagine delicate, crisp meringue shells, playfully shaped into “nests,” each cradling a luscious dollop of sweet strawberry jam, generously crowned with fresh, airy whipped cream, and adorned with vibrant, juicy strawberries. This stunning dessert isn’t just a feast for the eyes; it’s a symphony of textures and flavors that embodies the essence of spring and early summer. Perfect for elegant gatherings, festive celebrations like Easter or Mother’s Day, or simply a charming afternoon treat, this recipe proves that impressive desserts can also be surprisingly easy to master. Get ready to impress your guests and delight your taste buds with every ethereal bite!
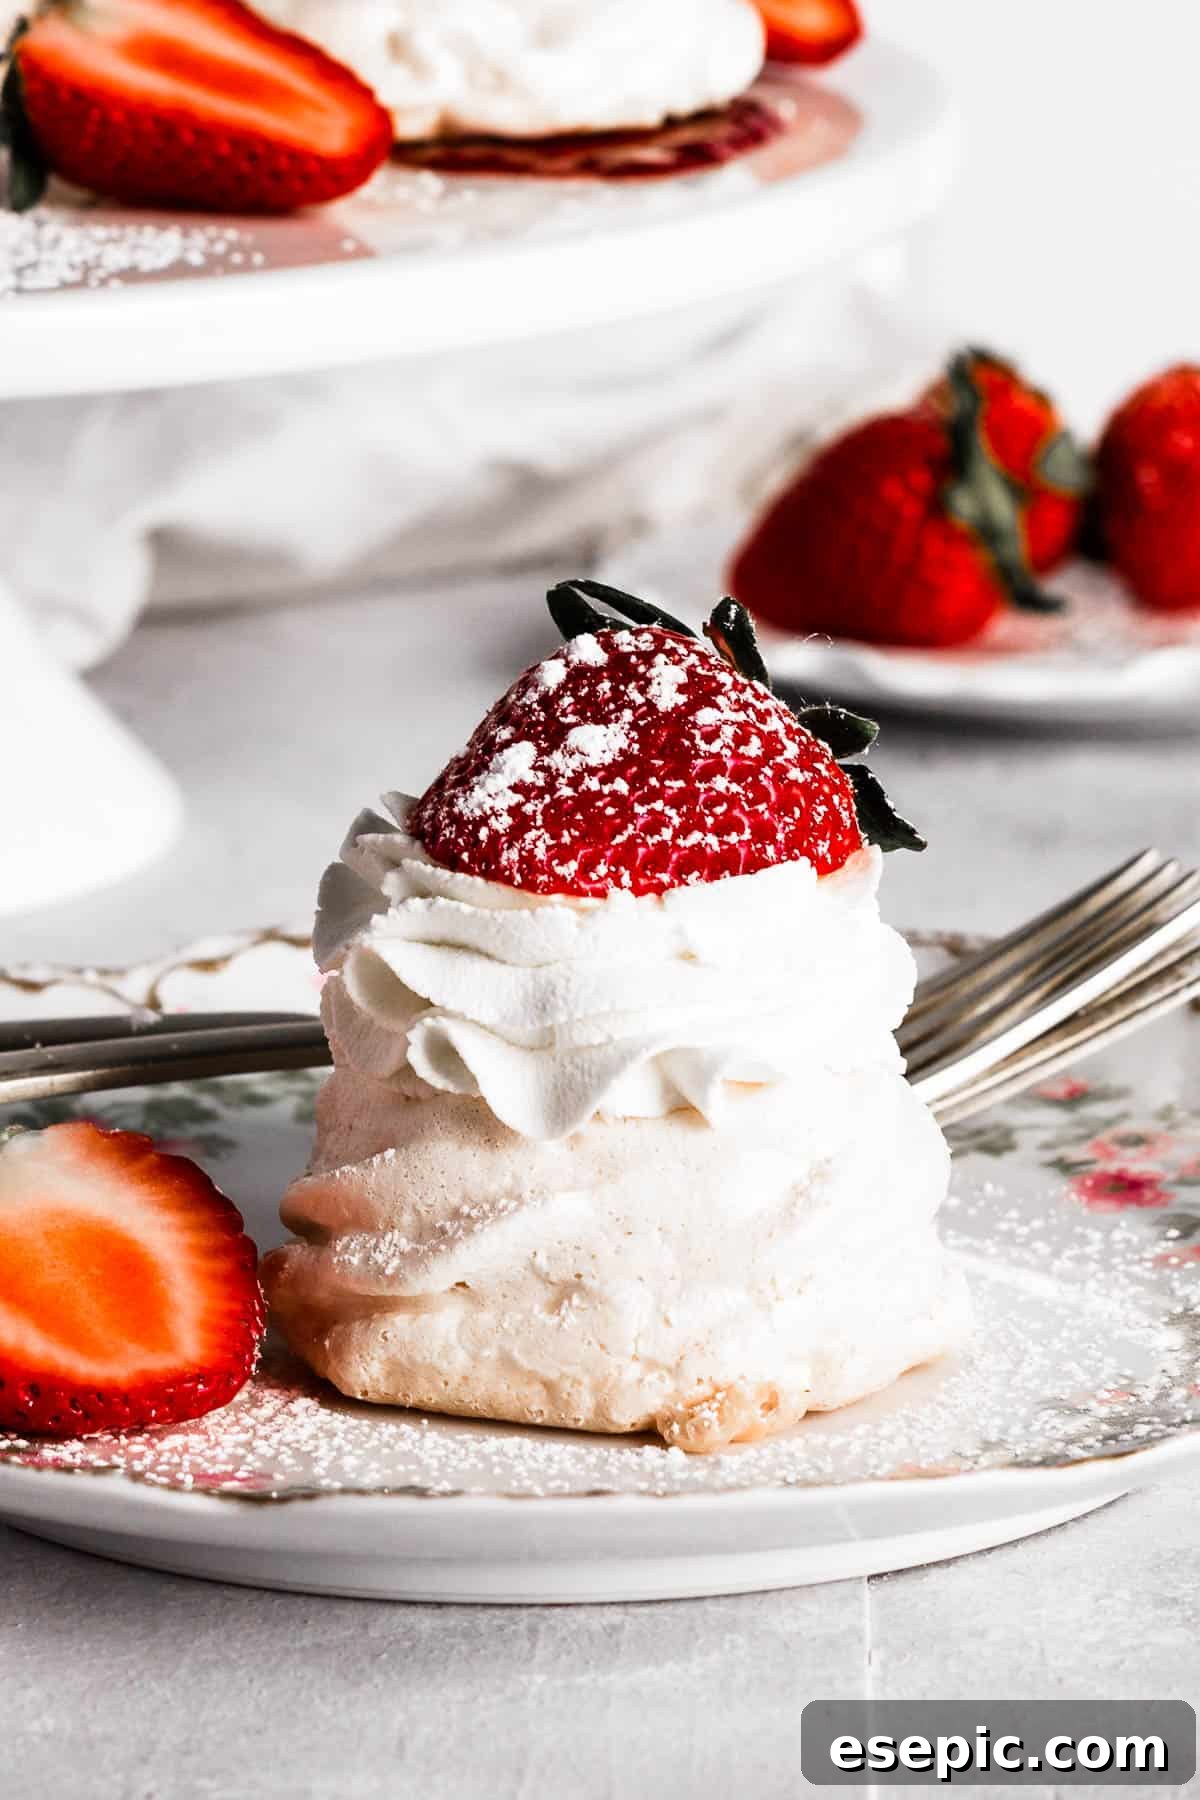
Irresistible Mini Strawberry Pavlova Nests
Pavlova holds a special place in the hearts of dessert lovers worldwide, and for good reason. Its unique combination of a crisp exterior, marshmallow-soft interior, and the fresh burst of fruit creates an unforgettable experience. This recipe takes that classic appeal and miniaturizes it, creating individual “nests” that are as charming as they are delicious. The addition of both fresh strawberries and a hidden layer of strawberry jam transforms these mini pavlovas into a springtime masterpiece, bursting with color and vibrant flavor.
While these elegant mini pavlovas look incredibly sophisticated, the truth is, they’re surprisingly straightforward to prepare. They are an ideal choice for any occasion that calls for a touch of celebratory flair, offering a beautiful and light alternative to heavier desserts. Whether you’re hosting an Easter brunch, a Mother’s Day luncheon, or simply want to brighten a regular weekend, these Strawberry Pavlova Nests are guaranteed to be a hit, bringing gorgeous pops of red and white to your table.
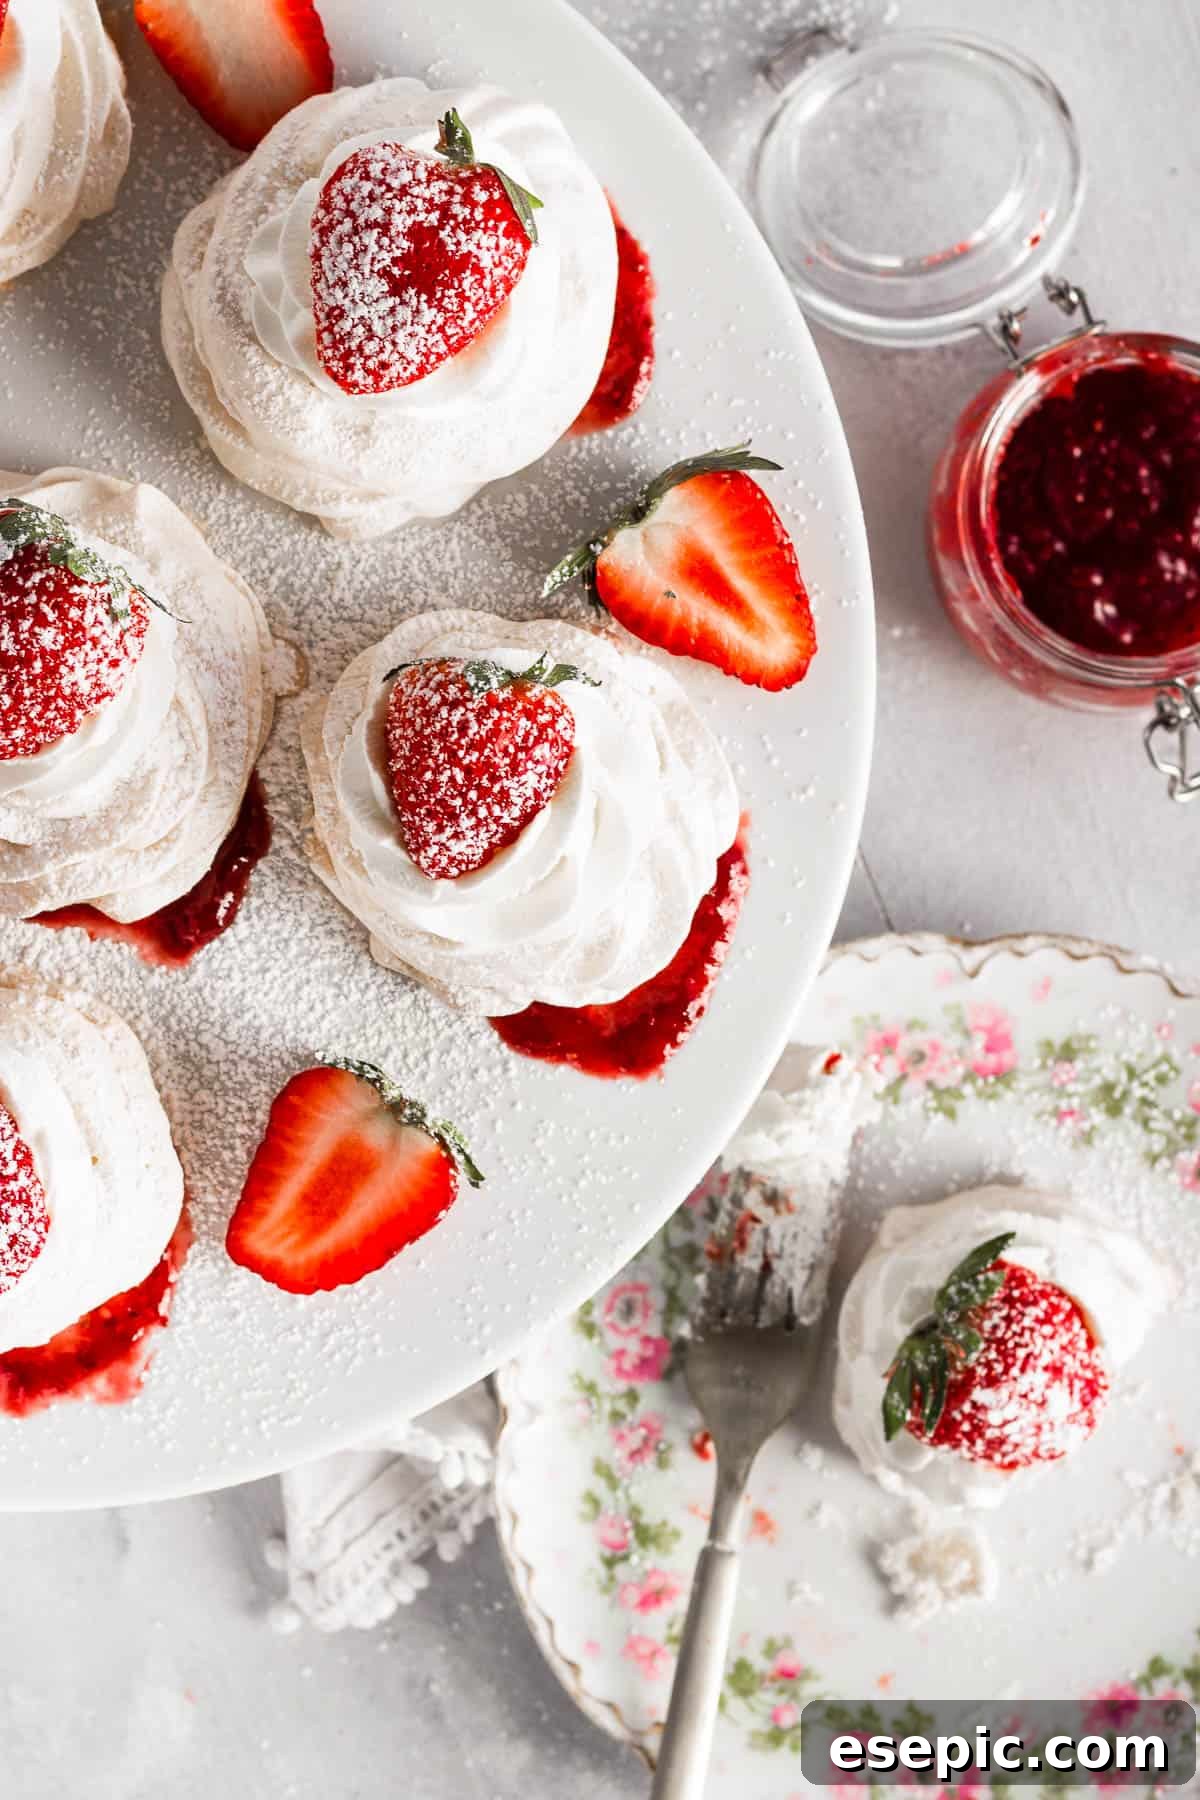
Exploring the Delightful World of Pavlova
At its heart, a pavlova is a meringue-based dessert, but with a distinctive twist that sets it apart from a traditional hard meringue. Crafted primarily from egg whites and granulated sugar, it bakes to achieve a wonderfully crisp, delicate outer shell. However, the true magic lies within: a soft, chewy, almost marshmallow-like interior that truly melts in your mouth. This unique texture contrast, combined with its customary adornment of fresh whipped cream and an abundance of fresh, vibrant fruits like strawberries, kiwi, or berries, makes pavlova a truly exquisite dessert.
The origins of pavlova are steeped in a friendly rivalry between Australia and New Zealand, both claiming to have invented this iconic dish in the 1920s. It was created in honor of the renowned Russian ballerina, Anna Pavlova, during one of her tours in the Southern Hemisphere. To this day, pavlova remains immensely popular in both countries, often gracing tables during festive seasons. In the Southern Hemisphere, it’s a Christmas staple, enjoyed during their summer months. Its light, airy nature and emphasis on eggs and fresh fruit also make it a popular choice for Easter celebrations worldwide, fitting perfectly with the themes of spring and renewal. Our mini pavlova “nests” embrace this tradition, adding an extra touch of thematic charm for holiday occasions.
Essential Ingredients for Perfect Pavlova Nests
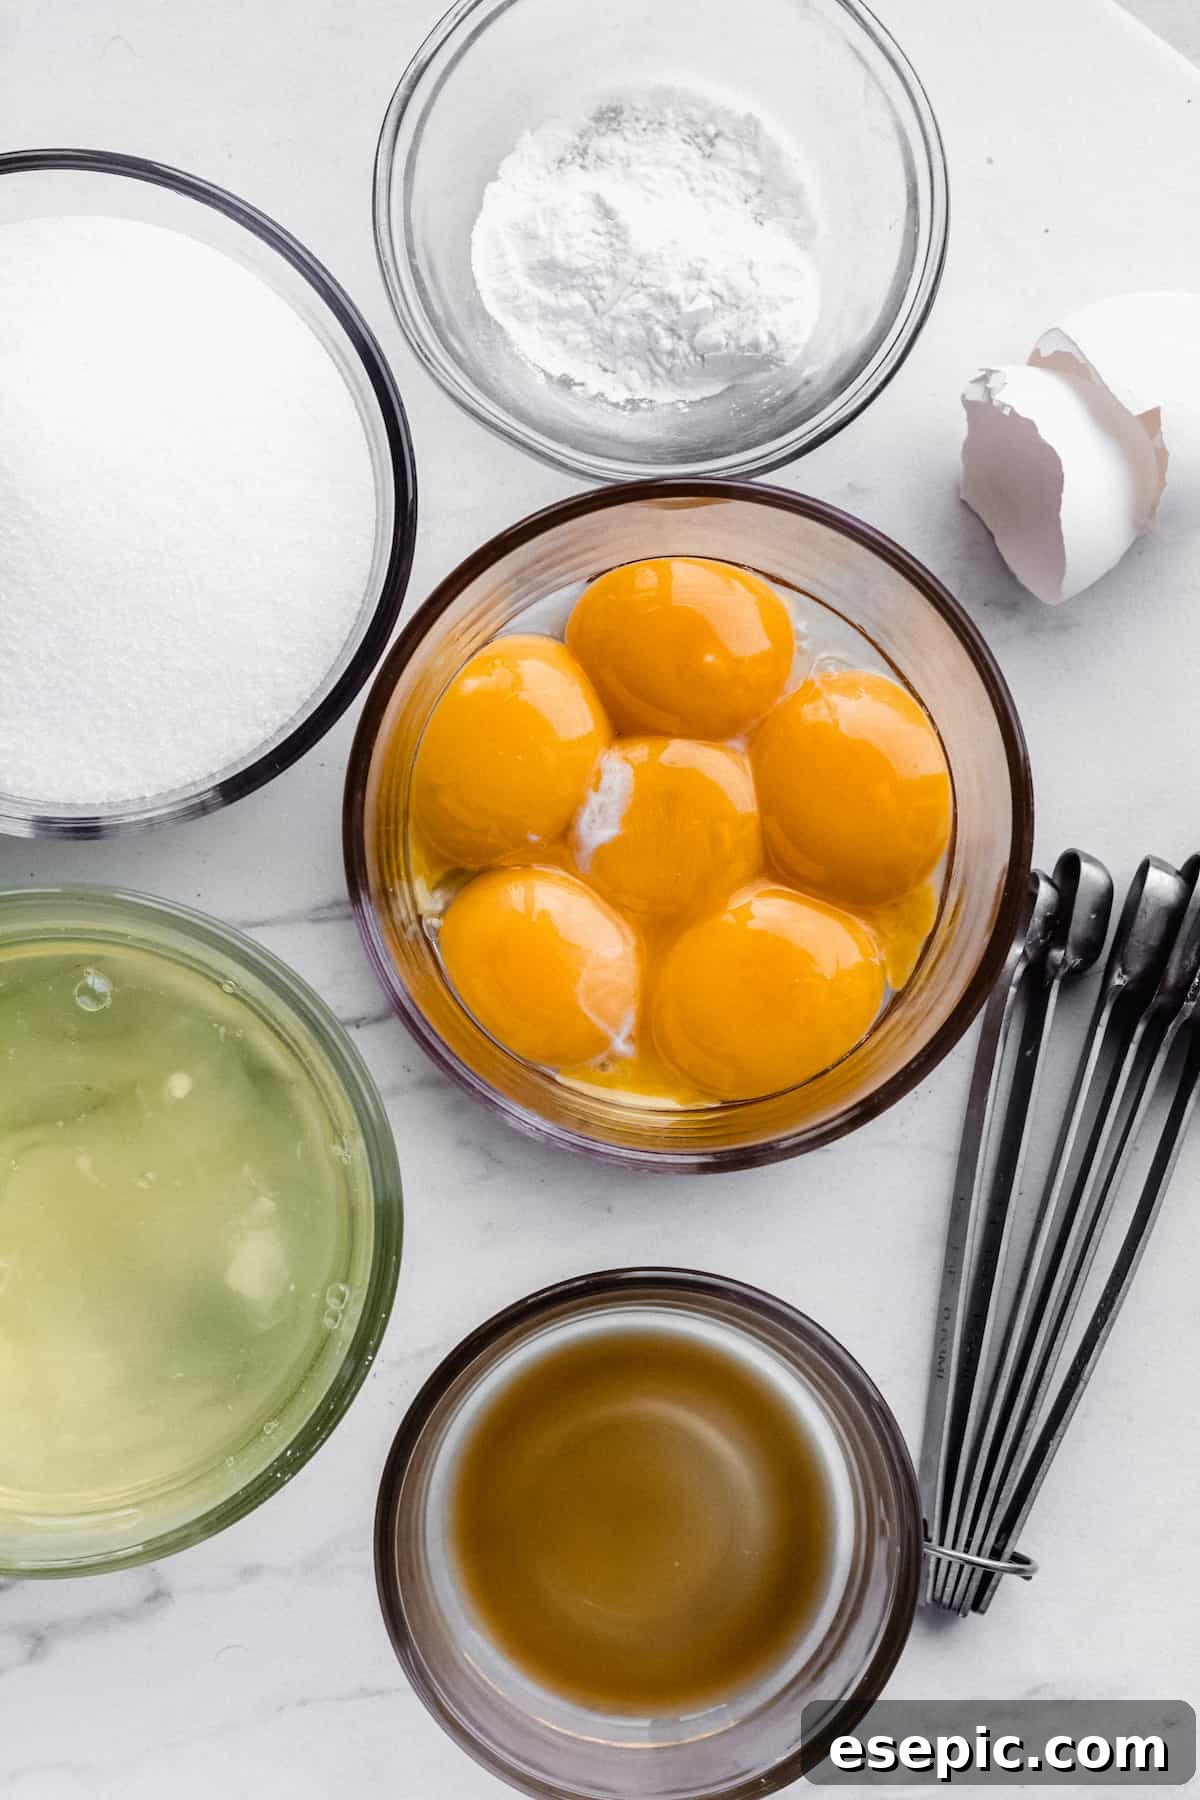
Crafting these heavenly Strawberry Pavlova Nests requires only a handful of readily available ingredients. The beauty of this recipe lies in its simplicity, allowing the quality of each component to truly shine. You’ll be amazed at how such basic elements can transform into such a stunning and delicious dessert.
For the Pavlova Base:
- Egg Whites: The foundation of our meringue. You’ll need 6 large egg whites. Ensure they are at room temperature, as this significantly improves their ability to whip up into voluminous, stable peaks. Cold egg whites are more reluctant to incorporate air.
- Granulated Sugar: Two cups of granulated sugar provide the sweetness and structure for the meringue. For the best results, superfine sugar (caster sugar) is often preferred as it dissolves more easily, leading to a smoother, less gritty meringue. If you only have regular granulated sugar, ensure it is thoroughly dissolved during the beating process.
- Cornstarch (or Arrowroot Powder): A crucial ingredient for achieving the signature soft, chewy interior of a pavlova. 2 ½ teaspoons of cornstarch help stabilize the egg whites and prevent the meringue from becoming too dry and brittle. Arrowroot powder can be used as an excellent alternative.
- Lemon Juice: Don’t underestimate the power of this ingredient! Half a tablespoon of fresh lemon juice adds a subtle tang that balances the sweetness and, more importantly, helps stabilize the egg whites, contributing to a lighter, more tender texture and a beautiful crisp finish.
- Pure Vanilla Extract: One teaspoon of vanilla extract imparts a warm, aromatic flavor that complements the sweetness of the meringue beautifully. Use a good quality extract for the best taste.
For the Luscious Toppings:
- Heavy Whipping Cream: To create our cloud-like whipped cream, you’ll need 1 ½ cups of heavy whipping cream. It’s essential that the cream is thoroughly chilled before whipping for maximum volume and stability.
- Granulated Sugar: Just 2 tablespoons of granulated sugar are needed to lightly sweeten the whipped cream, ensuring it’s not overly sweet and provides a perfect contrast to the meringue.
- Strawberry Jam or Preserves: A small jar (about ½ cup) of your favorite strawberry jam or preserves will form the delightful fruity layer in the center of each nest. The intensity of the strawberry flavor will vary with the jam you choose, so pick one you love.
- Fresh Strawberries: The crowning glory! You’ll need about 8 fresh strawberries, sliced or halved, for garnish. Choose ripe, vibrant strawberries for the best flavor and visual appeal.
- Powdered Sugar: An optional but highly recommended garnish. A light dusting of powdered sugar over the finished pavlovas adds a touch of elegance and subtle sweetness.
Crafting Your Delicate Strawberry Pavlova Nests
Making pavlova is a rewarding experience, and these mini nests offer a fun and accessible way to enjoy this classic dessert. While the instructions are for individual portions, feel free to adapt and create one larger pavlova if you prefer, spreading the jam and whipped cream over a single, grand meringue base.
- Prepare Your Egg Whites: Carefully separate 6 egg whites from their yolks. It is absolutely crucial that no trace of yolk (or any fat) gets into the whites, as this will prevent them from whipping properly. Place the egg whites in a clean bowl and let them sit at room temperature for about 20-30 minutes. Room temperature egg whites whip up faster and achieve greater volume.
- Preheat and Prepare: Preheat your oven to a low 225°F (107°C). Line two large baking sheets with parchment paper. This non-stick surface is essential for preventing the meringues from sticking. Prepare your piping bag by fitting it with a large star tip (or a round tip for a simpler look). Set aside.
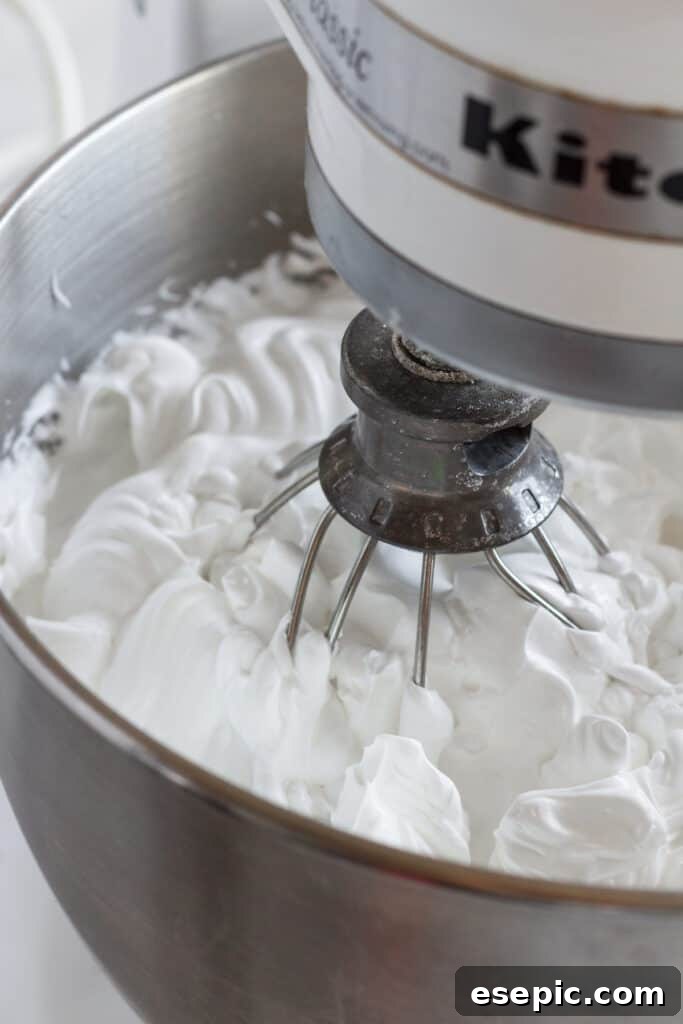
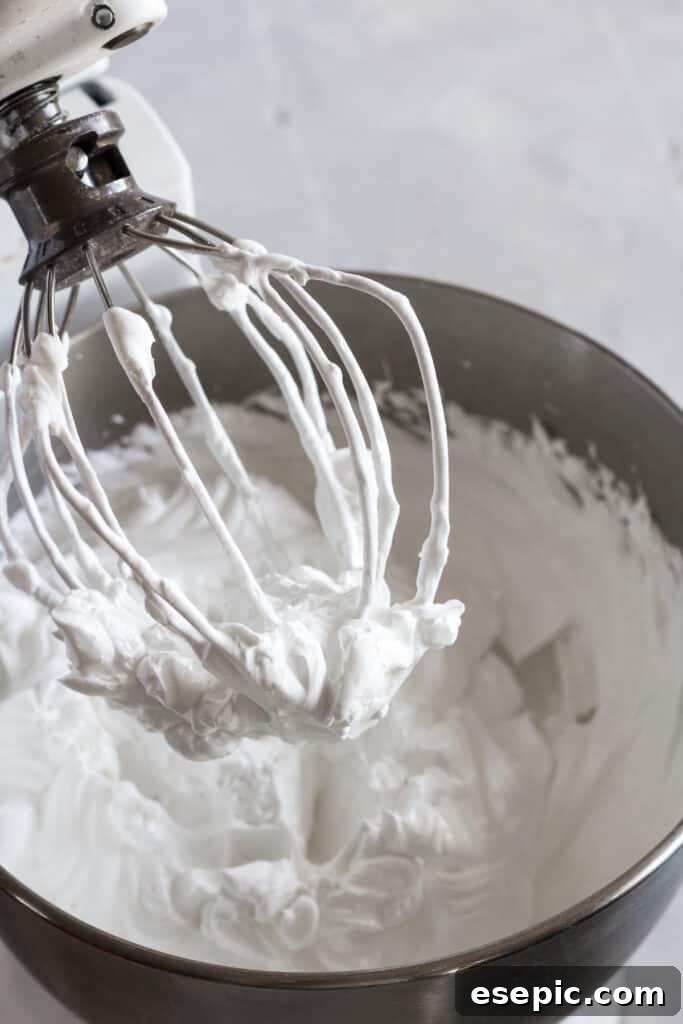
- Whip the Egg Whites to Soft Peaks: Using either a stand mixer with a whisk attachment or a handheld electric mixer, begin beating the room-temperature egg whites on HIGH speed. Beat for 1 to 2 minutes until they become frothy and form soft peaks. This means when you lift the whisk, the peaks gently curl over. Ensure your mixing bowl and whisk are impeccably clean and dry before starting to prevent any issues with whipping.
- Gradually Add Sugar for Stiff Peaks: With the mixer still running on HIGH, slowly add the granulated sugar, a tablespoon at a time. This gradual addition is key to ensuring the sugar dissolves completely into the egg whites. Continue beating for a full 8 minutes after all the sugar has been incorporated, or until the mixture is glossy, thick, and forms very stiff peaks. You should be able to hold the bowl upside down without the meringue moving, and when you rub a small amount between your fingers, it should feel completely smooth, not grainy.
- Fold in Remaining Ingredients: Once stiff, glossy peaks are achieved, gently fold in the lemon juice, vanilla extract, and cornstarch. Use a spatula and a light hand, making sure not to deflate the air you’ve built up. Mix just until combined. Scoop the finished pavlova mixture into your prepared piping bag.
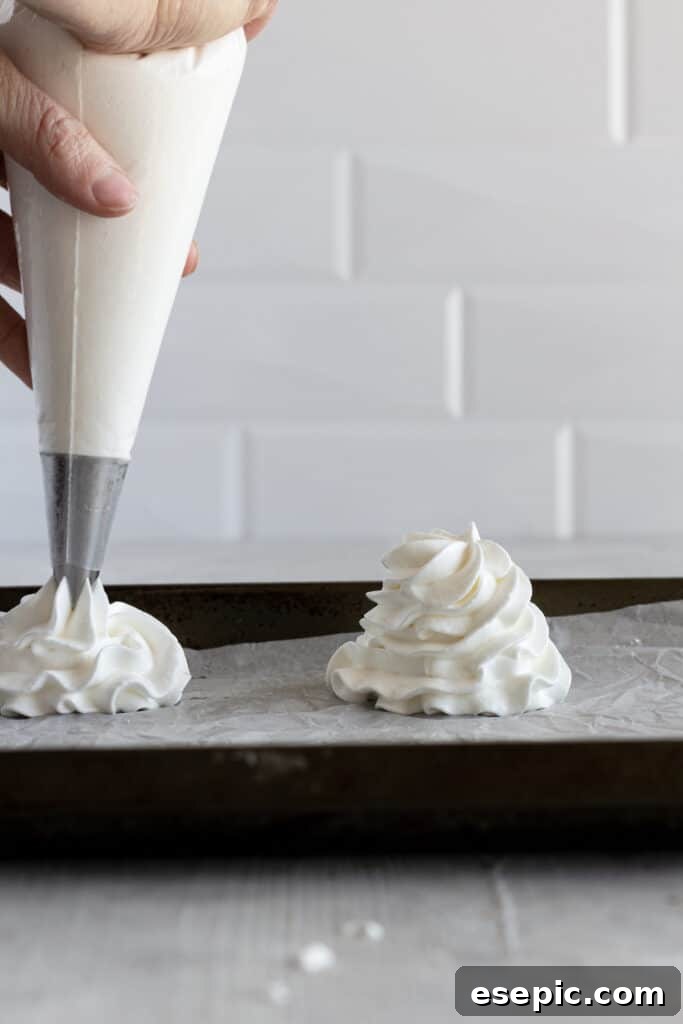
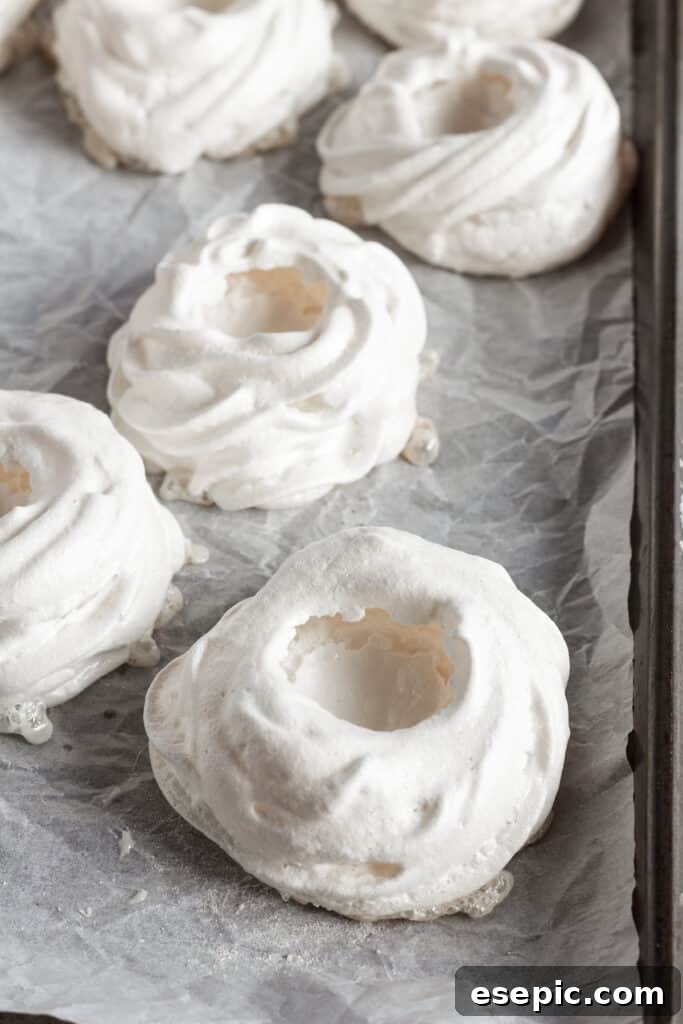
- Shape the Mini Pavlovas: On the parchment-lined baking sheets, pipe the meringue mixture into roughly 3-inch wide circular nests. You can achieve this by piping a flat disc for the base and then piping two or three concentric rings on top to build up the sides, creating a well in the center. Gently press the back of a spoon into the center of each piped meringue to create a slight indentation, perfect for holding your delicious fillings. You should yield approximately 12 to 15 nests from this batch.
- Bake and Cool with Patience: Bake the meringue nests for 1 hour at 225°F (107°C). The low temperature and long baking time are crucial for drying out the meringue slowly without browning it. After 1 hour, turn OFF the oven. Critically, leave the pavlovas inside the closed oven for at least another 30 minutes (or even longer, up to several hours, or overnight for extra crispness). This slow cooling prevents cracking and ensures the meringue dries out completely. Once fully cooled, transfer them to a wire rack.
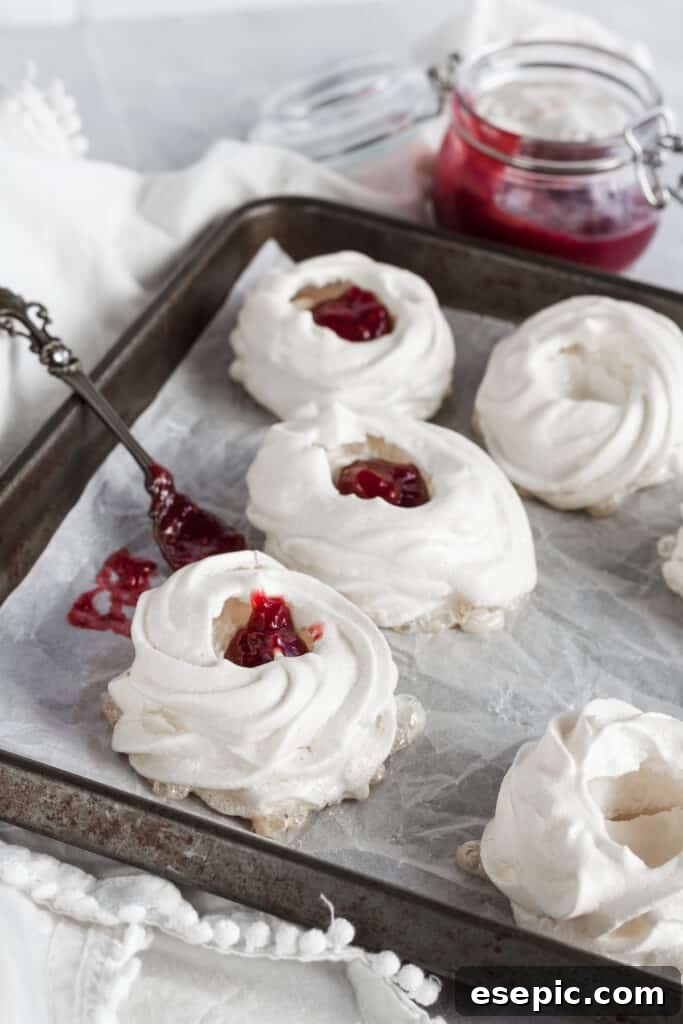
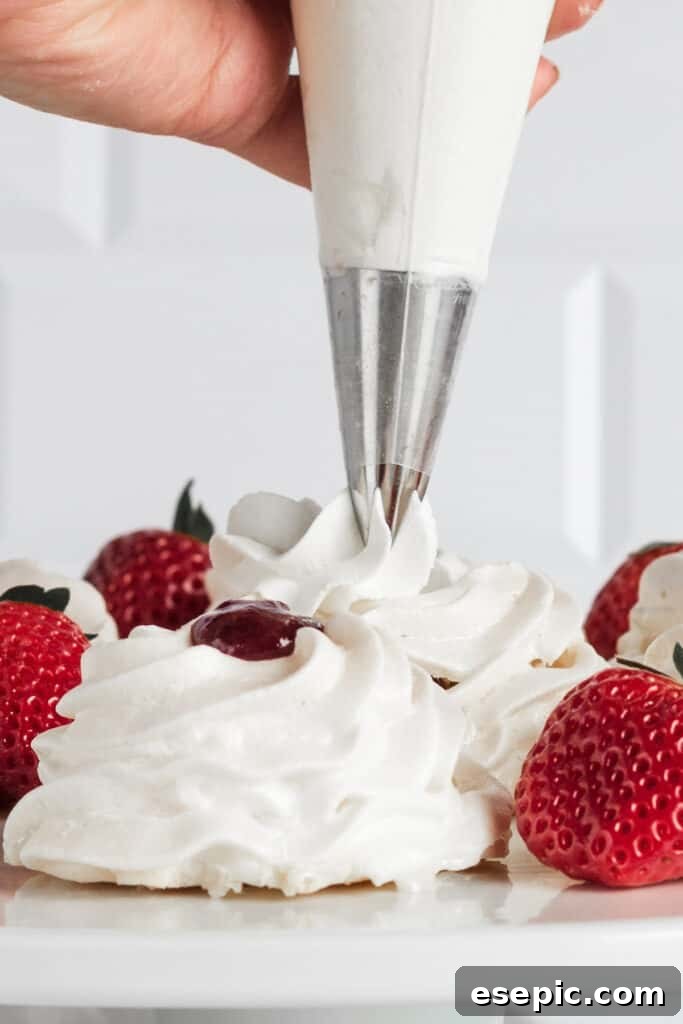
- Whip the Cream (Just Before Serving): For the freshest taste and best texture, whip the cream just before assembling and serving. In a chilled mixing bowl (you can chill the bowl and whisk in the freezer for 10-15 minutes), combine the cold heavy whipping cream and 2 tablespoons of sugar. Beat on HIGH speed for 2 to 3 minutes, or until stiff peaks form. Be careful not to overbeat, as it can quickly turn to butter!
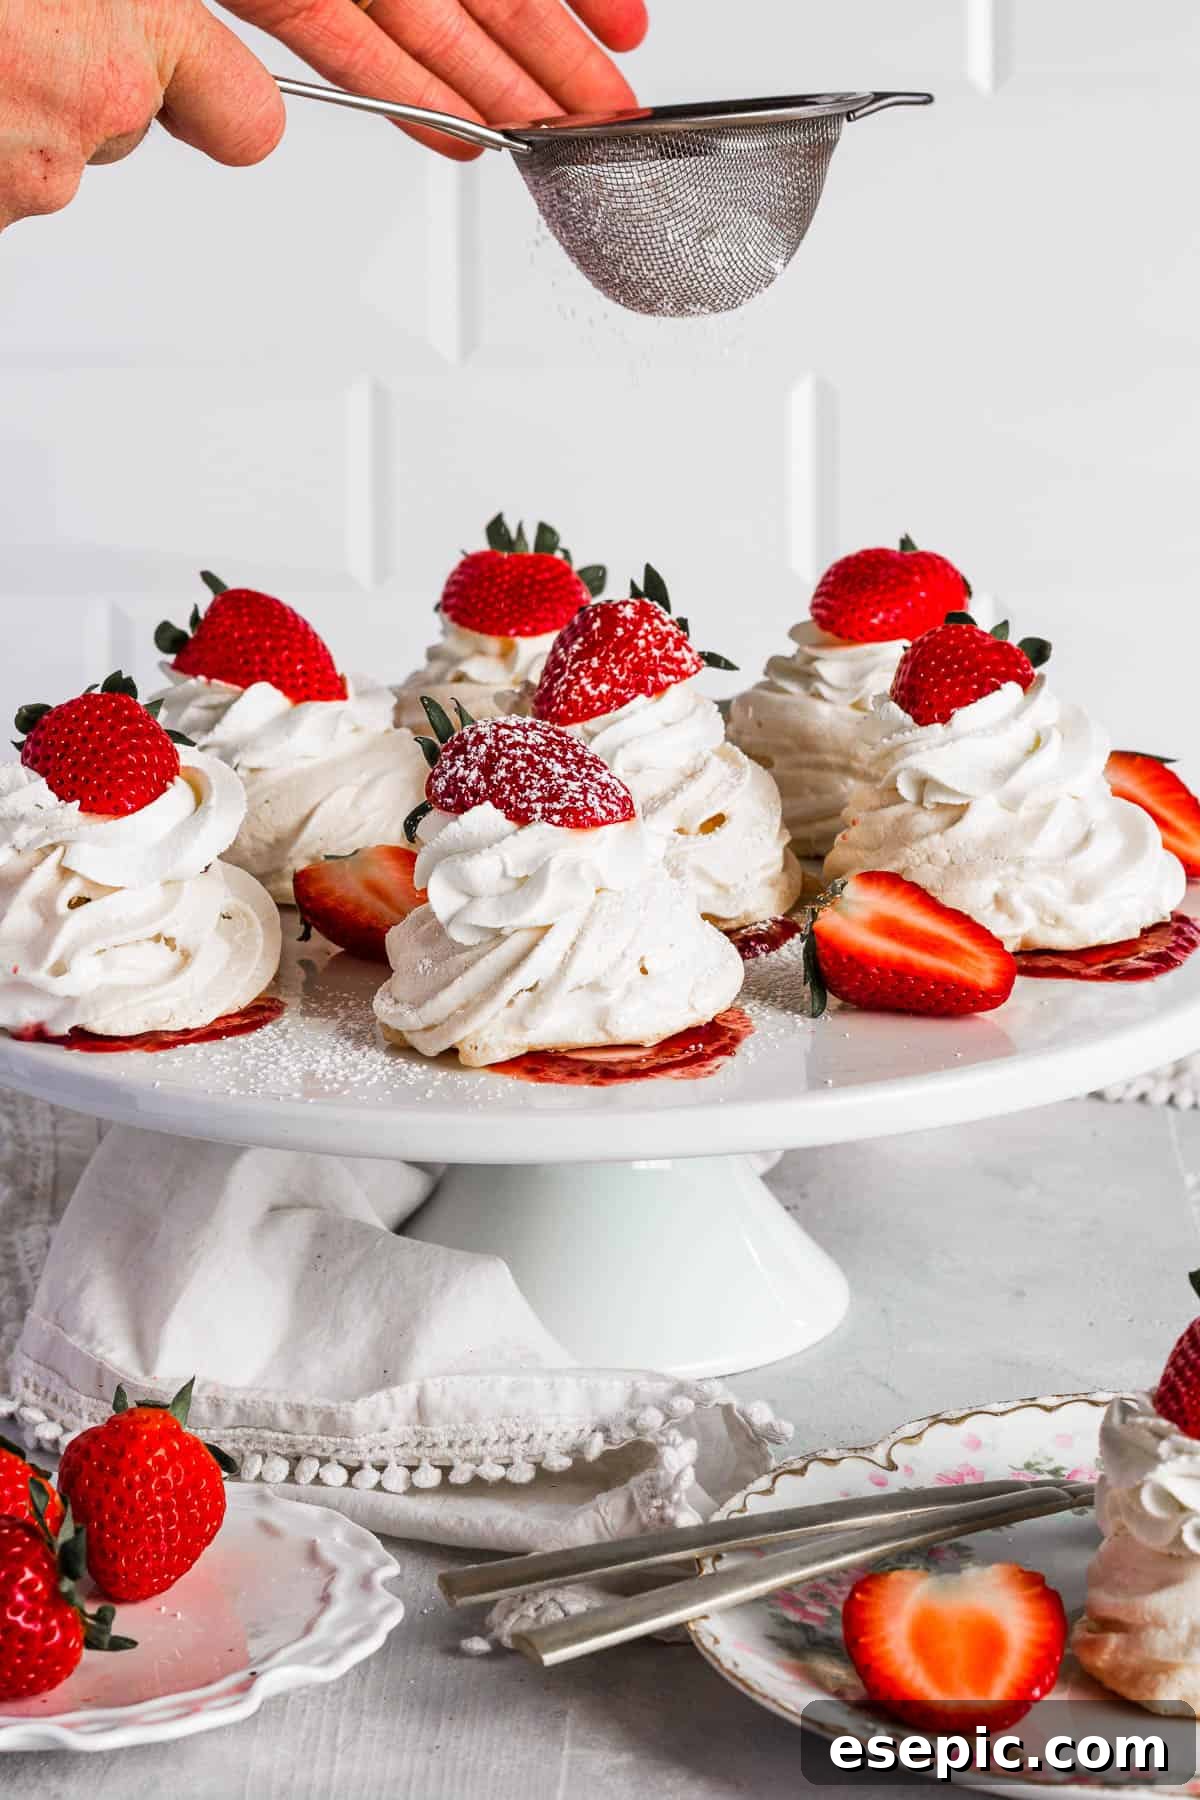
- Assemble and Enjoy: Once the pavlova nests are completely cool and the whipped cream is ready, it’s time to assemble. Place roughly 1 tablespoon of strawberry jam in the indentation of each pavlova nest. Then, pipe or spoon a generous dollop of whipped cream on top of the jam. Finally, garnish each with a sliced or halved fresh strawberry. For an extra touch of elegance, you can lightly dust them with powdered sugar. Serve immediately and savor every exquisite bite!
Creative Ways to Shape Your Pavlova Nests
The “nest” shape is particularly charming for these mini pavlovas, especially when filled with luscious ingredients. It creates a natural basin for the jam and whipped cream, enhancing both presentation and ease of eating. To create this shape, pipe a flat base disc, then pipe one or two concentric rings on top to build up the sides. Gently pressing a spoon into the center helps define the well.
However, your creativity isn’t limited to just nests! You can also opt for simple, elegant rounds, resembling small, flat meringue cakes with toppings spread across them. Another popular choice is creating little domes with slightly flattened tops. For a more dramatic presentation, consider a larger, single pavlova base, shaped like a shallow tray with a raised rim, perfect for a grand centerpiece dessert. The possibilities are endless, allowing you to tailor the look to your occasion and preference.
Ensuring Your Pavlova Reaches Perfection
Determining when your pavlova is perfectly done is key to its success. The process requires patience, as the baking is a slow drying rather than a true cooking. A well-baked pavlova should have a firm, crisp, and dry exterior on both the sides and top. It should feel light when lifted, indicating that the moisture has been drawn out.
One of the most reliable indicators of doneness is how it releases from the parchment paper. A properly baked and cooled pavlova will peel away effortlessly from the parchment. If it’s sticky, resistant, or tears when you try to remove it, it likely needs more time in the turned-off oven to dry out further. Trust the low and slow method, and resist the urge to open the oven door during the cooling process, as sudden temperature changes can cause cracking or collapsing.
Beyond Strawberries: A World of Pavlova Toppings
While the strawberry jam and fresh strawberries in this recipe are absolutely divine, pavlova’s versatility shines through with countless topping possibilities. The crisp meringue and fluffy cream provide a neutral canvas for almost any flavor combination you can imagine. Here are a few inspiring ideas to get you started, focusing on a generous base of whipped cream:
- Lemon-Berry Pavlova: For a bright and zesty twist, spread a layer of homemade or good-quality lemon curd into the pavlova nests. Then, generously sprinkle with a vibrant mix of fresh blueberries, blackberries, raspberries, and of course, more strawberries. The tartness of the lemon beautifully cuts through the sweetness.
- Exotic Tropical Pavlova: Transport your taste buds to a sunny paradise. Top your pavlovas with a medley of fresh tropical fruits like sliced kiwi, mango cubes, passion fruit pulp, and pineapple chunks. A light drizzle of lime syrup can enhance the tropical notes.
- Baklava-Inspired Pavlova: For an intriguing fusion, drizzle the whipped cream-topped pavlovas with warm honey. Then, sprinkle generously with finely chopped pistachios and, for an extra indulgent touch, crumble store-bought baklava over the top.
- Chocolate Cherry Pavlova: A decadent classic. Spoon a rich chocolate ganache over the whipped cream. Garnish with slivered almonds for crunch and vibrant maraschino cherries (or fresh dark cherries when in season) for a sophisticated finish.
- Watermelon Peach Pavlova: A wonderfully refreshing summer option. Cut slices of fresh watermelon into fun shapes using small cookie cutters and arrange them decoratively. Add slices of ripe, juicy peaches. If the fruit isn’t overly sweet, a light dusting of powdered sugar will bring out its natural flavors.
- Peppermint Chocolate Pavlova: Perfect for the festive holidays. Drizzle your pavlova with chocolate syrup and sprinkle generously with crushed peppermints or candy canes. For a more classic mint-chocolate flavor, use crushed spearmint candies.
Mastering the Art of Pavlova: Key Tips for Flawless Results
While pavlova seems simple, it can be a bit temperamental. Following these essential tips will help ensure your mini pavlova nests turn out beautifully crisp on the outside and wonderfully chewy within, every single time.
- Ensure All Sugar is Dissolved: This is paramount! Add the sugar to the egg whites very gradually, and beat until each spoonful is fully incorporated and dissolved. If sugar crystals remain undissolved, they can attract moisture, causing the meringue to “weep” or become sticky during baking and cooling, leading to a soft and soggy pavlova. The best way to check is to rub a tiny bit of the meringue between your fingers – it should feel perfectly smooth.
- Cleanliness is Next to Godliness: Any trace of fat (from egg yolk, oily fingers, or a dirty bowl) will prevent egg whites from whipping up properly. Ensure your mixing bowl and whisk attachment are spotlessly clean and dry before you start. Wiping them down with a lemon wedge or white vinegar can help eliminate any invisible grease residues.
- Don’t Overbeat the Cream: Whipping cream is delicate. Beat it only until firm peaks form. If you continue to beat past this point, the cream will start to separate, becoming grainy and eventually turning into butter and whey. Stop as soon as it’s thick and holds its shape.
- Avoid Humidity: Pavlova is highly sensitive to moisture in the air. For the best results, always make pavlova on a dry, low-humidity day. High humidity can cause the meringue to absorb moisture, leading to a sticky, soft, and rubbery texture rather than the desired crispness.
- Patience During Cooling: Resist the urge to open the oven door prematurely during the cooling process. Sudden changes in temperature can cause the meringue to crack or collapse. Let it cool slowly and completely inside the turned-off oven.
- Serve Fresh: Pavlovas are best served on the day they are assembled. While the meringue bases can be made ahead, the whipped cream and fruit should be added just before serving to maintain their freshness and prevent the meringue from softening.
Troubleshooting Common Pavlova Problems: Cracking
It can be disheartening to see your beautiful pavlova crack, but it’s a common issue that often has a simple explanation. Cracks typically occur because the soft, marshmallowy interior of the pavlova shrinks as it cools, pulling away from the crisp, rigid outer shell. Here’s how to minimize the chances of cracking:
- Proper Meringue Consistency: The key to a stable pavlova lies in the meringue mixture itself. It must be beaten until it is very stiff, glossy, and perfectly smooth, with all sugar dissolved. If the meringue mixture is grainy, or not whipped to sufficient stiffness, it’s more prone to leaking moisture during baking and shrinking excessively during cooling, leading to cracks. If your mixture feels grainy, it’s best to start over.
- Gradual Cooling is Essential: As mentioned in our tips, sudden temperature changes are a major culprit for cracking. Always allow the pavlova to cool slowly inside the turned-off oven with the door closed. This gentle transition helps the meringue set and dry out evenly, reducing stress on the structure.
- Don’t Overbake: While it’s important for the pavlova to be dry, overbaking can make the outer shell too brittle and prone to cracking. Stick to the recommended baking time and rely on the slow cooling process to complete the drying.
Storage and Make-Ahead Magic
One of the best features of pavlova is its ability to be prepared in stages, making it a fantastic make-ahead dessert for entertaining. The meringue bases are quite robust if stored correctly.
- Meringue Bases: Once your pavlova nests are completely cooled and detached from the parchment paper, they can be stored in an airtight container at room temperature for up to 3-5 days. Ensure they are kept away from any moisture or humidity, which can quickly turn them soft and sticky. Do not refrigerate plain meringue bases, as the humidity in the fridge will ruin their crispness.
- Whipped Cream: Whipped cream is best made fresh just before serving. However, if absolutely necessary, you can whip it a few hours in advance and keep it chilled in the refrigerator. A tiny bit of cornstarch or cream of tartar added to the cream before whipping can help stabilize it, though freshly whipped is always superior.
- Fresh Fruit: Slice or halve your strawberries just before assembly to keep them looking vibrant and juicy.
- Assembled Pavlovas: Once assembled with jam, whipped cream, and fresh fruit, pavlovas should be served immediately. The moisture from the cream and fruit will quickly start to soften the delicate meringue, compromising its texture. If you have leftovers, store them loosely covered in the refrigerator for no more than a few hours, understanding that the meringue will lose some of its crispness.
Frequently Asked Questions About Pavlova Nests
Here are some common questions about making and enjoying Strawberry Pavlova Nests:
- Can I use egg whites from a carton? While fresh egg whites are generally preferred for pavlova for their superior whipping ability, carton egg whites can be used. Ensure they are pure egg whites with no additives for best results.
- What if I don’t have a piping bag? No problem! You can use a large spoon to dollop the meringue onto the parchment paper, shaping it into a rough circle and then using the back of the spoon to create an indentation in the center. It might not look as uniform as piped nests, but it will taste just as delicious.
- My meringue is weeping (leaking liquid). What went wrong? Weeping usually indicates that the sugar did not fully dissolve into the egg whites. Ensure you add the sugar slowly and beat until the mixture is perfectly smooth and glossy, with no grittiness. Humidity can also contribute to weeping.
- Can I freeze pavlova? Unassembled meringue bases can be frozen for up to a month. Wrap them tightly in plastic wrap and then in foil, and store in an airtight container. Thaw them at room temperature, unwrapped, to prevent condensation, then assemble as usual. Assembled pavlovas do not freeze well due to the cream and fruit.
- Can I make a larger pavlova instead of mini nests? Absolutely! Simply pipe the entire meringue mixture into one large circle (about 8-10 inches in diameter) on a single parchment-lined baking sheet. Increase the baking time slightly if needed, and ensure a long, slow cool-down in the turned-off oven.
More Delicious Dessert Ideas to Explore
If you’ve fallen in love with the elegance and flavor of these Strawberry Pavlova Nests, you’ll surely enjoy these other delectable dessert recipes perfect for any occasion:
- Red Velvet Crinkle Cookies: Rich, chewy, and vibrant, these cookies are a beautiful addition to any dessert spread.
- Easy Tres Leches Cake: A moist, sweet sponge cake soaked in three kinds of milk, topped with whipped cream – a true Latin American classic.
- Homemade Banana Pudding: Layers of creamy vanilla pudding, fresh bananas, and Nilla wafers create a comforting and utterly delicious dessert.
Mini Strawberry Pavlova Nests
by Katerina | Easy Weeknight Recipes
A light and airy meringue dessert with a creamy center, topped with strawberry jam, whipped cream, and fresh strawberries.
Prep Time: 30 minutes
Cook Time: 1 hour
Resting Time: 30 minutes
Total Time: 2 hours
Servings: 14 mini pavlovas
Ingredients
For the Pavlova Base:
- 6 egg whites, at room temperature
- 2 cups superfine sugar
- 2 ½ teaspoons cornstarch or arrowroot powder
- ½ tablespoon lemon juice
- 1 teaspoon vanilla extract
For the Toppings:
- 1 ½ cups heavy whipping cream, chilled
- 2 tablespoons granulated sugar
- ½ cup strawberry jam or preserves
- 8 fresh sliced or halved strawberries, for garnish
- Powdered sugar, for garnish (optional)
Instructions
- Separate 6 eggs from their yolks, ensuring no yolk gets into the whites. Place egg whites in a bowl and allow to sit at room temperature for about 20 minutes.
- Preheat the oven to 225°F (107°C). Line two baking sheet pans with parchment paper and set aside. Fit your piping bag with a large star tip.
- In a stand mixer or mixing bowl with an electric hand mixer, beat the egg whites on HIGH for one to two minutes, or until soft peaks form. With the mixer still on, gradually add the sugar a little bit at a time until dissolved. Once all the sugar is dissolved, continue beating for 6 to 8 minutes on HIGH speed, or until stiff, glossy peaks form.
- Once stiff peaks form, gently fold in the lemon juice, vanilla extract, and cornstarch. Scoop the pavlova mixture into the prepared piping bag.
- On the parchment-lined baking sheets, pipe the meringue into roughly 3-inch nests. You should end up with about 12 to 15 nests. Gently press a spoon on the top to create a small indent in the center of each.
- Bake the meringue nests for 1 hour at 225°F (107°C). After the first hour, turn the oven off and keep the door closed. Let the pavlovas cool in the oven for at least 30 minutes (or longer for extra crispness). Then transfer them to a cooling rack to cool completely.
- In the meantime, when ready to serve, place the chilled heavy whipping cream and 2 tablespoons of sugar in a mixing bowl. Mix on HIGH for 2 to 3 minutes, or until stiff peaks form.
- Place roughly 1 tablespoon of jam in the center of each pavlova nest.
- Top with piped whipped cream and half of a fresh strawberry. Enjoy immediately!
Nutrition
Calories: 250kcal | Carbohydrates: 40g | Protein: 2g | Fat: 9g | Saturated Fat: 6g | Cholesterol: 35mg | Sodium: 35mg | Potassium: 62mg | Fiber: 1g | Sugar: 37g | Vitamin A: 376IU | Vitamin C: 5mg | Calcium: 21mg | Iron: 1mg
Nutritional information is an estimate and provided as courtesy. Values may vary according to ingredients and tools used. Please use your preferred nutritional calculator for more detailed information.