
The Ultimate Baked Caesar Chicken: Your New Go-To Recipe for Juicy, Cheesy Perfection
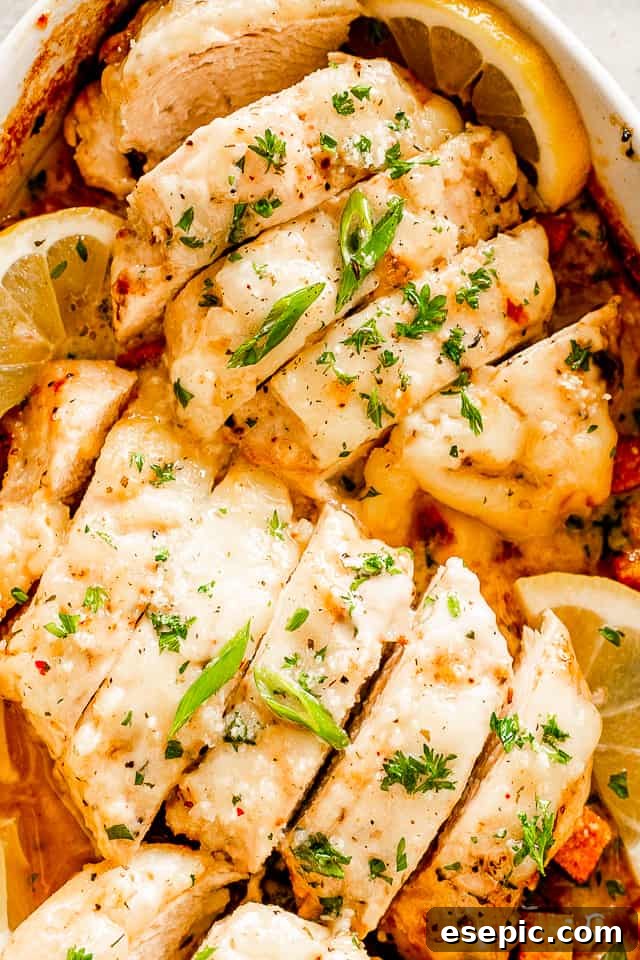
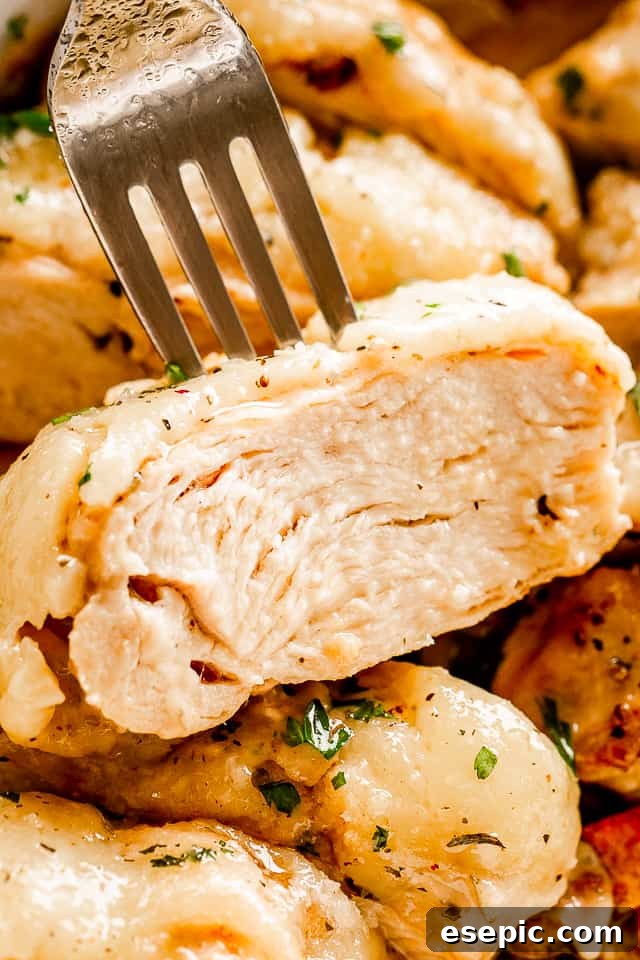
Prepare to discover your new favorite weeknight meal! This incredibly simple, 5-ingredient Baked Caesar Chicken Recipe delivers the juiciest, most flavorful chicken breasts you’ll ever sink your teeth into. Imagine tender chicken, generously coated in rich Caesar dressing, crowned with a blanket of gooey, melted mozzarella cheese, and then perfectly baked until golden. It’s a dish that effortlessly combines elegance with ease, making it ideal for busy evenings yet impressive enough for company. Forget dry, bland chicken – this recipe guarantees melt-in-your-mouth deliciousness with minimal effort, transforming basic chicken breasts into a culinary delight that the whole family will adore.
Why This Baked Caesar Chicken Will Become Your Favorite Dinner
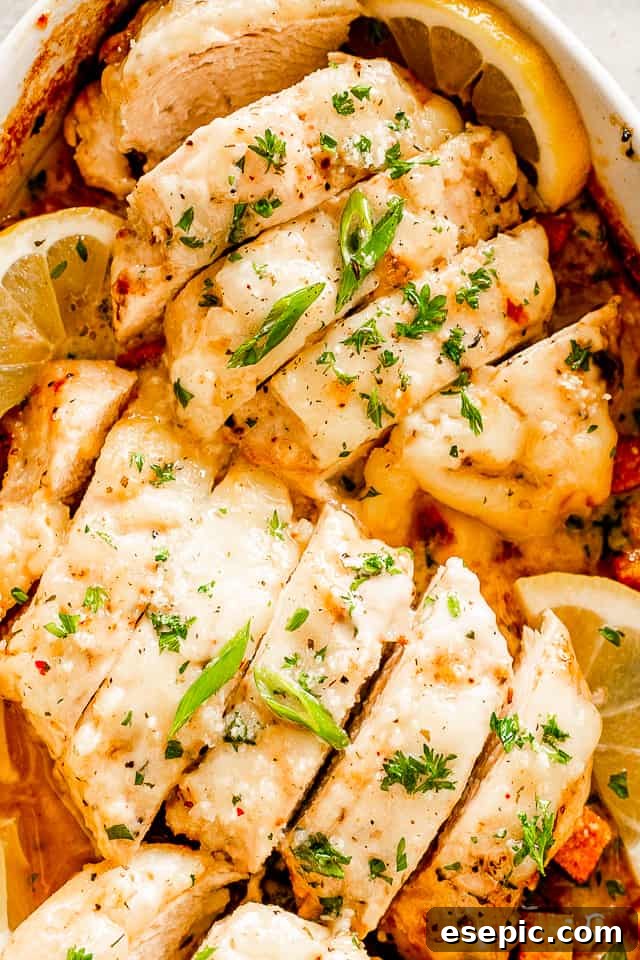
In a world of complicated recipes, this Baked Caesar Chicken stands out for its sheer simplicity and incredible flavor payoff. It’s a culinary marvel that requires just a handful of staple ingredients and minimal hands-on time, allowing you to whip up a gourmet-tasting meal without spending hours in the kitchen. Whether you’re a seasoned chef or a kitchen novice, this recipe is designed for success, promising tender, juicy results every single time.
An Effortless Weeknight Dinner Solution
Life gets hectic, and cooking shouldn’t add to the stress. This recipe is your answer to a quick and delicious weeknight dinner. With just over 20 minutes of baking time, you can have a flavorful and satisfying meal on the table in under 40 minutes, including prep. The beauty of this dish lies in its streamlined process: a quick pound of the chicken, a generous slathering of dressing and cheese, and into the oven it goes. It’s perfect for those evenings when you crave something homemade and comforting but are short on time and energy.
Unforgettable Flavor in Every Bite
The secret to the irresistible taste of this chicken lies in the creamy Caesar dressing and the luxurious layer of melted cheese. The dressing not only infuses the chicken with its signature tangy, savory, and garlicky notes but also keeps the chicken incredibly moist as it bakes. The mozzarella cheese forms a golden, bubbling crust that locks in moisture and adds a delightful textural contrast. Each bite is a harmonious blend of tender chicken, rich Caesar flavor, and gooey cheese, creating a truly satisfying experience that will have everyone asking for seconds.
Essential Ingredients for Baked Caesar Chicken Perfection
The magic of this recipe is that it achieves such incredible flavor with so few ingredients. Quality ingredients are key here, so choose wisely to maximize the taste. You’ll only need five core items to create this restaurant-quality dish that looks as impressive as it tastes.
The Stars of the Show:
- Boneless, Skinless Chicken Breasts: We opt for boneless and skinless chicken breasts for their lean protein content and quick cooking time. Their mild flavor makes them the perfect canvas for the bold Caesar dressing. Ensure they are fresh and of good quality for the best results.
- Creamy Caesar Dressing: This is the hero ingredient that imparts most of the flavor and moisture. Choose your favorite brand of creamy Caesar dressing – the richer and more flavorful, the better! Avoid chunky varieties as they won’t coat the chicken as evenly.
- Shredded Mozzarella Cheese: A generous amount of shredded mozzarella creates that irresistible, melty, gooey layer over your chicken. It adds a mild, milky flavor and a fantastic texture that perfectly complements the tang of the Caesar dressing.
- Fresh Parsley: Chopped fresh parsley is primarily used as a vibrant garnish, adding a touch of color and a fresh, herbaceous note that brightens up the rich flavors of the dish. It’s an optional touch but highly recommended for presentation and a subtle flavor boost.
- Grated Parmesan Cheese: An optional final flourish, a sprinkle of grated Parmesan cheese just before serving adds an extra layer of salty, nutty, umami depth. It enhances the classic Caesar profile and adds a lovely finish.
Step-by-Step Guide: How to Make Baked Caesar Chicken
Creating this delicious Baked Caesar Chicken is incredibly straightforward. Follow these simple steps, and you’ll have a mouth-watering meal on your table in no time. Precision in preparation ensures evenly cooked, juicy chicken every time.
Detailed Instructions for a Flawless Dish:
- Preheat Your Oven: Begin by preheating your oven to 400°F (200°C). This ensures the oven is at the correct temperature when the chicken goes in, promoting even cooking and a beautiful golden crust.
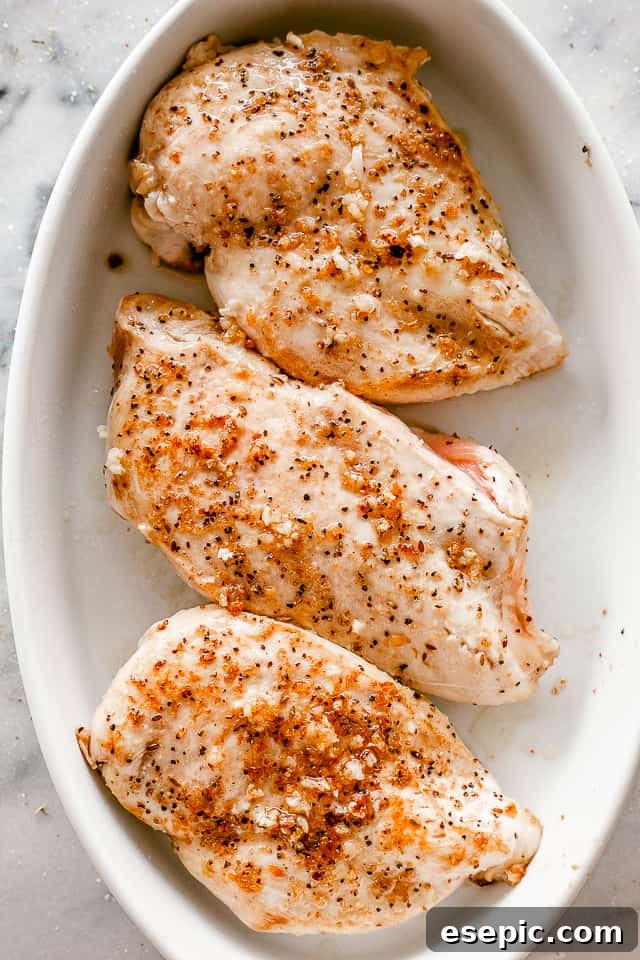
- Pound the Chicken Breasts: Place each boneless, skinless chicken breast between two sheets of plastic wrap or parchment paper. Using a meat mallet or a heavy rolling pin, pound each chicken breast to an even ½-inch thickness. This crucial step ensures the chicken cooks uniformly, preventing drier edges and allowing it to absorb the dressing more effectively.
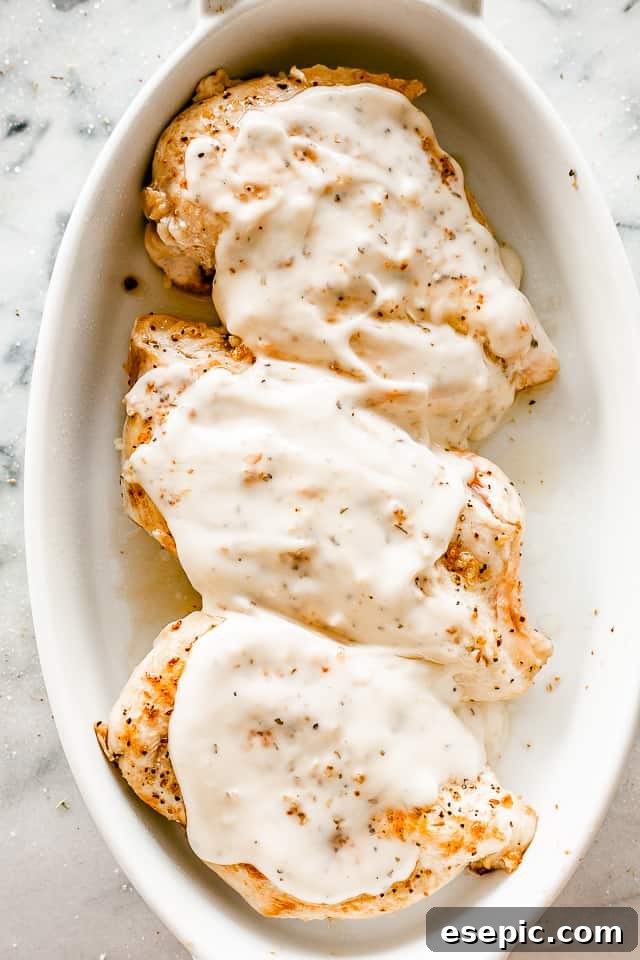
- Coat with Caesar Dressing: Transfer the pounded chicken breasts to a baking dish large enough to hold them in a single layer without overcrowding. Pour the creamy Caesar dressing generously over the chicken, making sure to flip and turn each piece until it is thoroughly coated on all sides. This marinade step is where the chicken truly soaks up its signature flavor.
- Top with Shredded Cheese: Evenly sprinkle the shredded mozzarella cheese over the coated chicken breasts. Ensure each piece is well covered, as this will create that delightful, melty, cheesy crust once baked.
- Bake to Perfection: Place the uncovered baking dish into the preheated oven. Bake for approximately 20-25 minutes, or until the chicken’s internal temperature reaches 160˚F (71˚C) when measured with an instant-read thermometer. At this stage, the chicken is nearly cooked through and beautifully tender.
- Broil for a Golden Finish: To achieve that irresistible golden-brown crust and perfectly melted cheese, switch your oven setting to BROIL. Broil the chicken breasts for an additional 3 to 4 minutes, keeping a very close eye on them, until the cheese is bubbling, fully melted, and lightly browned to your liking. Broiling can happen quickly, so watch carefully to prevent burning.
- Garnish and Serve: Carefully remove the baking dish from the oven. Garnish the baked Caesar chicken with freshly chopped parsley and an optional sprinkle of grated Parmesan cheese. Allow the chicken to rest for a few minutes before serving to ensure the juices redistribute, making it even juicier. Serve immediately and enjoy!
Expert Tips for the Juiciest and Most Flavorful Baked Caesar Chicken
While this recipe is incredibly simple, a few expert tips can elevate your Baked Caesar Chicken from great to absolutely exceptional. These insights will help you achieve perfectly cooked, consistently juicy, and maximally flavorful results every time you prepare this dish.
Achieving Optimal Tenderness and Taste:
- Always Check Internal Temperature: The single most important tip for perfectly cooked chicken is to use an instant-read thermometer. This ensures your chicken is cooked through to a safe temperature (160°F / 71°C for breasts, which will rise to 165°F / 74°C during resting) without overcooking and drying out. Don’t rely solely on visual cues; a thermometer is your best friend for juicy chicken.
- Resist the Urge to Salt: Unlike many chicken recipes, there’s no need to pre-salt your chicken breasts for this dish. High-quality Caesar dressing is typically rich in flavor and sodium, providing all the seasoning your chicken needs. Adding extra salt could make the dish overly salty. However, feel free to add a dash of paprika or a bit of freshly ground black pepper for a personal touch, if desired.
- Choose Creamy Caesar Dressing: The consistency of your Caesar dressing makes a big difference. Opt for a smooth, creamy variety rather than a chunky one. A creamy dressing will adhere better to the chicken, creating an even, flavorful coating that helps lock in moisture and contributes to a tender finish.
- Pound Chicken to Uniform Thickness: Pounding your chicken breasts to an even ½-inch thickness using a meat mallet is crucial for consistent cooking. Thicker parts would take longer to cook, leading to drier, overcooked thinner sections. Uniform thickness ensures every bite is equally tender and juicy.
- Don’t Overcrowd the Baking Dish: Arrange the chicken breasts in a single layer with a little space between them in your baking dish. Overcrowding can steam the chicken instead of baking it, preventing that beautiful golden-brown crust from forming. Use two dishes if necessary.
- Let It Rest: Once the chicken is out of the oven, cover the baking dish loosely with foil and let it rest for 5-10 minutes. This allows the juices to redistribute throughout the meat, resulting in exceptionally juicy and tender chicken.
Serving Suggestions: What to Serve with Your Baked Caesar Chicken
This Baked Caesar Chicken is wonderfully versatile and pairs beautifully with a variety of sides, making it easy to create a complete and satisfying meal. Whether you’re in the mood for something hearty, light, or extra cheesy, there’s a perfect accompaniment.
Perfect Pairings for a Complete Meal:
- Fluffy Rice: Chicken and rice is a timeless, comforting combination. The creamy sauce from the Caesar chicken is fantastic when served over a bed of fluffy white rice, soaking up all the delicious juices. For an elevated experience, try it with my Creamy Garlic Butter Rice, which complements the cheesy notes perfectly.
- Crusty Bread: Since the chicken is so creamy and juicy, it begs for something to mop up every last drop of that flavorful sauce. A warm, crusty loaf of homemade bread or a simple baguette is ideal. If you’re a fellow cheese addict, pairing your Caesar chicken breasts with this delightful No-Knead Skillet Cheese Bread creates an unparalleled cheesy feast.
- Fresh Vegetables & Salads: To balance the richness of the chicken, a crisp green salad or a vibrant vegetable side is an excellent choice. A classic Caesar salad makes a wonderful companion, or whip up a quick batch of my easy Roasted Sugar Snap Peas for a fresh and slightly sweet contrast. Steamed broccoli, asparagus, or a simple garden salad with a light vinaigrette would also be fantastic.
- Roasted Potatoes: For a heartier side, roasted potatoes or sweet potato wedges can be a fantastic addition. Their earthy flavors and satisfying texture provide a great counterpoint to the chicken.

Storage, Reheating, and Meal Prep for Your Baked Caesar Chicken
One of the many benefits of this Baked Caesar Chicken recipe is how well it stores and reheats, making it perfect for meal prepping or enjoying delicious leftovers throughout the week. Properly storing and reheating ensures your chicken remains as tender and flavorful as when it was first made.
Keeping Your Caesar Chicken Fresh:
- Storing Leftovers: If you find yourself with any delicious leftover Caesar chicken, allow it to cool completely before transferring it to an airtight container. Store the container in the refrigerator, where the chicken will remain fresh and flavorful for 3-4 days. For longer storage, you can freeze the cooked chicken. Place cooled chicken breasts in a freezer-safe bag or container, ensuring as much air as possible is removed to prevent freezer burn. Frozen leftovers will stay good for 2 to 3 months.
- Reheating for Optimal Flavor:
- Microwave Method: For a quick reheat, place individual chicken breasts on a microwave-safe plate. Heat in the microwave for 30-60 seconds at a time, checking for warmth, until heated through. Be careful not to overheat, as this can dry out the chicken.
- Oven Method: For a more even reheat that helps restore some of the original texture, place the chicken breasts in a baking dish. If reheating multiple pieces, cover the dish tightly with aluminum foil to trap moisture. Cook in a preheated oven at 350°F (175°C) for about 15-20 minutes, or until the chicken is warmed through. For a slightly crispier top, uncover the baking dish for the last few minutes of reheating, or even broil for 1-2 minutes, watching closely to avoid burning the cheese.
- Meal Prep Perfection: This recipe is fantastic for meal prepping! Cook a larger batch at the beginning of the week and portion it out with your favorite sides for healthy, ready-to-eat lunches or dinners.
Creative Ways to Enjoy Leftover Caesar Chicken
Don’t let any of your delicious Baked Caesar Chicken go to waste! The flavorful, cheesy chicken is incredibly versatile and can be transformed into a variety of exciting new meals. Reinventing your leftovers is a fantastic way to keep dinner interesting and minimize food waste.
Reinventing Your Leftovers for Exciting Meals:
- Chicken Quesadillas: Since your chicken is already packed with cheesy goodness, turning it into a quesadilla is a natural next step. Simply shred or dice the leftover chicken, place it in a tortilla with additional shredded cheese (if desired), and pan-fry until golden and the cheese is melted. Serve with salsa, sour cream, or guacamole for a quick and satisfying lunch or dinner.
- Chicken Caesar Salad: This cheesy chicken is the absolute perfect topping for a classic Caesar salad. Slice or chop the chicken and add it warm or cold to a bed of crisp romaine lettuce, croutons, and extra Caesar dressing. It elevates a simple salad into a hearty and complete meal.
- Gourmet Sandwiches or Wraps: Spruce up your midday meal by incorporating leftover chicken into a delicious sandwich or wrap. Slice the chicken thinly, add it to your favorite bread or wrap with fresh lettuce, tomato, and maybe a little extra dressing or mayo. A good chicken sandwich for lunch is always a winner!
- Flavorful Chicken Tacos: Shred your leftover Caesar chicken and use it as the star filling for the most flavorful chicken tacos ever. Warm tortillas, your favorite taco toppings (shredded lettuce, diced tomatoes, a dollop of sour cream, or a sprinkle of cotija cheese), and this flavorful chicken make for an unexpectedly delicious taco night.
- Pasta Topping: Dice the chicken and toss it with your favorite pasta and a light cream sauce or olive oil, creating a quick and elegant pasta dish.
- Baked Potato Topping: Load up a baked potato or sweet potato with shredded Caesar chicken, a dollop of sour cream, and some chives for a hearty and comforting meal.
Frequently Asked Questions About Baked Caesar Chicken
Here are some common questions about making Baked Caesar Chicken, designed to help you perfect this easy and delicious dish.
Can I use chicken thighs instead of breasts?
Yes, absolutely! Boneless, skinless chicken thighs can be used as a delicious alternative. Thighs are generally more forgiving and tend to stay juicier due to their higher fat content. The cooking time might be slightly longer (around 25-30 minutes at 400°F/200°C), and you should still aim for an internal temperature of 175°F (80°C) for thighs, as they are best when cooked to a higher temperature than breasts.
What kind of Caesar dressing should I use?
For the best results, use a high-quality, creamy Caesar dressing. Avoid thin, watery dressings or those with very large chunks, as they won’t coat the chicken as effectively or infuse as much flavor. Your favorite brand will work perfectly, but generally, a richer, thicker dressing will yield a more flavorful and moist result.
How do I know when the chicken is cooked through?
The most reliable way to check for doneness is by using an instant-read meat thermometer. Insert the thermometer into the thickest part of the chicken breast, avoiding any bones. Chicken breasts are safely cooked when they reach an internal temperature of 160°F (71°C). Remember that the temperature will rise slightly (carryover cooking) to 165°F (74°C) as the chicken rests outside the oven, ensuring maximum juiciness.
Can I prepare this dish in advance?
Yes, this recipe is great for meal prepping! You can pound the chicken breasts, coat them in Caesar dressing, and place them in the baking dish a few hours, or even up to 24 hours, in advance. Cover the dish tightly with plastic wrap and refrigerate. When ready to bake, simply add the cheese and proceed with the baking instructions. This helps the flavors meld even more intensely.
What if I don’t have a meat mallet to pound the chicken?
No problem! If you don’t have a meat mallet, you can use the bottom of a heavy skillet, a rolling pin, or even a sturdy, heavy can. Just be sure to place the chicken between two sheets of plastic wrap or in a large zip-top bag before pounding to prevent a mess and ensure food safety.
The Full Baked Caesar Chicken Recipe Card

Recipe Rating: 5 out of 5 stars from 6 votes
Baked Caesar Chicken
by Katerina | Easy Weeknight Recipes
This 5-ingredient Baked Caesar Chicken Recipe makes the juiciest baked chicken breasts you’ll ever eat! Covered in Caesar dressing and melty cheese, they’re full of flavor and easy to make.
- Prep Time: 10 minutes
- Cook Time: 25 minutes
- Total Time: 35 minutes
- Servings: 4
Ingredients
- 4 boneless, skinless chicken breasts
- 1 cup creamy Caesar dressing
- ¾ cup shredded mozzarella cheese
- Chopped fresh parsley, for garnish (optional)
- Grated Parmesan cheese, for garnish (optional)
Instructions
- Preheat oven to 400˚F (200°C).
- Pound each chicken breast to a ½-inch thickness.
- Transfer chicken breasts to a baking dish. Pour Caesar dressing over the chicken breasts and flip around to coat evenly.
- Add shredded mozzarella cheese over the chicken breasts, ensuring good coverage.
- Bake chicken, uncovered, for 20-25 minutes, or until an instant-read thermometer registers 160˚F (71˚C) in the thickest part of the chicken.
- Set the oven to BROIL. Broil the chicken breasts for about 3 to 4 minutes, or until the cheese is melted, bubbly, and the top is lightly browned. Watch carefully to prevent burning.
- Remove from oven and garnish with fresh chopped parsley and grated Parmesan cheese, if desired. Serve immediately and enjoy!
Equipment
- Oven
- Baking Dish
- Meat Mallet (or heavy rolling pin/skillet)
- Instant-Read Thermometer
Nutrition Information (Estimated per serving)
- Calories: 511 kcal
- Carbohydrates: 2g
- Protein: 30g
- Fat: 42g
- Saturated Fat: 9g
- Cholesterol: 112mg
- Sodium: 974mg
- Potassium: 453mg
- Fiber: 1g
- Sugar: 2g
- Vitamin A: 196IU
- Vitamin C: 1mg
- Calcium: 140mg
- Iron: 1mg
Nutritional info is an estimate and provided as courtesy. Values may vary according to the ingredients and tools used. Please use your preferred nutritional calculator for more detailed info.
Conclusion: Your New Favorite Chicken Dinner Awaits!
There you have it – a robust, flavorful, and incredibly easy recipe for Baked Caesar Chicken that promises to become a staple in your meal rotation. With minimal ingredients, straightforward steps, and a result that’s consistently juicy, cheesy, and utterly delicious, this dish is a testament to how simple cooking can be incredibly satisfying. Whether you’re feeding a busy family, hosting friends, or just craving a comforting meal, this recipe delivers on all fronts. So, gather your ingredients, follow these steps, and prepare to enjoy the best Baked Caesar Chicken you’ve ever made. We’re confident it will earn a permanent spot in your cookbook!