
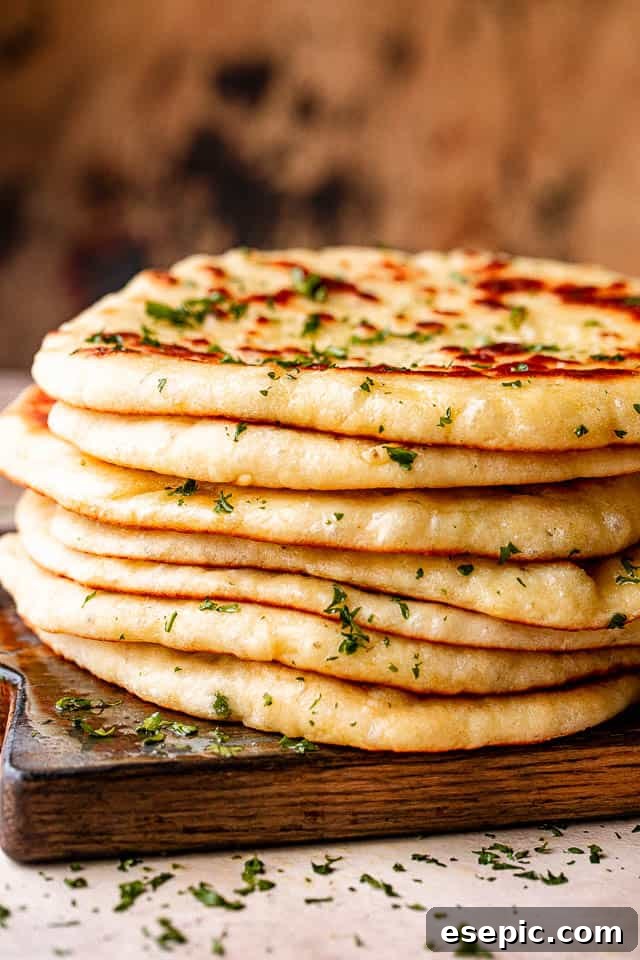
There’s nothing quite like the aroma of freshly baked bread filling your home, and this Homemade Flatbread recipe delivers that comforting experience with unparalleled ease and flavor. Imagine soft, fluffy, and incredibly tender flatbreads, lightly brushed with aromatic olive oil and sprinkled with vibrant fresh parsley. They are perfect as a warm, inviting snack or a versatile side dish that elevates any meal.

For many, homemade bread holds a special place in their hearts. As a Macedonian, who deeply cherishes carb-rich comfort foods, flatbread stands out as my ultimate indulgence. While a crusty French baguette might be the go-to for some, I find myself continually drawn to the warm, yielding embrace of a perfectly made flatbread. This recipe isn’t just about making bread; it’s about creating a memorable culinary experience right in your kitchen.
Why You’ll Love This Easy Flatbread Recipe
If you’ve ever been intimidated by baking bread, this easy flatbread recipe is the perfect starting point. It’s designed for simplicity without compromising on taste or texture. Here’s why it will quickly become a staple in your kitchen:
- Effortlessly Simple to Make: Forget complicated techniques or endless proofing times. Making this flatbread is refreshingly straightforward and significantly quicker than most traditional bread recipes. There’s no lengthy second rise, and the cooking process on a skillet eliminates the guesswork often associated with oven baking. It’s truly a no-fuss recipe for delicious results.
- Bursting with Flavor and Incredible Texture: The secret to this flatbread’s superior taste, subtle tanginess, and wonderfully fluffy texture lies in one humble yet powerful ingredient: plain yogurt. Yogurt not only tenderizes the dough but also contributes a depth of flavor that sets this flatbread apart from others. Combined with carefully selected seasonings, each bite is a delightful experience.
- A Family Favorite: Children are naturally drawn to the magic of homemade bread, and flatbread seems to hold a particular charm for them. The warm, fragrant, and utterly delicious nature of freshly cooked flatbread makes it an instant hit with kids and adults alike. It’s a wonderful way to get the whole family involved in the kitchen and enjoy a wholesome treat.
- Incredibly Versatile: Whether you need a quick snack, a hearty side, or a creative base for a meal, this flatbread adapts beautifully. Its mild flavor and soft texture make it suitable for a myriad of culinary applications.
What is the Difference Between Flatbread and Naan?
Understanding the distinction between flatbread and naan often causes confusion, but it’s quite simple. “Flatbread” is a broad culinary category encompassing any bread made from a simple mixture of flour, water, and salt, typically prepared without a leavening agent or with minimal leavening, and cooked in various ways ( skillet, griddle, oven). This ancient form of bread is found in nearly every culture, each with its unique twist.
Naan, on the other hand, is a specific type of leavened flatbread originating from Central, South, and West Asia. What often distinguishes naan is the use of yogurt, milk, or eggs in its dough, giving it a richer, softer, and more pliable texture. It’s traditionally cooked in a tandoor (a clay oven), resulting in its characteristic charred bubbles and smoky flavor. So, while all naan is a flatbread, not all flatbread is naan. This particular recipe, with its incorporation of plain yogurt for exceptional softness and flavor, shares some wonderful characteristics with traditional naan but maintains the simplicity and versatility of a classic skillet-cooked flatbread.

Essential Ingredients for Your Fluffy Flatbread
Creating truly delicious homemade flatbread starts with a handful of accessible ingredients. Each component plays a vital role in achieving that perfect soft, chewy, and flavorful result. Here’s a closer look at what you’ll need and why:
- Lukewarm Water: The foundation for activating your yeast. Water that is too hot will kill the yeast, while water that is too cold won’t allow it to activate properly. Aim for around 105°F (40°C) – comfortably warm to the touch, like a baby’s bath. A quick 30-second microwave zap often gets it just right.
- Active Dry Yeast: This is our leavening agent, responsible for the flatbread’s delightful puffiness and softness. Even if you’re not an avid baker, small packets are readily available in the baking aisle of most grocery stores. Ensure it’s active dry yeast for optimal results.
- Sugar: A small amount of sugar acts as food for the yeast, helping it to activate and thrive. It also contributes to a more golden crust and a subtle sweetness that balances the savory seasonings.
- Plain Yogurt: This is the star ingredient that sets this flatbread apart. Plain yogurt, ideally full-fat for the richest flavor and most tender crumb, is the secret to its above-average taste, a hint of pleasant tanginess, and incredibly soft, fluffy texture. Be sure to use unflavored yogurt – skip vanilla or any sweetened varieties.
- Olive Oil: Used both in the dough and for brushing the flatbread during cooking. In the dough, it adds richness and moisture. Brushed on the outside, it promotes a beautiful golden color and a slightly crispy exterior while keeping the interior tender.
- Seasoning: We’ll be infusing our flatbread with a harmonious blend of dried basil, oregano, garlic powder, and salt. These Mediterranean-inspired flavors create a fragrant and savory profile that complements a wide range of dishes. Feel free to adjust these to your preference or experiment with other herbs like thyme or rosemary.
- All-Purpose Flour: The primary structural component of our flatbread. All-purpose flour provides the necessary gluten development for a chewy yet tender texture. Ensure you measure it correctly, preferably by weight, or spoon and level for accuracy.
- Fresh Parsley: While optional, a sprinkle of finely chopped fresh parsley after cooking adds a burst of vibrant color and a fresh, herbaceous note. It’s the perfect finishing touch, enhancing both the visual appeal and the overall flavor.
Step-by-Step Guide: Crafting Your Perfect Flatbread
Making homemade flatbread is a rewarding experience, and with these clear instructions, you’ll be baking like a pro in no time. Follow each step carefully for the best results:
- 1. Activate the Yeast: In a spacious mixing bowl, gently whisk together the lukewarm water, active dry yeast, and sugar. This initial step awakens the yeast. Set the bowl aside for 8 to 10 minutes, allowing the mixture to become visibly foamy. This foam indicates that your yeast is active and ready to work its magic, ensuring a light and airy flatbread.
- 2. Combine Wet and Dry Ingredients: Once the yeast mixture is foamy, whisk in the plain yogurt, olive oil, salt, dried basil, dried oregano, and garlic powder until well combined. Next, gradually add the all-purpose flour and the fresh parsley (if using). Stir everything thoroughly with a sturdy wooden spoon until the dough comes together into a shaggy mass.
- 3. Knead the Dough: Lightly flour a clean work surface. Turn the dough out onto this floured area, giving it a light sprinkle of flour on top to prevent sticking. Knead the dough vigorously for about 4 minutes. This process develops the gluten, which is essential for the flatbread’s structure and chewiness. If the dough feels too sticky during kneading, add a tiny bit more flour, a tablespoon at a time, until it’s pliable but not dry.
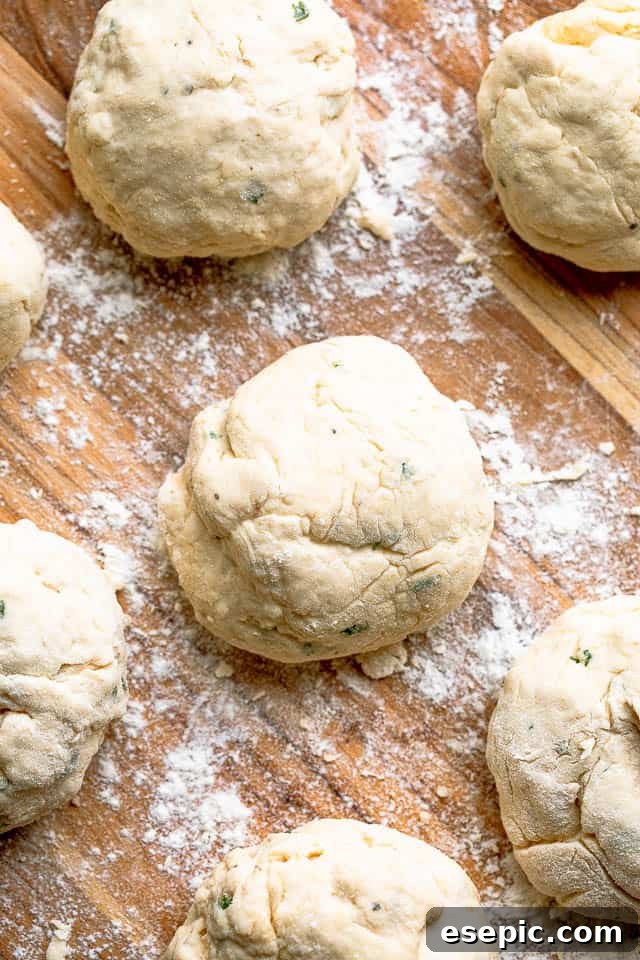
- 4. Divide and Rest: Once kneaded, cut the dough into 10 equal pieces. For consistent size and even cooking, you can use a kitchen scale to weigh each piece, aiming for uniformity. Roll each piece into a small, smooth ball. Arrange the dough balls on a lightly floured tray, cover them with a clean kitchen towel, and let them rest for 15 minutes. This resting period allows the gluten to relax, making the dough much easier to roll out later.
- 5. Prepare for Cooking: While the dough rests, place a frying pan or cast-iron skillet over medium-low heat and allow it to preheat thoroughly. It’s crucial to have a consistently hot pan for even cooking and a beautiful golden crust.
- 6. Roll Out and Oil: Take one dough ball and, using a rolling pin, roll it out into a circle approximately 7 inches in diameter. The dough should be relatively thin but not translucent. Lightly brush the top surface of the rolled-out dough with olive oil. This not only prevents sticking but also contributes to flavor and texture.
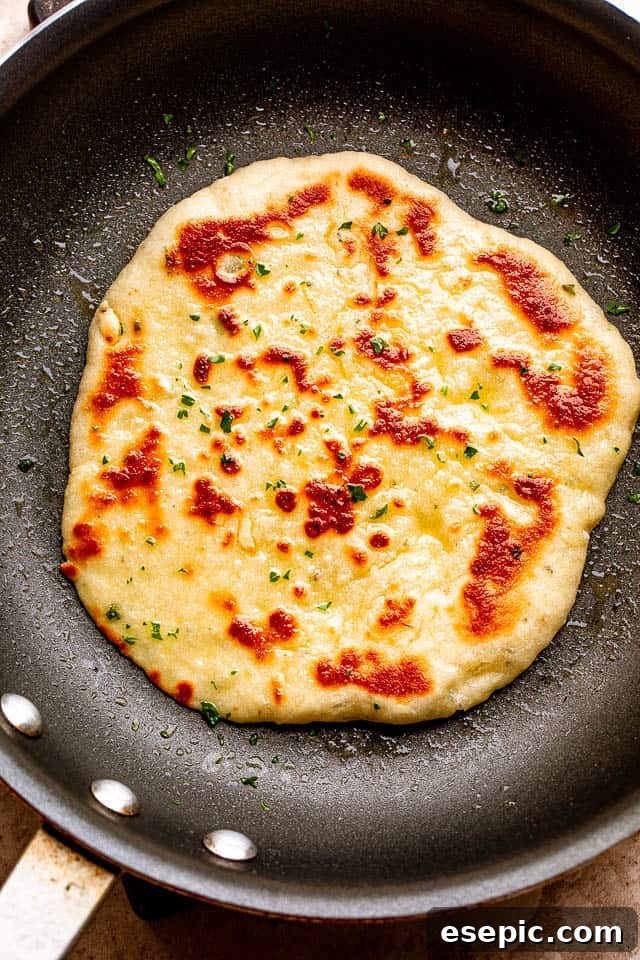
- 7. Cook the First Side: Once the pan is hot, carefully pick up the oiled flatbread dough and place it into the pan, oiled side down. Cook for about 1½ minutes, or until you see numerous bubbles forming on the top surface. While this side is cooking, take a moment to lightly brush the exposed top side of the flatbread with olive oil.
- 8. Flip and Finish: Using tongs or a spatula, flip the flatbread to the other side. Continue to cook for another 1 minute, or until the bottom is beautifully golden brown and slightly blistered. Remove the cooked flatbread from the pan and transfer it to a plate. It’s important to keep the cooked flatbreads covered with a clean kitchen towel to keep them warm and soft while you continue cooking the remaining dough.
- 9. Repeat and Serve: Repeat the rolling and cooking process with the remaining dough balls. Always ensure the uncooked dough balls remain covered to prevent them from drying out. Once all flatbreads are cooked, sprinkle them with freshly chopped parsley, if desired, and serve them warm for the best experience.
Expert Tips for Flatbread Success
Achieving consistently perfect homemade flatbread is simple once you know a few key tricks. These tips will help you master the process and enjoy delicious results every time:
- Proper Yeast Activation is Key: The temperature of your water is critical for yeast. Use lukewarm water, ideally around 105°F (40°C). Water that’s too hot will kill the yeast, preventing your flatbread from rising and becoming fluffy. Too cold, and the yeast won’t activate effectively, leading to dense, “flat” flatbreads. Look for that distinct foamy layer after mixing; it’s your sign of active yeast.
- Uniformity for Even Cooking: For the most consistent cooking and appealing presentation, aim to make each dough ball as close to the same size as possible. A kitchen scale is an excellent tool for this, ensuring each piece weighs equally before rolling. This prevents some flatbreads from being undercooked while others are perfectly done.
- No Yeast? No Problem (with a caveat): While yeast is crucial for the signature fluffy texture of this recipe, you can make a version without it in a pinch. However, be aware that flatbread made without yeast will be less airy and soft, resulting in a denser, chewier texture more akin to a tortilla. It will still be delicious but will lack the characteristic puffiness.
- Brush Liberally with Olive Oil: Don’t skip brushing both sides of your flatbread with olive oil before and during cooking. This step is vital for two reasons: it prevents the dough from sticking to the pan and helps create that desirable golden-brown exterior with slight crispiness, while keeping the interior moist and tender. It also infuses the flatbread with wonderful flavor.
- Don’t Overcook: Flatbreads cook quickly, especially on a hot skillet. Overcooking can lead to dry, stiff results. Cook until golden spots appear and bubbles form, but resist the urge to leave them on the heat for too long. They should remain soft and pliable.
- Keep Dough Covered: Whether it’s the dough balls resting or the cooked flatbreads waiting to be served, always keep them covered with a clean kitchen towel. This prevents the dough from drying out and helps maintain the softness and warmth of the cooked flatbreads.
- Adjust Heat as Needed: Every stove and pan is different. Start with medium-low heat and adjust as you go. If your flatbreads are browning too quickly, lower the heat. If they’re not browning enough, increase it slightly. Consistent heat ensures even cooking without burning.
Creative Ways to Serve Your Delicious Flatbread
This homemade flatbread recipe opens up a world of delicious possibilities, proving its incredible versatility. Far beyond just a simple side, it can be the star of countless meals, transforming everyday ingredients into extraordinary culinary delights. Its soft, pliable texture and subtle flavor make it the perfect canvas for your culinary creativity.
- A Perfect Companion for Hearty Meals: This flatbread is a wonderful, flavorful alternative to traditional dinner rolls or sliced bread. It pairs exceptionally well with rich and savory dishes such as a comforting Mulligan stew, the delicate flavors of Chicken Madeira, or robust curries. It’s also superb alongside various meat and rice dishes, ideal for scooping up sauces and gravies. For a lighter yet satisfying combination, try it with a vibrant Salmon BLT Salad.
- Ideal for Dipping and Snacking: For a quick and delightful snack or appetizer, cut the warm flatbread into triangles. These are perfect for dipping into your favorite creamy hummus, a refreshing tzatziki sauce, a spicy baba ghanoush, or even a simple olive oil and balsamic vinegar blend. The soft texture absorbs flavors beautifully.
- The Ultimate Sandwich or Wrap Base: Flatbread transforms into the perfect vessel for crafting creative and satisfying sandwiches. Fold it around your favorite fillings – grilled chicken, roasted vegetables, deli meats, cheeses, or falafel – for a portable and delicious meal. Its flexibility makes it much easier to handle than rigid bread.
- Mediterranean-Style Tacos: Reimagine taco night with flatbread! Use it as a base for Mediterranean-inspired “tacos.” Top the warm flatbread with seasoned ground beef or lamb, shredded lettuce, diced tomatoes, thinly sliced red onion, and crumbled feta cheese, finished with a drizzle of cooling yogurt sauce for an authentic taste.
- Fun and Customizable Mini Pizzas: This is a guaranteed hit with kids and a fantastic option for a quick weeknight dinner. Use individual flatbreads as the base for personal pizzas. Let everyone customize their own with tomato sauce, mozzarella, and their preferred toppings, from pepperoni and mushrooms to bell peppers and olives. They cook up quickly in the oven or air fryer for a fun, interactive meal.
- Breakfast Delight: Don’t overlook flatbread for breakfast! Use it to make breakfast wraps with scrambled eggs, cheese, and your choice of breakfast meats or vegetables. Or, simply enjoy it warm with a smear of butter and jam or a drizzle of honey.
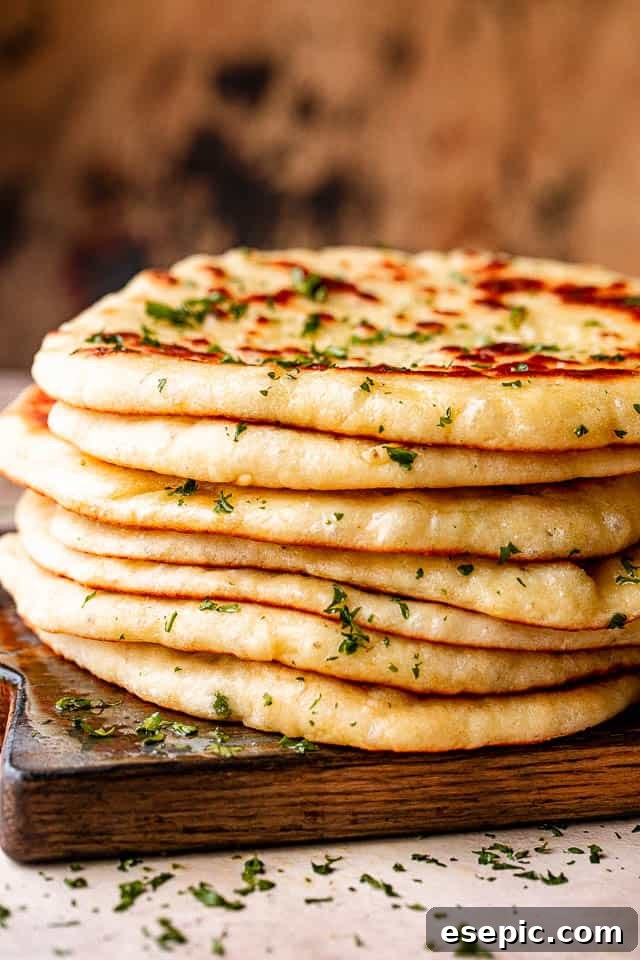
Storing and Reheating for Lasting Freshness
One of the great things about this homemade flatbread is how well it stores, allowing you to enjoy its deliciousness for days or even months. Proper storage ensures that your efforts in the kitchen pay off with continued freshness and convenience.
- Room Temperature Storage: Once your flatbreads have cooled completely, you can store any leftovers in airtight ziploc bags or containers. They will remain wonderfully soft and fresh at room temperature for up to 2 days, making them perfect for quick snacks or packed lunches.
- Refrigeration: For longer storage, transfer the cooled flatbreads to an airtight container or a securely sealed ziploc bag and keep them in the refrigerator. They will stay fresh and delicious for up to 5 days.
- Freezing for Long-Term Enjoyment: Flatbreads freeze exceptionally well, which is fantastic for meal prep! Once fully cooled, stack them with parchment paper in between each flatbread to prevent sticking. Place the stack in a freezer-safe bag or container, removing as much air as possible. They can be frozen for up to 3 months. To thaw, simply take them out of the freezer and let them come to room temperature, or reheat directly from frozen.
- Serving Them Warm: To bring refrigerated or frozen flatbreads back to their freshly baked glory, reheating is simple. My preferred method is to warm them in a dry skillet over medium-low heat for just a few seconds on each side. This brings back their softness and can even add a slight crispness to the exterior, making them taste as good as new. You can also quickly warm them in a microwave for 10-15 seconds or in a toaster oven.

Other Irresistible Bread Recipes to Try
If you loved making this easy flatbread, you’re in for a treat! The world of homemade bread is vast and rewarding. Here are some other fantastic bread recipes that are perfect for bakers of all skill levels, from no-knead wonders to delightful sweet loaves:
- No-Knead Dutch Oven Bread
- Challah Bread
- Homemade Cornbread
- Spinach And Feta No Yeast Bread
- Zucchini Banana Bread
- Pumpkin Swirl Bread

Homemade Flatbread Recipe
Make this incredibly soft and fluffy Homemade Flatbread recipe for a warm, fresh, and delicious snack or the perfect complement to any meal.
Ingredients
- 1¼ cups lukewarm water, about 105˚F
- 2½ teaspoons active dry yeast
- 1 tablespoon sugar
- ¾ cups plain yogurt
- 2 tablespoons olive oil
- 1 tablespoon salt
- ½ tablespoon dried basil
- ½ tablespoon dried oregano
- 1 teaspoon garlic powder
- 3¾ cups all-purpose flour
- ¼ cup chopped fresh parsley
- ½ cup olive oil, for brushing
Instructions
- In a large mixing bowl, whisk together water, yeast, and sugar; set aside for 8 to 10 minutes or until foamy. Then, whisk in the yogurt, olive oil, salt, basil, oregano, and garlic powder.
- Add the flour and parsley, and stir everything together with a wooden spoon until the dough comes together.
- Generously sprinkle flour over your kitchen counter or work area and turn the dough onto the floured surface; turn it to coat with the flour and then knead it for 4 minutes. Sprinkle more flour if the dough is sticky while kneading.
- Cut the dough into 10 equal pieces and form each piece into a small ball. Lightly sprinkle each dough ball with flour; cover them with a kitchen towel and let stand for 15 minutes.
- Preheat a frying pan over medium-low heat. Take one of the dough balls and, using a rolling pin, roll it out to about a 7-inch circle. Lightly brush the top of the rolled-out dough with olive oil.
- When the pan is hot, pick up the rolled-out dough and place it in the pan, oiled side down, and cook for about 1 ½ minutes, or until the top surface is covered with bubbles. While frying, brush the opposite side of the flatbread with olive oil.
- Flip the flatbread and cook for 1 more minute or until golden on the bottom. Remove it from the pan and transfer it to a plate; keep cooked flatbreads covered with a kitchen towel while working with the rest of the dough.
- Repeat the process with the remaining balls of dough. Make sure to keep the other dough balls covered while working.
- Serve the flatbreads warm or cold.
Equipment
-
Measuring Cups and Spoons
-
Mixing Bowls
-
Large Skillet
-
Wooden Spoon
Video
Notes
- Right Temperature for Water: Make sure the water is lukewarm (around 105˚F) to activate the yeast without killing it. Too hot or too cold, and the yeast won’t work effectively.
- Kneading the Dough: Knead the dough thoroughly for at least 4 minutes to develop gluten, which gives the flatbread its structure and chewiness. If the dough is sticky, add a little more flour, but be cautious not to add too much.
- Resting the Dough: Allow the dough balls to rest covered for about 15 minutes before rolling. This resting period helps the gluten relax, making the dough easier to roll out.
- Adding Herbs: Incorporate herbs like dried basil and oregano – or whatever you like – into the dough for additional flavor.
- Storage: Once cooled, store the flatbreads in zip-top bags and keep them at room temperature for 2 days; keep refrigerated for up to 5 days or freeze for 3 months.
Nutrition
Nutritional info is an estimate and provided as courtesy. Values may vary according to the ingredients and tools used. Please use your preferred nutritional calculator for more detailed info.
Did you make a recipe? Leave a rating