
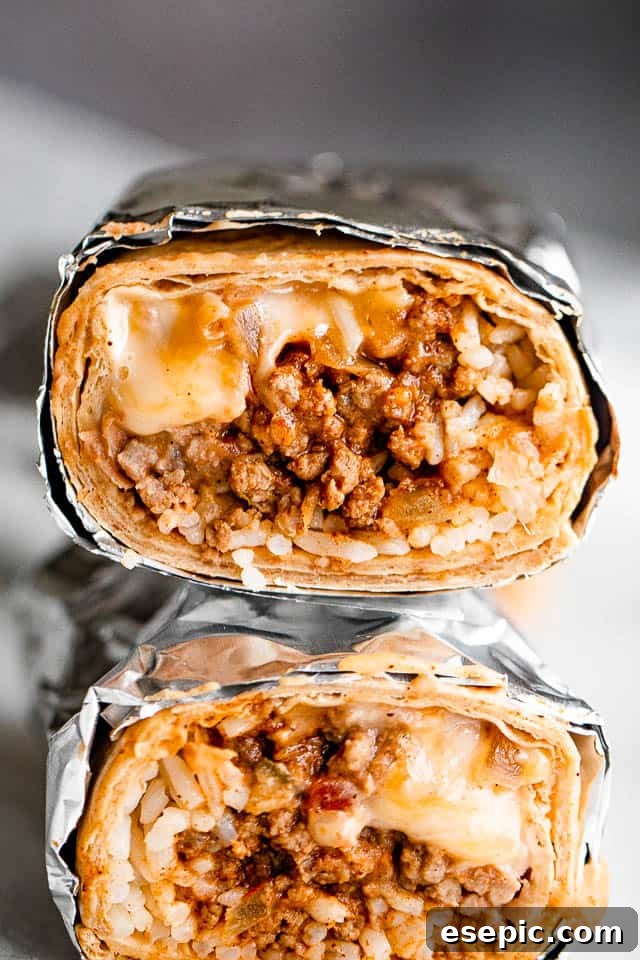
Prepare to revolutionize your meal planning with these incredibly flavorful Beef and Bean Freezer Burritos! This recipe offers a fantastic solution for busy individuals and families alike, providing an easy, make-ahead dinner idea that promises to be a universal crowd-pleaser. Imagine having delicious, homemade burritos ready to heat and eat whenever hunger strikes – a true game-changer for any household!
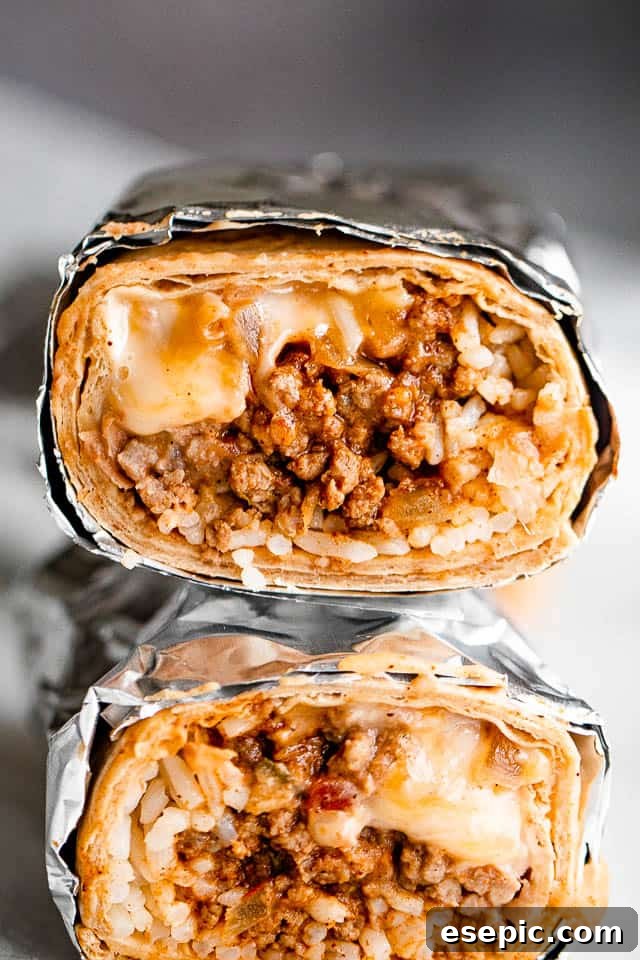
Ultimate Beef and Bean Freezer Burritos: Your Guide to Easy Make-Ahead Meals
In the whirlwind of daily life, finding time to prepare wholesome, satisfying meals can often feel like a monumental task. That’s where the magic of Freezer Burritos comes in. This recipe isn’t just about making dinner; it’s about smart meal prep, reclaiming precious time, and ensuring you always have a delicious, comforting option on hand. With just a little foresight and effort, you can stock your freezer with these homemade culinary treasures, transforming hectic weeknights into moments of effortless enjoyment. Older kids will especially appreciate the convenience, easily heating them up for a fulfilling after-school snack or a quick, satisfying lunch. They’re a true lifesaver for anyone looking to simplify their cooking routine without compromising on taste!
Why You’ll Absolutely Love These Make-Ahead Beef and Bean Burritos
These Beef and Bean Freezer Burritos aren’t just another recipe; they’re a strategy for smoother, more enjoyable meal times. Here’s why they’re destined to become a staple in your kitchen:
- Unbeatable Convenience: Life gets busy, and having a freezer full of ready-to-heat burritos means a wholesome meal is always just minutes away. Forget last-minute takeout or complicated cooking after a long day.
- Economical & Budget-Friendly: Making your burritos from scratch allows you to control ingredients and costs, often proving much more affordable than store-bought frozen options or eating out. It’s smart saving without sacrificing quality.
- Customizable to Perfection: This recipe provides a fantastic base, but the beauty lies in its flexibility. Adjust spices, add extra vegetables, or swap cheeses to suit your family’s preferences and dietary needs.
- Family-Friendly Favorite: Burritos are universally loved! The savory beef, creamy beans, and melty cheese create a flavor profile that appeals to both adults and children, making mealtime battles a thing of the past.
- Ideal for Meal Prep: Dedicate a small amount of time on the weekend, and you’ll be set for multiple meals throughout the week or even months. It’s the ultimate grab-and-go solution for lunches, dinners, or hearty snacks.
- Wholesome & Satisfying: Packed with protein from beef and beans, along with fiber and essential nutrients, these burritos are genuinely filling and provide sustained energy, unlike many fast-food alternatives.
The Essential Ingredients for Your Flavorful Freezer Burritos
Crafting the perfect freezer burrito starts with selecting quality ingredients. Each component plays a vital role in building the layers of flavor and ensuring your burritos hold up beautifully after freezing and reheating. Here’s a detailed look at what you’ll need:
- Olive Oil (1 tablespoon): A touch of light olive oil is perfect for sautéing our aromatics, providing a subtle richness without overpowering the other flavors. Any neutral oil like canola or vegetable oil would also work.
- Ground Beef (1 pound): For a truly robust flavor, opt for lean ground beef such as ground round or sirloin. While these provide excellent taste and reduce excess grease, ground chuck or market blends are also perfectly acceptable and can add a richer flavor if you don’t mind a bit more fat. Ensure you drain any excess fat after browning.
- Grated or Finely Diced Onion (¼ cup yellow onion): Onions are foundational to many savory dishes. Grating or finely dicing the yellow onion ensures it disperses evenly throughout the filling, melting into the mixture and providing a sweet, aromatic base. White or red onions can be substituted based on your preference for intensity.
- Garlic (3 cloves, finely minced): Fresh garlic is indispensable for depth of flavor. Three cloves, finely minced, will infuse the beef mixture with a pungent, aromatic kick that complements the other ingredients beautifully.
- Salsa (1 cup): This is where much of our burritos’ vibrant, zesty flavor comes from. You can use any type of tomato-based salsa you love – mild, medium, or hot. A chunky garden salsa will add texture, while a smoother restaurant-style salsa will blend more seamlessly. Feel free to use homemade salsa for an extra fresh touch.
- Taco Seasoning (2 tablespoons): Whether you prefer the convenience of a store-bought packet (typically 1 ounce, or about 2 tablespoons) or the customizability of a homemade blend, taco seasoning is key. It delivers that signature Tex-Mex flavor with a perfect balance of chili powder, cumin, oregano, and other spices.
- Pinto Beans (2 cans, 15 ounces each, rinsed and drained): Pinto beans add a creamy texture and earthy flavor to the filling, as well as a significant boost of fiber and protein. Rinsing canned beans thoroughly removes excess sodium and starch. If you prefer, you can also use an equivalent amount of cooked dried pinto beans.
- Beef Broth (½ cup low-sodium OR water): Used to achieve a smooth consistency when pureeing the beans, beef broth adds an extra layer of savory depth. Low-sodium broth allows you to control the overall saltiness of the dish. Chicken or vegetable broth can be used as alternatives if beef broth is unavailable.
- Shredded Cheddar Cheese (2 cups): Melty, savory cheddar cheese brings a wonderful creaminess and classic flavor to these burritos. Feel free to experiment with other shredded cheeses like Monterey Jack, a Mexican blend, or even a spicier pepper jack for an extra kick.
- Flour Tortillas (10, 10-inch): The vessel for our delicious filling! Ten-inch flour tortillas are ideal as they are large enough to hold a generous amount of filling and are flexible enough for easy rolling.
- Cooked Rice (optional): Adding a couple of tablespoons of cooked white or brown rice to each burrito can provide extra bulk and help absorb moisture, contributing to a more satisfying and less soggy texture upon reheating.
Step-by-Step Guide: Crafting Your Delicious Freezer Burritos
Making these scrumptious beef and bean burritos is a straightforward process that’s incredibly rewarding. You’ll first prepare the savory filling, then create a smooth bean mixture, and finally, assemble and roll them up for freezing. Let’s break it down:
1. Preparing the Hearty Beef & Bean Filling
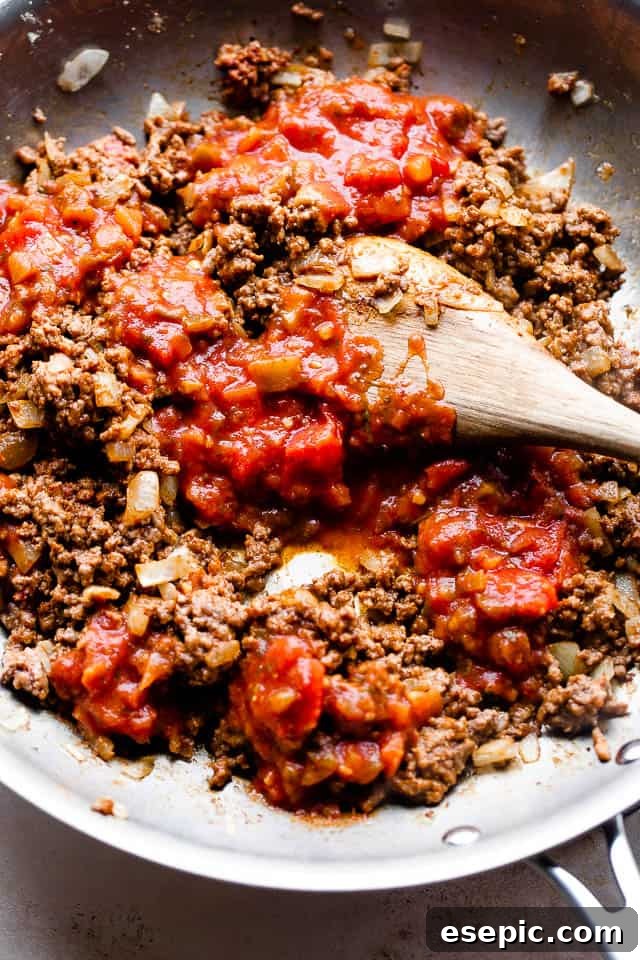
- Sauté Aromatics: Begin by heating 1 tablespoon of olive oil in a large skillet over medium heat. Add the ¼ cup of grated or finely diced yellow onion and cook for about 2 minutes, allowing it to soften and become fragrant. Stir in the 3 cloves of minced garlic and cook for just an additional 20 seconds until aromatic, being careful not to burn it.
- Brown the Ground Beef: Add 1 pound of ground beef to the skillet. Cook, breaking up the meat with a wooden spoon, until it is thoroughly browned, which usually takes about 8 minutes. Once cooked, drain any excess fat from the skillet to prevent greasy burritos.
- Simmer with Salsa and Seasoning: Stir in 2 tablespoons of taco seasoning and 1 cup of tomato salsa into the browned beef. Bring the mixture to a gentle boil, then reduce the heat to a simmer. Allow it to cook for about 2 minutes, giving the flavors time to meld and the mixture to thicken slightly. Remove the skillet from the heat and set the filling aside to cool slightly.
- Puree the Pinto Beans: In a blender or food processor, combine the 2 cans of rinsed and drained pinto beans with ½ cup of water or low-sodium beef broth. Process until the mixture is completely smooth and creamy.
- Combine and Add Cheese: Incorporate the pureed bean mixture into the beef mixture in the skillet, stirring until thoroughly combined. Finally, stir in 2 cups of shredded cheddar cheese until it’s evenly distributed and just beginning to melt into the warm filling. This quick mixing step speeds up the assembly process, but you can also layer ingredients separately during assembly if you prefer.
2. Expert Burrito Assembly Techniques
- Prepare Tortillas: If your tortillas are not soft and pliable, briefly warm them in a microwave or a dry skillet. This makes them easier to roll without tearing.
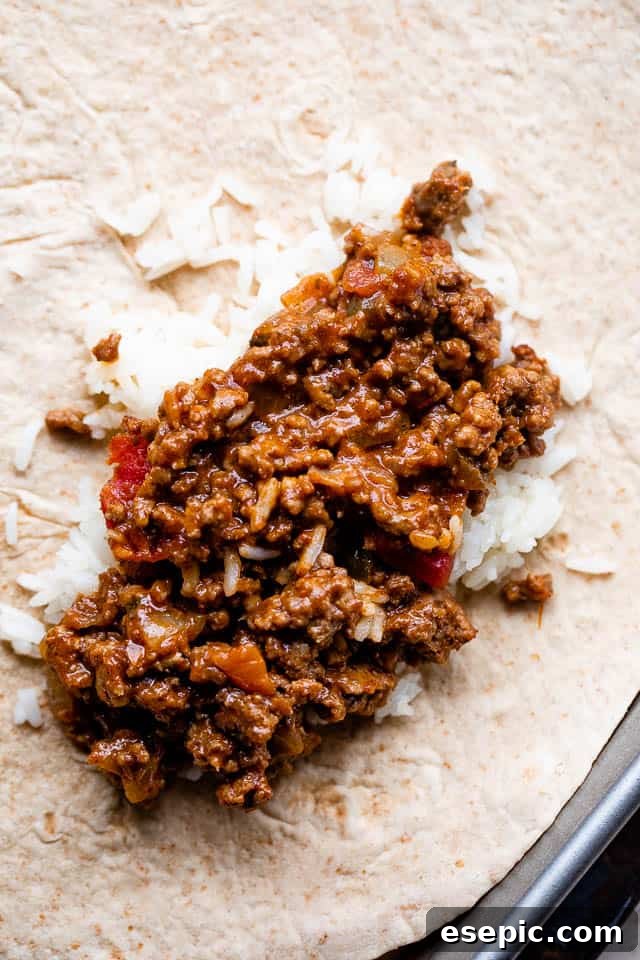
- Layer the Filling: Lay a 10-inch flour tortilla flat. If using, add about 2 tablespoons of cooked white or brown rice down the center of each tortilla, leaving space at the ends. Then, add approximately ½ cup of the beef and bean mixture directly over the rice (or directly onto the tortilla if not using rice). Be mindful not to overfill, as this makes rolling difficult.
- Fold and Roll: To assemble, fold the short ends of the tortilla inwards over the filling. Then, starting from one of the long sides, tightly roll the tortilla over the filling, tucking it in as you go, to create a neat, compact burrito.
Freezing for Future Feasts: Storage Best Practices
Proper freezing techniques are crucial for maintaining the quality and preventing freezer burn on your homemade burritos. Following these steps ensures they’ll taste just as good as the day you made them:
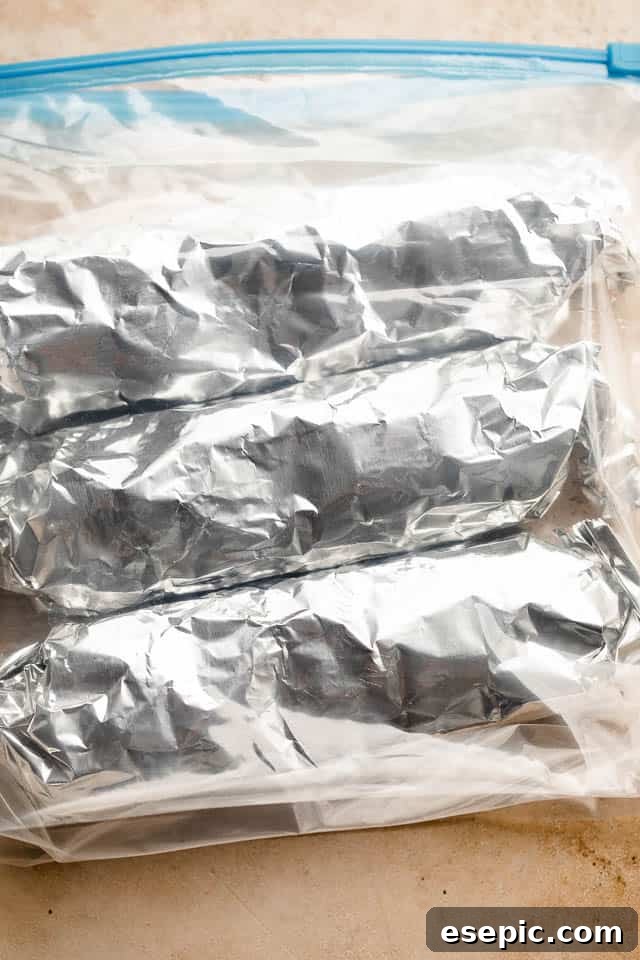
- Double-Wrap for Protection: First, wrap each individual burrito tightly in wax paper. This creates a non-stick barrier. Then, wrap each wax-paper-covered burrito snugly in aluminum foil. The foil provides a second layer of protection against air exposure and freezer burn, keeping your burritos fresh and delicious.
- Airtight Storage: Once double-wrapped, stack your burritos inside a gallon-sized freezer-safe ziploc bag or an airtight container. Removing as much air as possible from the bag helps further prevent freezer burn.
- Label and Date: Always label the bag or container with the date the burritos were made. This simple step is vital for food safety and ensures you consume them within their optimal freezer life.
- Storage Duration: When properly wrapped and stored, these homemade freezer burritos will maintain their excellent quality for up to 2 months. Beyond that, they are still safe to eat but might experience a slight decline in texture or flavor.
Pro Tips for Freezer Burrito Perfection
- Customize Your Filling Layers: While combining the beef and bean mixtures speeds up prep, you don’t have to! For those who prefer distinct layers, simply spread the cooked beef mixture (mixed with cheese) down the center of the tortilla, then spoon some of the pureed bean mixture over the beef, and roll it up.
- Mind the Fill Level: This is a golden rule for burritos. “Less is more” definitely applies when filling your tortillas. Overstuffing them will make them incredibly difficult to roll neatly and can cause them to burst or become soggy during reheating. Aim for about ½ cup of filling per 10-inch tortilla.
- Cool Down the Filling: Resist the urge to fill your tortillas with hot ingredients. Allow the beef and bean mixture to cool completely before assembly. Hot filling creates steam, which can lead to condensation inside the wrapped burrito, resulting in a soggy texture and potential ice crystals when frozen.
- Tortilla Flexibility: Ensure your tortillas are fresh and pliable. If they seem stiff, a quick warm-up in the microwave (10-15 seconds per stack) or a dry skillet will make them much easier to work with, preventing cracks and tears during rolling.
- Quality Ingredients Matter: Since these burritos are designed for freezing, starting with fresh, high-quality ingredients will yield the best results upon reheating. Good quality ground beef, flavorful salsa, and fresh cheese make a noticeable difference.
Tasty Variation Ideas to Spice Things Up
The beauty of freezer burritos lies in their versatility! Once you’ve mastered the basic beef and bean recipe, feel free to get creative with these delicious variations:
- Chicken Verde Burritos: Using the same method, substitute ground chicken (or turkey) for the beef, white beans for pinto, and a zesty salsa verde for the tomato salsa. Add a squeeze of lime for extra brightness.
- Veggie Power Burritos: For a delicious vegetarian option, swap the beef for black beans (in addition to pinto), use cooked brown rice, and add sautéed vegetables like bell peppers, corn, and zucchini. Adjust seasoning and consider adding a sprinkle of nutritional yeast for a cheesy flavor boost if skipping dairy.
- Hearty Breakfast Burritos: Turn these into a morning delight! Fill your tortillas with fluffy scrambled eggs, cooked sausage or bacon, crispy diced potatoes, and a generous sprinkle of your favorite cheese. A touch of hot sauce inside makes for a perfect start to the day.
- Spicy Chorizo & Potato: For those who love a kick, replace ground beef with spicy chorizo and add roasted diced potatoes to the filling. The smoky, spicy flavors of chorizo pair wonderfully with creamy beans and cheese.
- Mediterranean Inspired: A less traditional but equally delicious twist! Combine ground lamb or turkey with finely diced spinach, feta cheese, sun-dried tomatoes, and a pinch of oregano and mint.
Serving Suggestions: What to Pair with Your Burritos
While these freezer burritos are perfectly satisfying on their own, pairing them with the right sides and toppings can elevate your meal into a full Tex-Mex feast. Here are some fantastic ideas:
- Dips and Toppings Extravaganza: Offer a selection of vibrant dips and toppings. Classic choices include creamy guacamole, cool sour cream or Greek yogurt, fresh Avocado Salsa, chunky pico de gallo, or a warm, cheesy queso. Don’t forget a dash of your favorite hot sauce for an extra kick!
- Refreshing Fruit Salad: A bright and sweet counterpoint to the savory burritos, a fresh fruit salad is always a welcome addition. Try my Easy Fruit Salad with Honey Lime Dressing for a burst of refreshing flavor.
- Classic Sides: Serve alongside a simple green salad with a cilantro-lime vinaigrette, a scoop of fluffy Mexican rice, or a side of creamy refried beans. Corn on the cob (especially grilled) also makes an excellent seasonal pairing.
- Sweet Finish: End your meal with a cool, light dessert. This sumptuous Mango Strawberry Frozen Yogurt is incredibly easy to make with just a blender and your freezer, no ice cream maker needed! The fresh and creamy frozen yogurt provides a delightful contrast to the Tex-Mex flavors of the burritos.
- Beverage Pairings: Complement your meal with an ice-cold Mexican soda, a classic horchata, or a simple glass of iced tea or agua fresca.
Freezing and Reheating FAQs
How Long Can You Freeze Homemade Burritos?
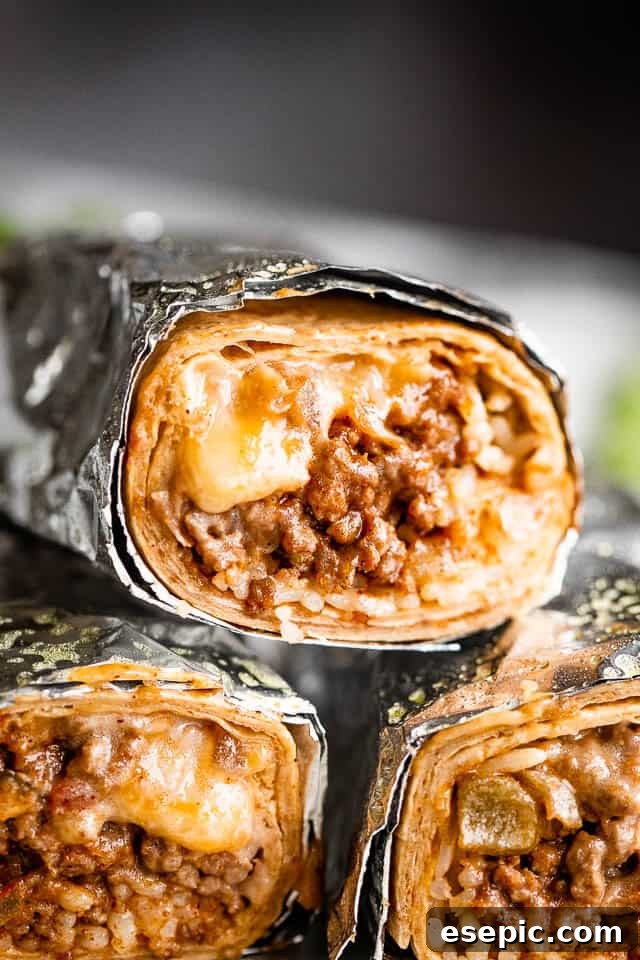
- When prepared and stored correctly with double-wrapping (wax paper then foil) and placed in an airtight freezer bag or container, homemade burritos generally maintain their peak quality for around 2 months in the freezer. Beyond this, they remain safe to consume but might experience a decline in texture or flavor. Always remember to check the freezer life of individual ingredients and clearly label your frozen items with the date for optimal food safety.
How to Reheat Frozen Burritos for Best Results?
Reheating frozen burritos is simple and can be done in a few different ways, depending on your preference and time constraints:
- Microwave Method (Quickest):
- Unwrap one burrito completely from both foil and wax paper.
- Place the unwrapped burrito on a microwave-safe plate.
- Microwave on HIGH for 2 to 2½ minutes, or until the internal temperature of the burrito registers at 165°F (74°C). Cooking time may vary depending on your microwave’s wattage.
- Oven Method (Crispier Results):
- Preheat your oven to 350°F (175°C).
- Place the foil-wrapped burritos (remove only the wax paper, keep the foil) on a baking sheet. The foil helps prevent the tortilla from drying out and getting too crisp.
- Bake for 20 to 30 minutes, or until the burrito is heated through to an internal temperature of 165°F (74°C). For a slightly crisper exterior, you can unwrap them for the last 5-10 minutes of baking.
- Air Fryer Method (Crispy & Fast):
- Unwrap one burrito completely.
- Place the unwrapped burrito in your air fryer basket.
- Air fry at 350°F (175°C) for 12-18 minutes, flipping halfway through, or until heated through and crispy to your liking. Internal temperature should reach 165°F (74°C).
Nutritional information provided is an estimate and offered as a courtesy. Values may vary significantly based on specific ingredients, brands, and preparation methods. Please use your preferred nutritional calculator for more detailed and accurate information tailored to your choices.
With this comprehensive guide, you’re now equipped to create a batch of the most delicious, convenient, and family-friendly Beef and Bean Freezer Burritos. Say goodbye to last-minute meal stress and hello to a freezer stocked with homemade goodness. Enjoy the ease and flavor of your expertly prepared make-ahead meals!