
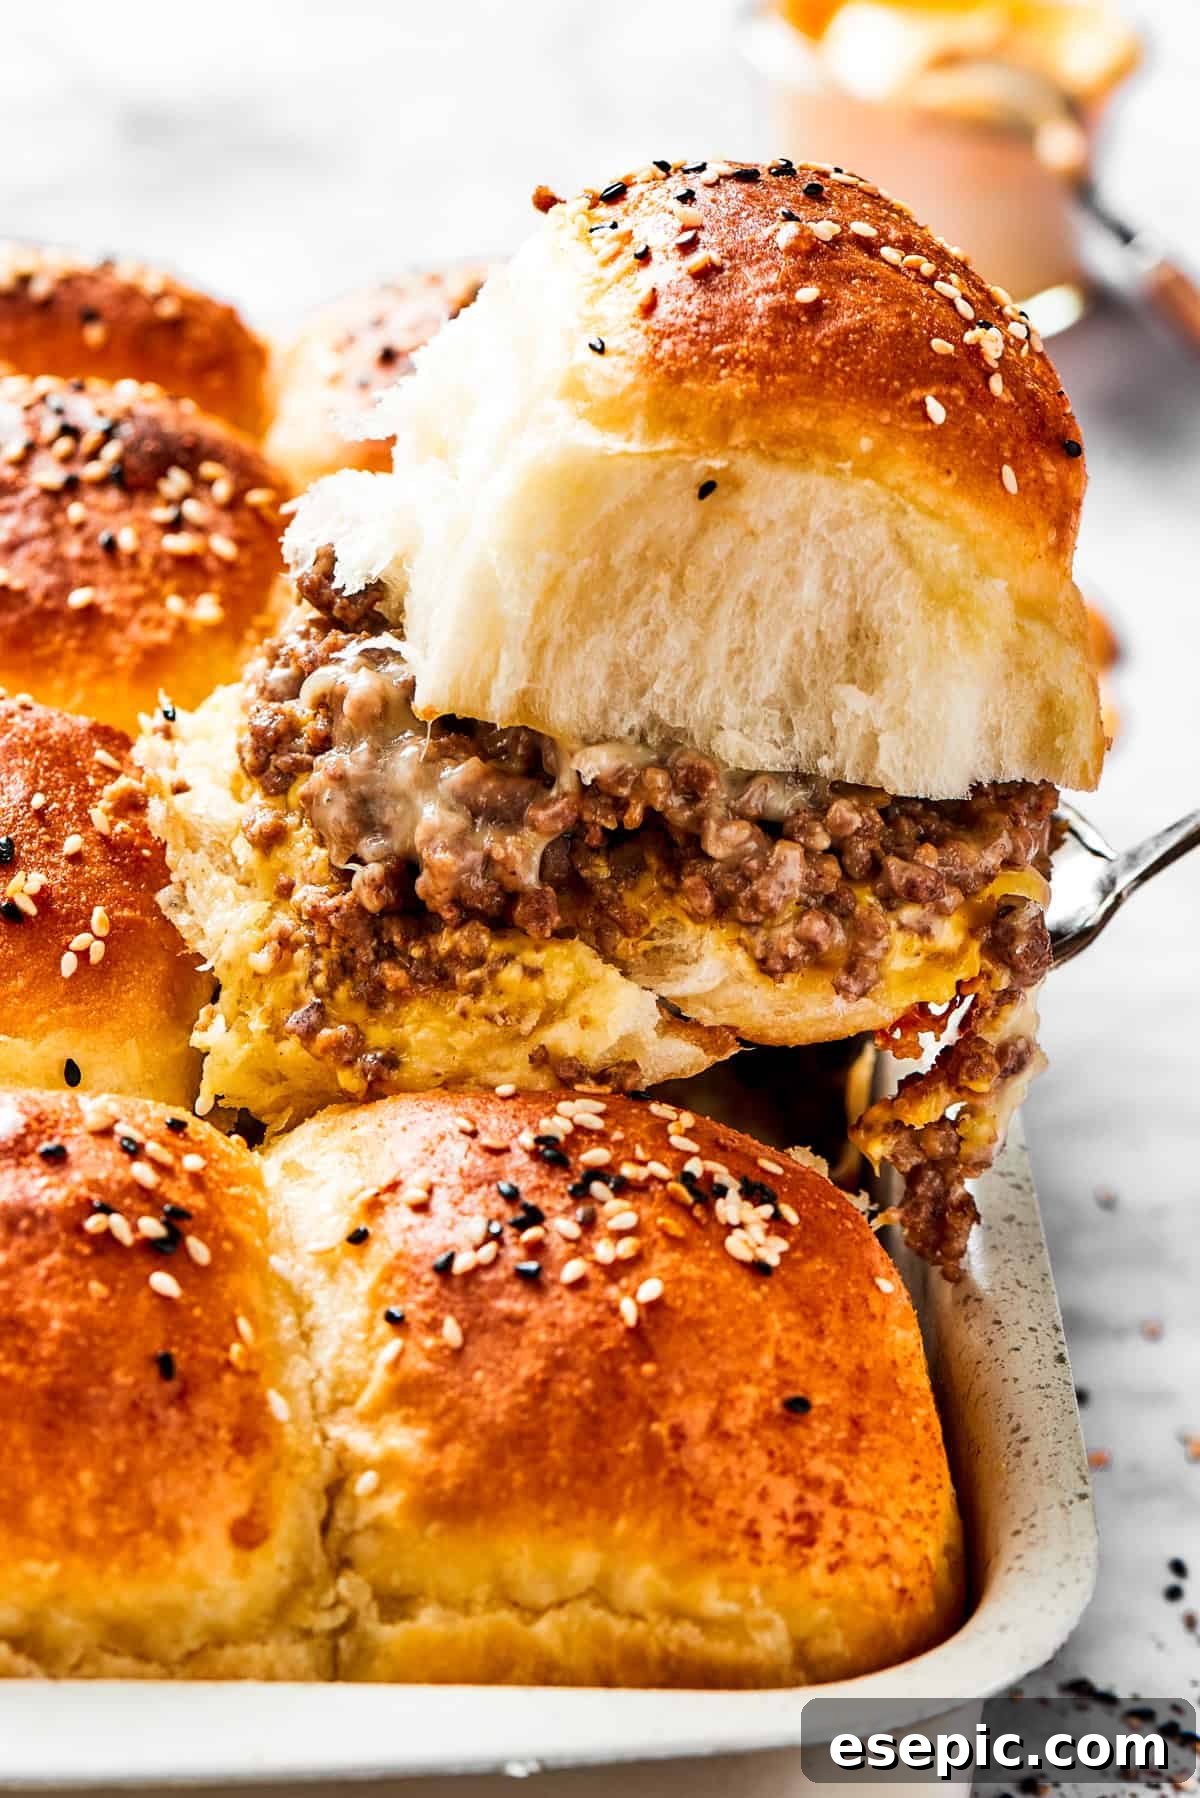
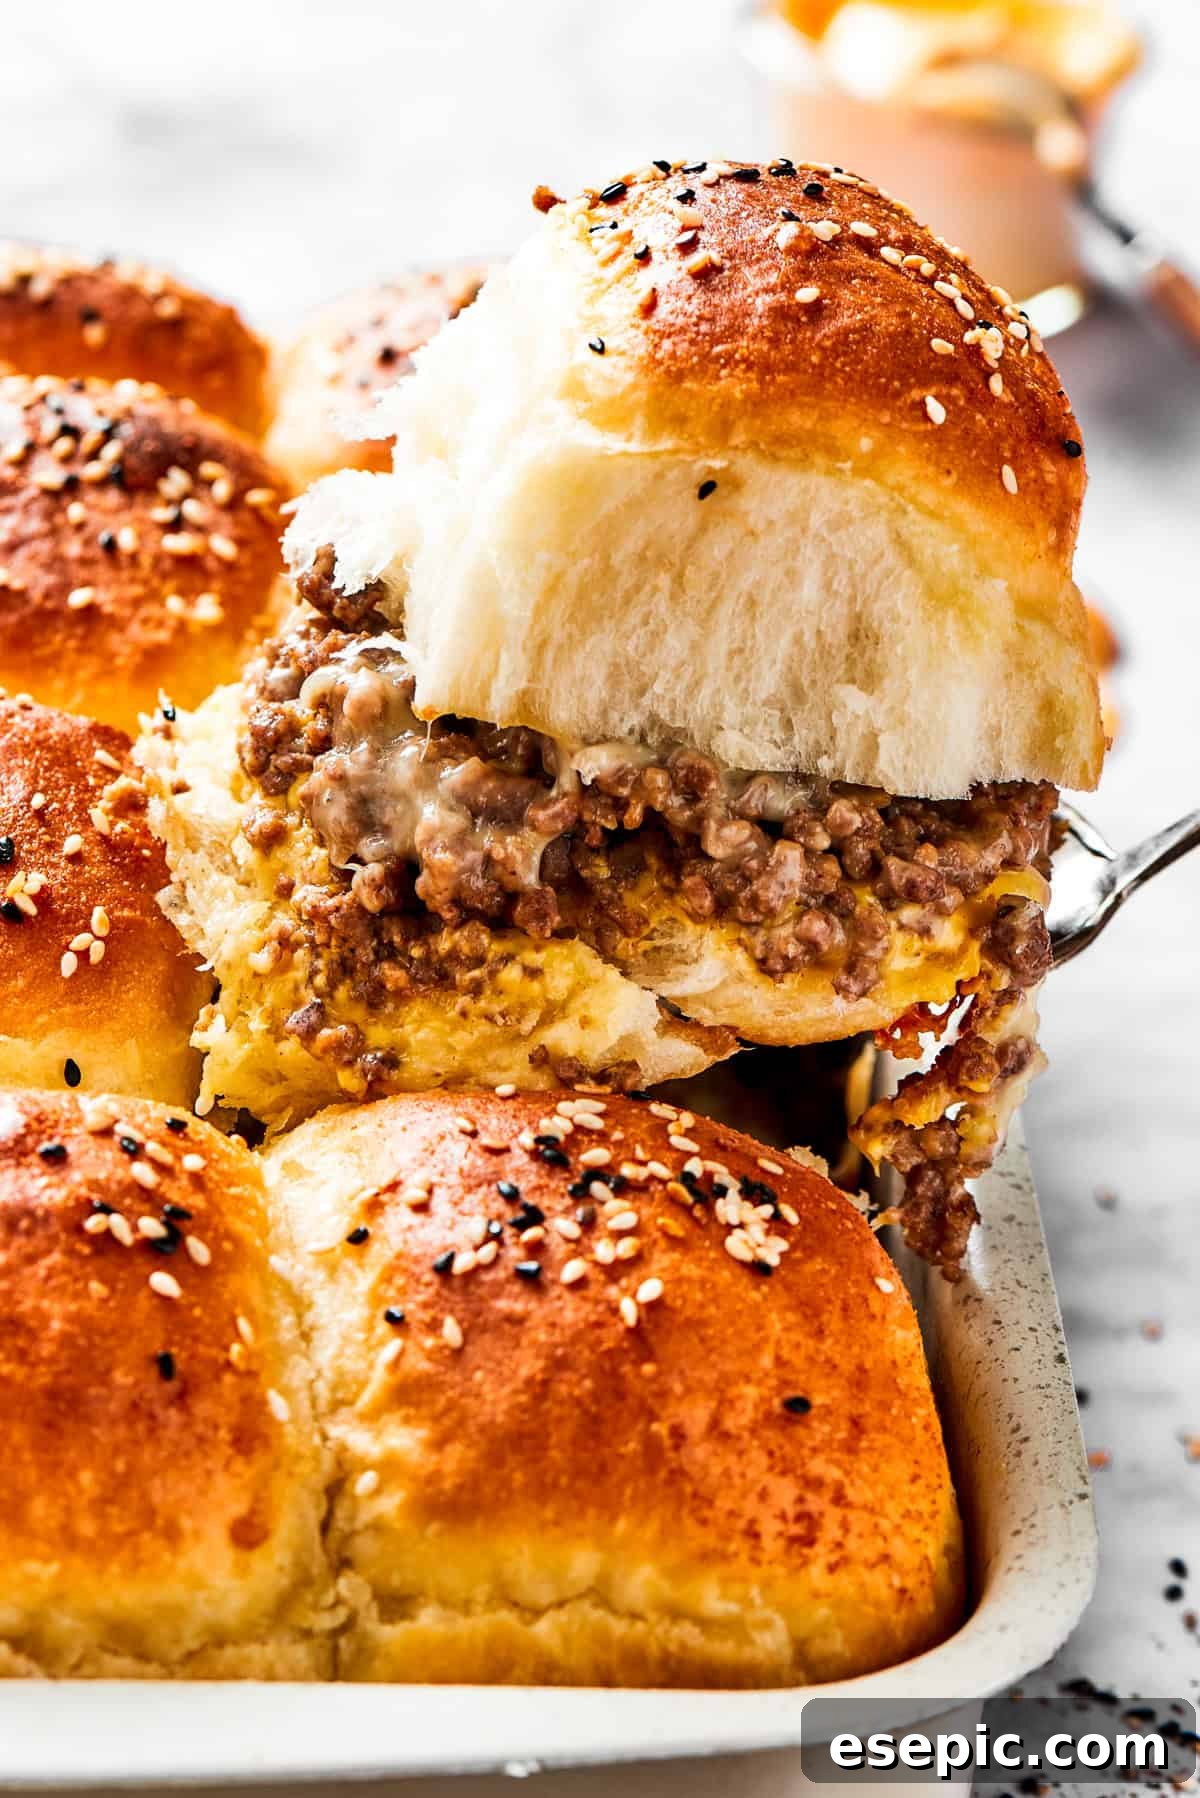
Welcome to the ultimate guide for crafting the most delectable, handheld Cheeseburger Sliders! These mini marvels are an absolute crowd-pleaser, perfect for any occasion – whether you need a quick appetizer, a satisfying snack, or a fun, family-friendly dinner. Imagine sinking your teeth into juicy, seasoned ground beef, generously topped with not one, but two kinds of gloriously gooey melted cheese, all nestled within soft, savory rolls brushed with aromatic garlicky melted butter. They are truly irresistible!
In this comprehensive recipe, we’ll walk you through every step to create these incredibly flavorful sliders that are as easy to make as they are to devour. Get ready to elevate your game day experience, delight your party guests, or simply make weeknight dinners a little more exciting with this versatile favorite.
And if you’re eager to explore more fantastic handheld recipes that are big on flavor and easy on prep, be sure to try my mouth-watering Copycat KFC Chicken Sandwich, indulge in the rich, complex flavors of my authentic Muffaletta, or savor the classic goodness of a hearty Reuben Sandwich. Each offers a unique and satisfying culinary adventure!
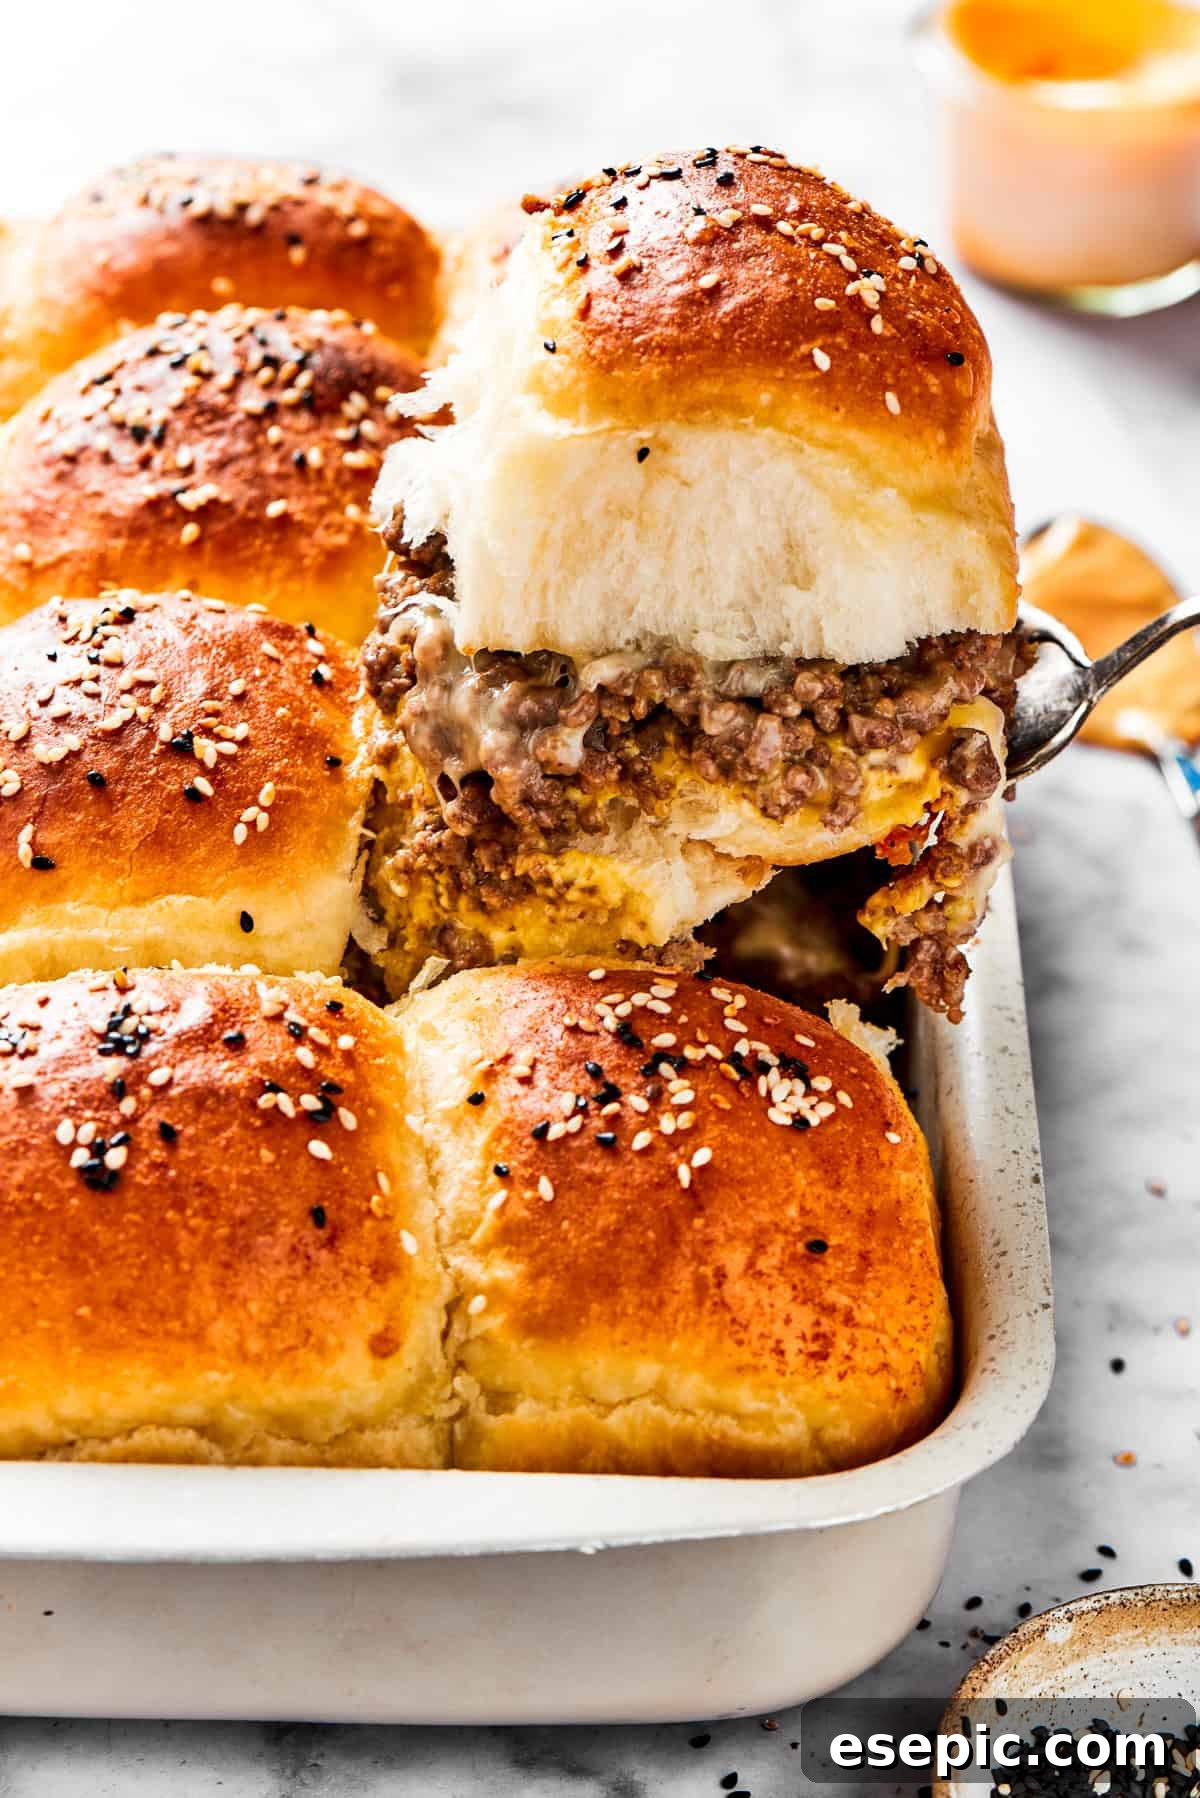
Sliders hold a special place in our family’s heart – they’re just the right size to kick off any gathering as an appetizer, but they’re equally fun and surprisingly filling when served as the main course for dinner. Their perfectly petite dimensions also make them an instant hit with kids, easily cementing their status as a cherished family favorite.
Every game night at our house inevitably features a platter of these delightful sliders gracing our coffee table. Just last weekend, we were all glued to the TV, each holding a plate piled high with these cheesy, beefy mini burgers, enthusiastically cheering on our favorite soccer team. My daughters are particularly fond of them because of their convenient size and, of course, the generous amount of melted cheese! What’s more, the recipe is so straightforward and quick to assemble that I never have to miss a single moment of the game. Whether we’re celebrating a triumphant win or simply enjoying the thrill of the match, these irresistible cheeseburger sliders consistently add an extra layer of deliciousness to our evenings, making every moment a little more memorable.
Why You’ll Love This Cheeseburger Sliders Recipe
These aren’t just any mini burgers; they’re a culinary experience designed for maximum enjoyment and minimal fuss. Here’s why these cheeseburger sliders are bound to become a staple in your recipe repertoire:
- Familiar Flavors in a Fun Size: If you adore the classic taste of a cheeseburger, you’re in for a treat! This recipe takes all those beloved flavors – savory ground beef, tangy mustard, and rich melted cheese – and transforms them into an adorable, two-bite package. The added richness from the butter-brushed rolls takes them over the top, delivering a gourmet feel in a casual setting.
- Unforgettably Satisfying: Don’t let their small stature fool you. These sliders are packed with flavor and substance, offering a deeply satisfying experience. There’s something uniquely delightful about a burger that’s perfectly portioned, allowing you to enjoy every ingredient in harmonious balance without feeling overwhelmed. They hit all the right notes for comfort food cravings.
- Incredibly Versatile for Any Occasion: The beauty of these sliders lies in their adaptability. They shine as an impressive appetizer for parties, a convenient and delicious game-day snack that keeps everyone fueled, or a creative, comforting centerpiece for a weeknight dinner. They effortlessly transition from casual get-togethers to more festive celebrations, making them an ideal choice no matter the event.
- Remarkably Easy to Assemble: Forget complicated techniques or lengthy cooking times. This recipe is designed for ease, allowing you to quickly prepare a batch without spending hours in the kitchen. The assembly process is straightforward, often utilizing a single baking dish for cooking, which means less cleanup and more time to enjoy your culinary creations.
- A Guaranteed Kid-Friendly Favorite: The smaller size and familiar taste make these sliders an instant hit with children. They’re easy for little hands to manage and the cheesy, beefy goodness is a combination most kids adore. They’re a fantastic way to get picky eaters excited about dinner or a perfect snack for after-school activities.
Gather Your Ingredients: What You’ll Need
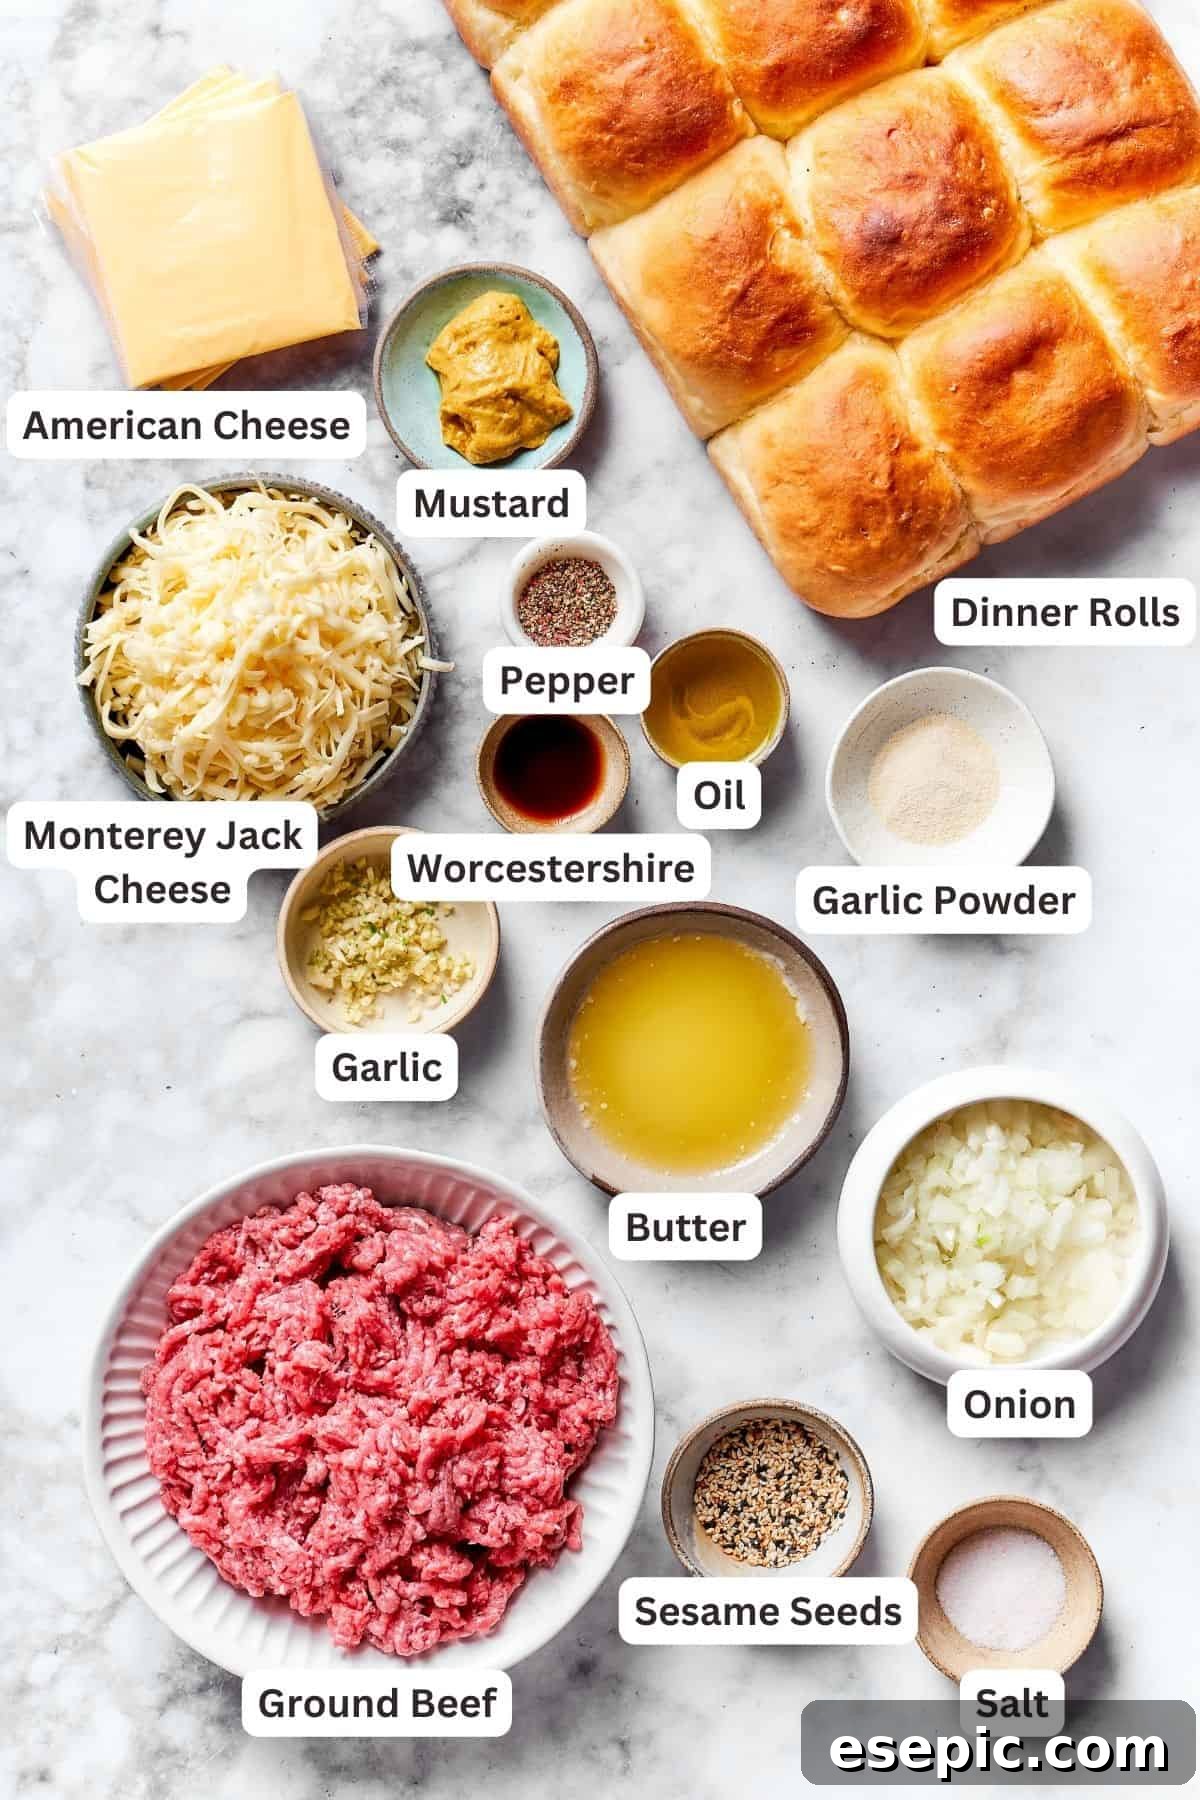
One of the best aspects of these cheeseburger sliders is that they call for simple, readily available ingredients that you can find at any local grocery store. Below is a detailed breakdown of what you’ll need to create these irresistible mini burgers. For precise measurements, please refer to the complete recipe card at the end of this post.
For the Flavorful Ground Beef Filling:
- Olive Oil: I always opt for extra virgin olive oil for its rich flavor and healthy properties. It’s essential for sautéing the onions and browning the beef to perfection, forming the savory base of our sliders.
- Yellow Onion: Finely diced yellow onion adds a foundational layer of sweetness and aromatic depth to the beef mixture. If you prefer a slightly sharper taste or a pop of color, a red onion can be a wonderful substitute.
- Ground Beef: The star of our sliders! I recommend using an 80/20 lean-to-fat ratio for ground beef. This ensures a juicy, flavorful patty that won’t be too greasy, providing the perfect texture for your mini burgers.
- Garlic: Freshly minced garlic is non-negotiable for that irresistible savory punch. Feel free to increase the amount if you’re a garlic enthusiast; it truly enhances the overall flavor profile of the meat.
- Mustard: My personal preference is Dijon mustard for its sophisticated sweet and spicy kick, which beautifully complements the beef. However, don’t hesitate to use your favorite type of mustard – yellow or stone-ground will also work wonderfully to add that classic burger tang.
- Worcestershire Sauce: A splash of Worcestershire sauce is a secret weapon for adding incredible umami and depth of flavor to the ground beef. It brings a complexity that elevates the taste beyond a simple seasoned patty.
- Salt and Pepper: Essential seasonings! I use Kosher salt for its pure flavor and larger flakes, and freshly ground black pepper for its vibrant aroma and gentle heat. These two staples bring out the best in the beef.
For the Perfect Sliders:
- Dinner Rolls: You’ll need one package of 12-count dinner rolls. My absolute favorites for this recipe are Hawaiian savory butter rolls due to their soft texture and slightly sweet, rich flavor that perfectly balances the savory filling. However, any soft dinner roll, such as brioche or potato rolls, would be a delightful choice.
- Cheese Combination: We’re going with a dynamic duo here – classic American cheese for its unparalleled meltiness and creamy texture, and shredded Monterey Jack cheese for its smooth, mild flavor and excellent melting capabilities. This combination ensures a truly gooey and irresistible cheesy layer.
- Butter: Melted butter is crucial for brushing over the tops of the rolls, giving them a beautiful golden-brown finish and adding an extra layer of richness. You can use either unsalted or salted butter, adjusting the salt content in the beef accordingly if using salted.
- Garlic Powder: Mixed with the melted butter, garlic powder creates a fragrant, savory topping that infuses the rolls with an amazing aroma and taste. If you’re not a huge fan of intense garlic, you can certainly reduce the amount or omit it entirely.
- Sesame Seeds: These are optional, but highly recommended for an authentic burger bun look and a subtle nutty crunch. I love using a mix of white and black sesame seeds for visual appeal, but white sesame seeds alone are perfectly fine and add that classic touch.
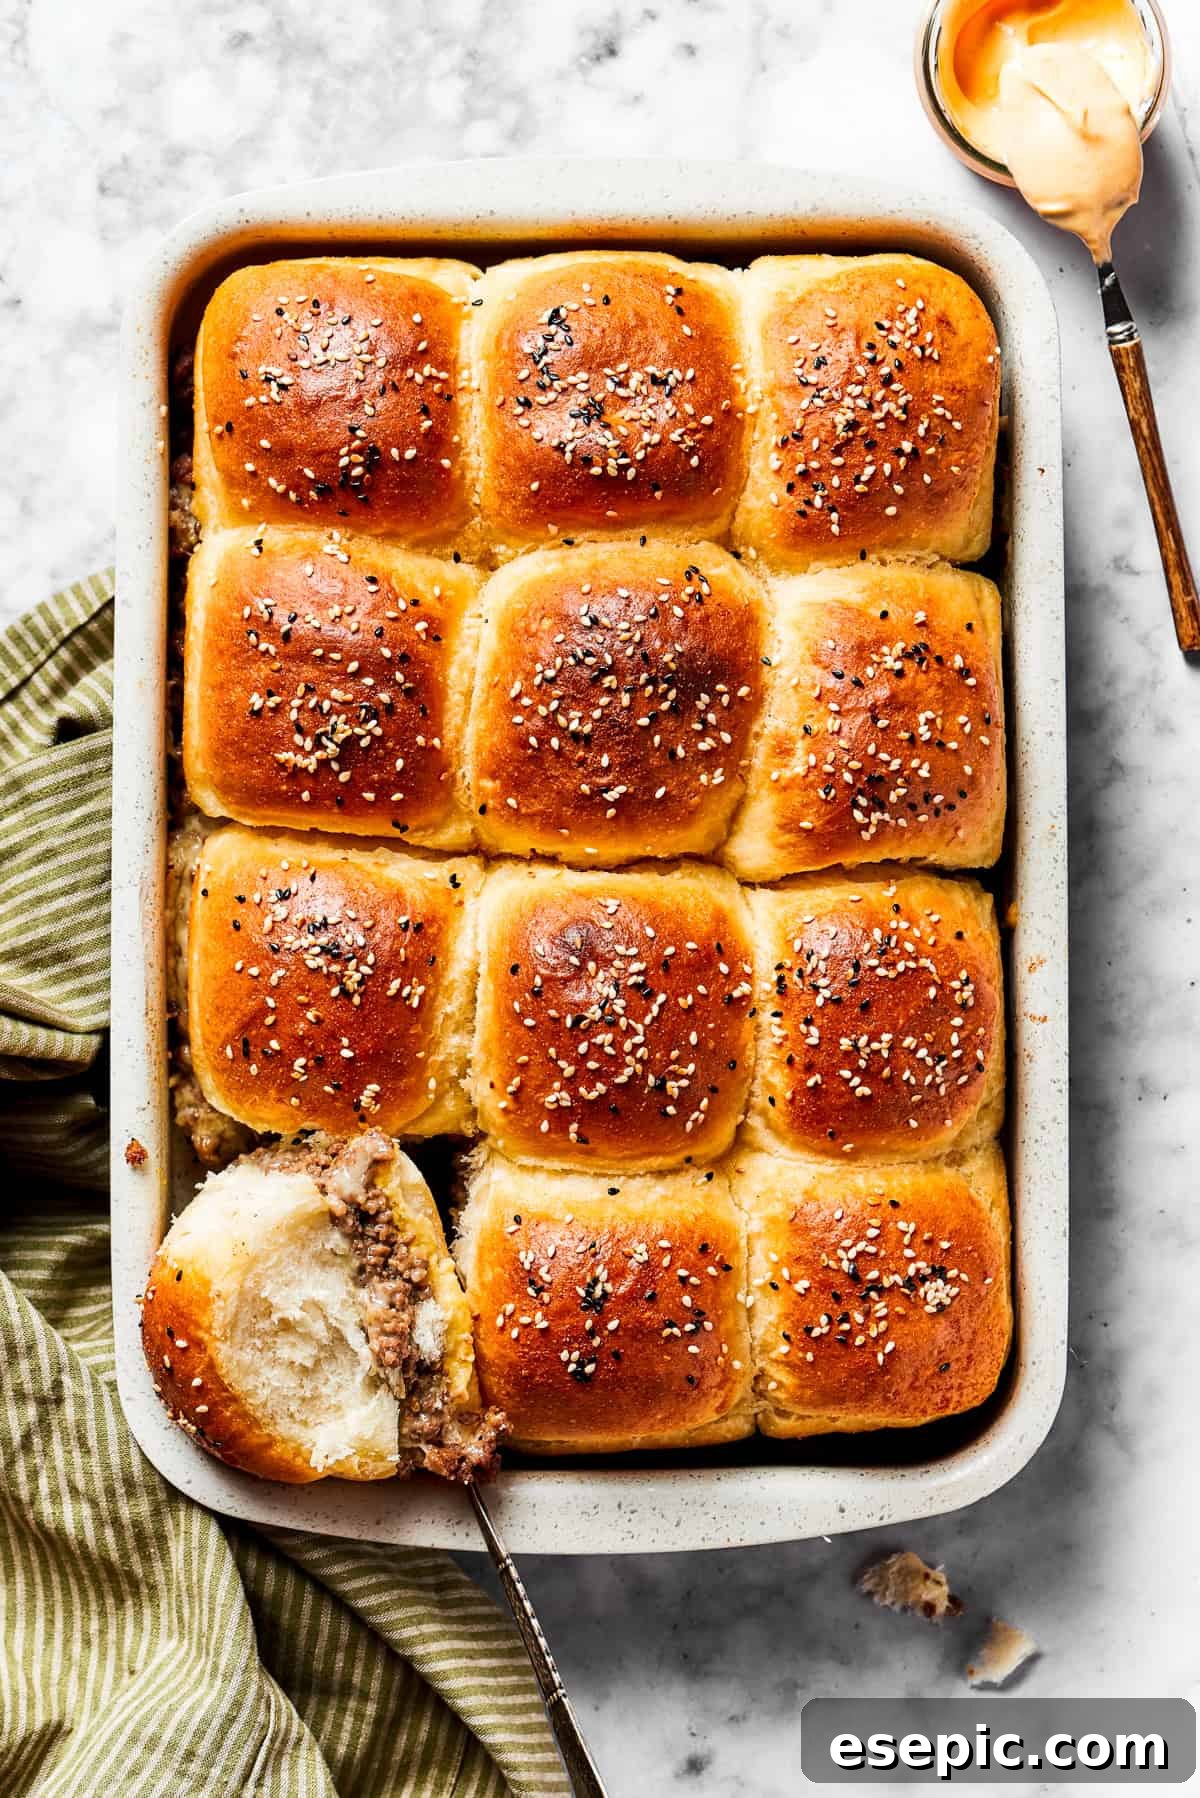
How To Make Irresistible Cheeseburger Sliders: Step-by-Step
Creating these delicious cheeseburger sliders is a breeze, even for novice cooks. Follow these simple steps, accompanied by visual cues, to craft perfectly juicy and cheesy mini burgers that will impress everyone. The assembly method is designed for efficiency, making it easy to prepare a large batch with minimal effort.
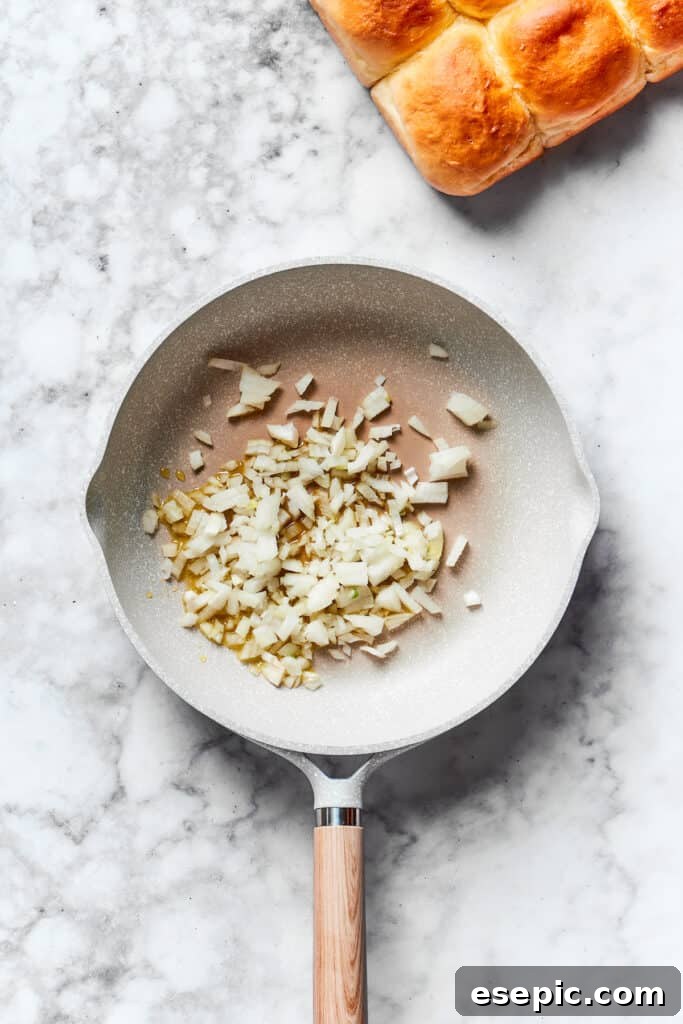
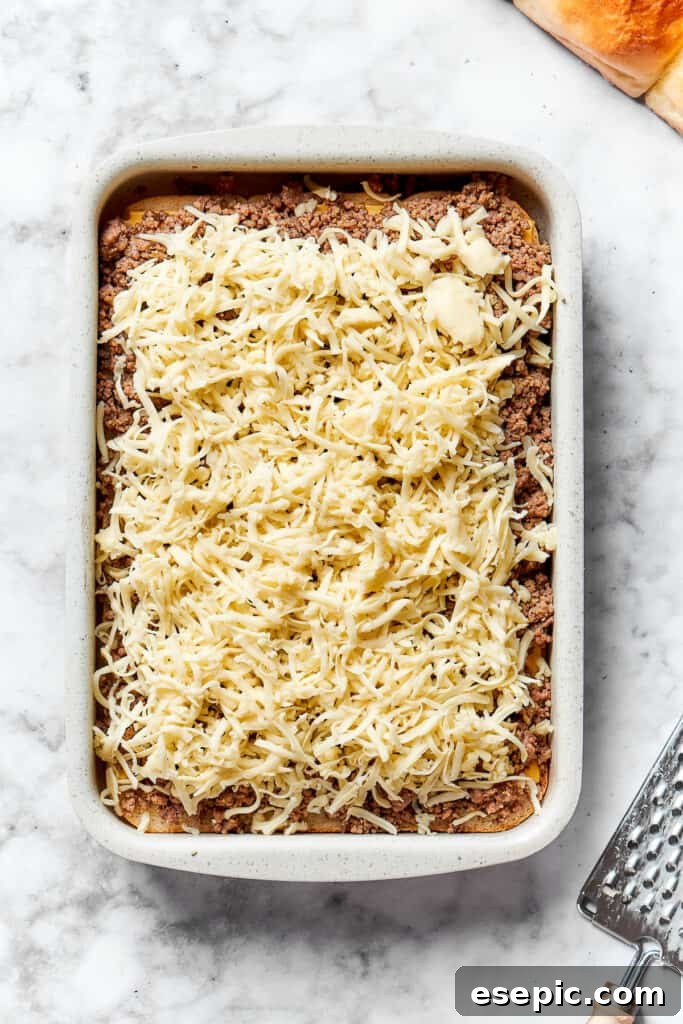
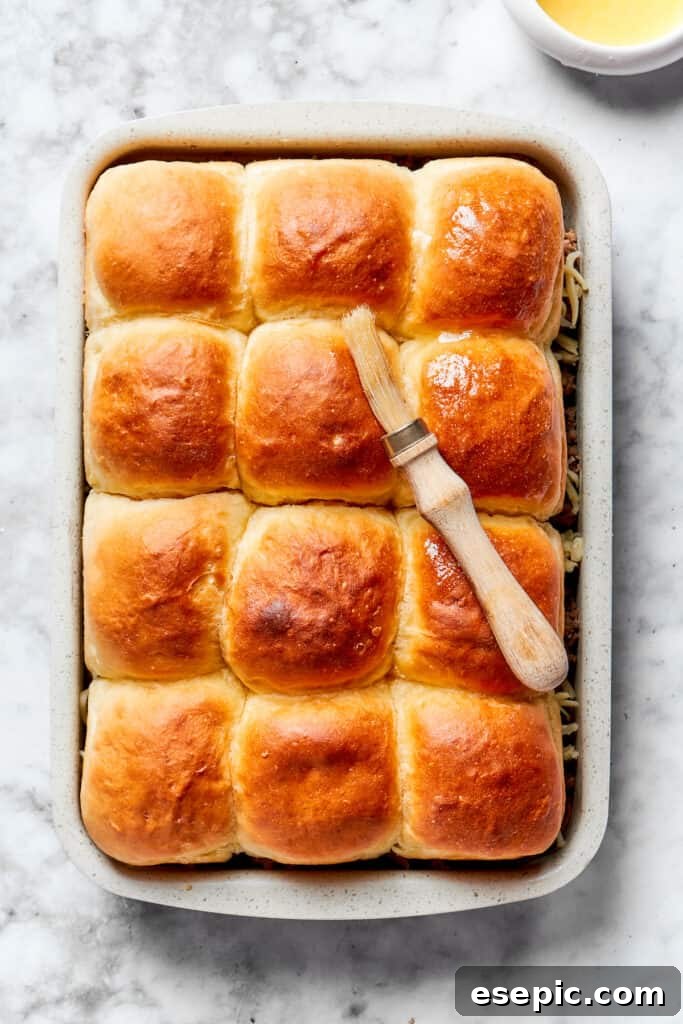
- Sauté the Aromatics: Begin by heating the olive oil in a large skillet over medium heat. Add your finely diced yellow onions and cook them for about 3-5 minutes, stirring occasionally, until they become soft and translucent. This step builds the aromatic foundation for your beef filling.
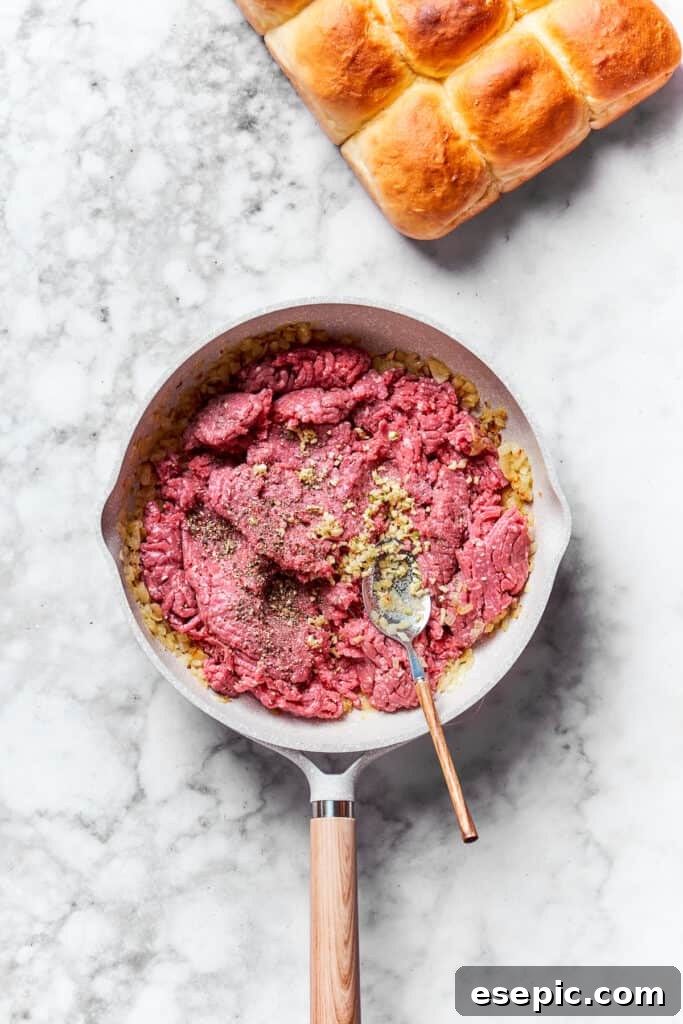
- Brown the Beef: Increase the heat slightly and add the ground beef to the skillet with the sautéed onions. Break the beef apart with a spatula as it cooks, stirring frequently, until it is thoroughly browned and no pink remains. Drain any excess grease to prevent the sliders from becoming soggy.
- Season the Meat: Once the beef is browned, stir in the minced garlic, your preferred mustard (Dijon adds a wonderful kick!), Worcestershire sauce, Kosher salt, and freshly ground black pepper. Cook for an additional 2-3 minutes, allowing all the flavors to meld beautifully. Remove the skillet from the heat and set the beef mixture aside.
- Prepare Your Baking Dish and Oven: Preheat your oven to 350°F (175°C). Lightly grease a 9×13-inch baking dish or line it with parchment paper to prevent sticking and ensure easy cleanup.
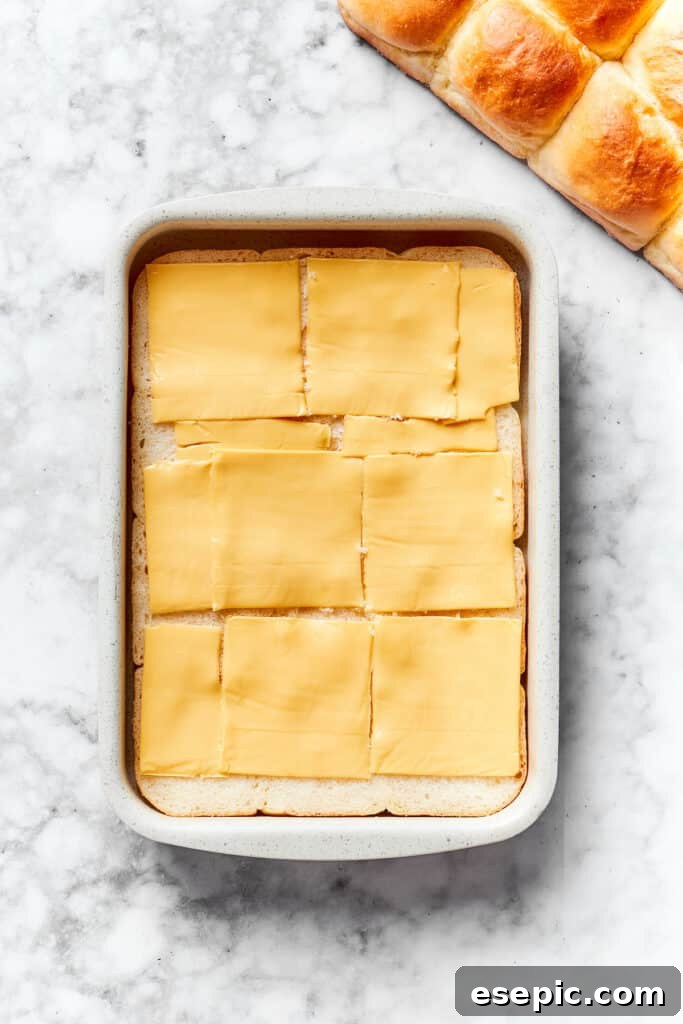
- Assemble the Base: Carefully slice your entire package of dinner rolls horizontally through the middle, keeping them connected as much as possible. Place the bottom half of the rolls snugly into your prepared baking dish.
- Layer with American Cheese: Arrange the slices of American cheese evenly over the bottom layer of rolls. Their excellent melting qualities will create a wonderfully gooey foundation for your sliders.
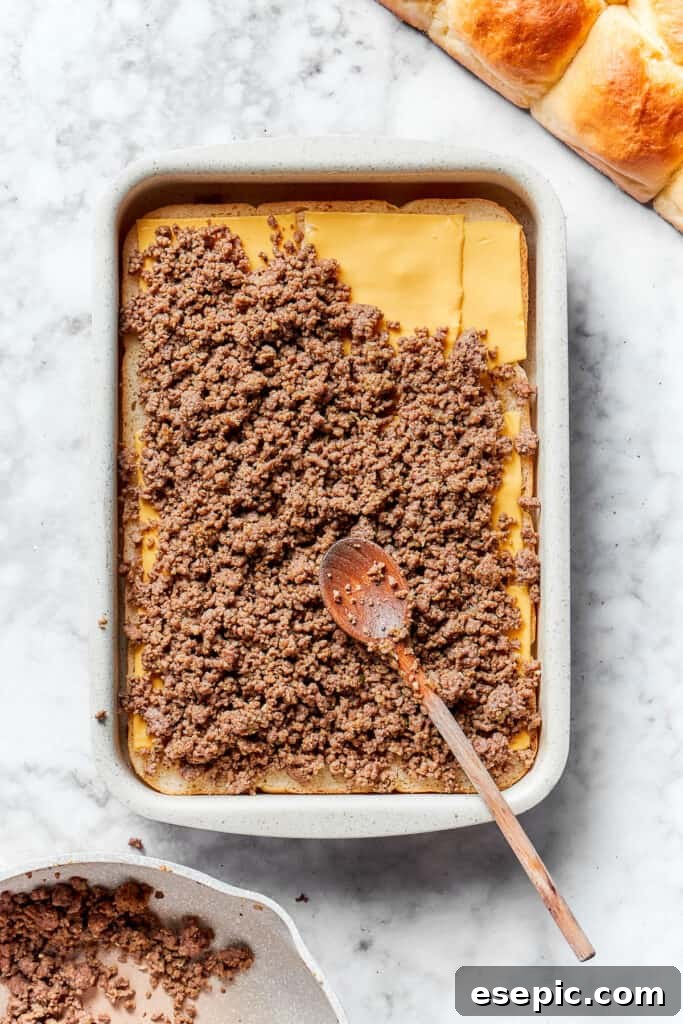
- Add the Savory Beef: Spread the prepared ground beef mixture evenly over the American cheese layer. Make sure to distribute it well so every slider gets a generous amount of filling.
- Top with Monterey Jack: Sprinkle the shredded Monterey Jack cheese uniformly over the ground beef. This adds another layer of creamy, melt-in-your-mouth cheese that brings everything together.
- Crown with Rolls and Garlic Butter: Gently place the top half of the dinner rolls over the cheese and beef layers. In a small bowl, whisk together the melted butter and garlic powder until well combined. Generously brush this fragrant garlic butter mixture over the tops of all the rolls. For an authentic touch, sprinkle with sesame seeds.
- Bake to Golden Perfection: Cover the baking dish tightly with aluminum foil. Bake in the preheated oven for 15 minutes. This initial covered baking allows the cheese to melt perfectly and the flavors to steam together.
- Finish Baking: Remove the foil and continue baking for another 5-7 minutes, or until the tops of the rolls are beautifully golden brown and the cheese is bubbly and fully melted. Keep a close eye on them during this stage to prevent over-browning.
- Serve Warm: Once baked, remove the dish from the oven and let it cool for just a few minutes before slicing into individual sliders. Arrange them on a serving platter and serve warm for the ultimate cheesy, beefy delight!
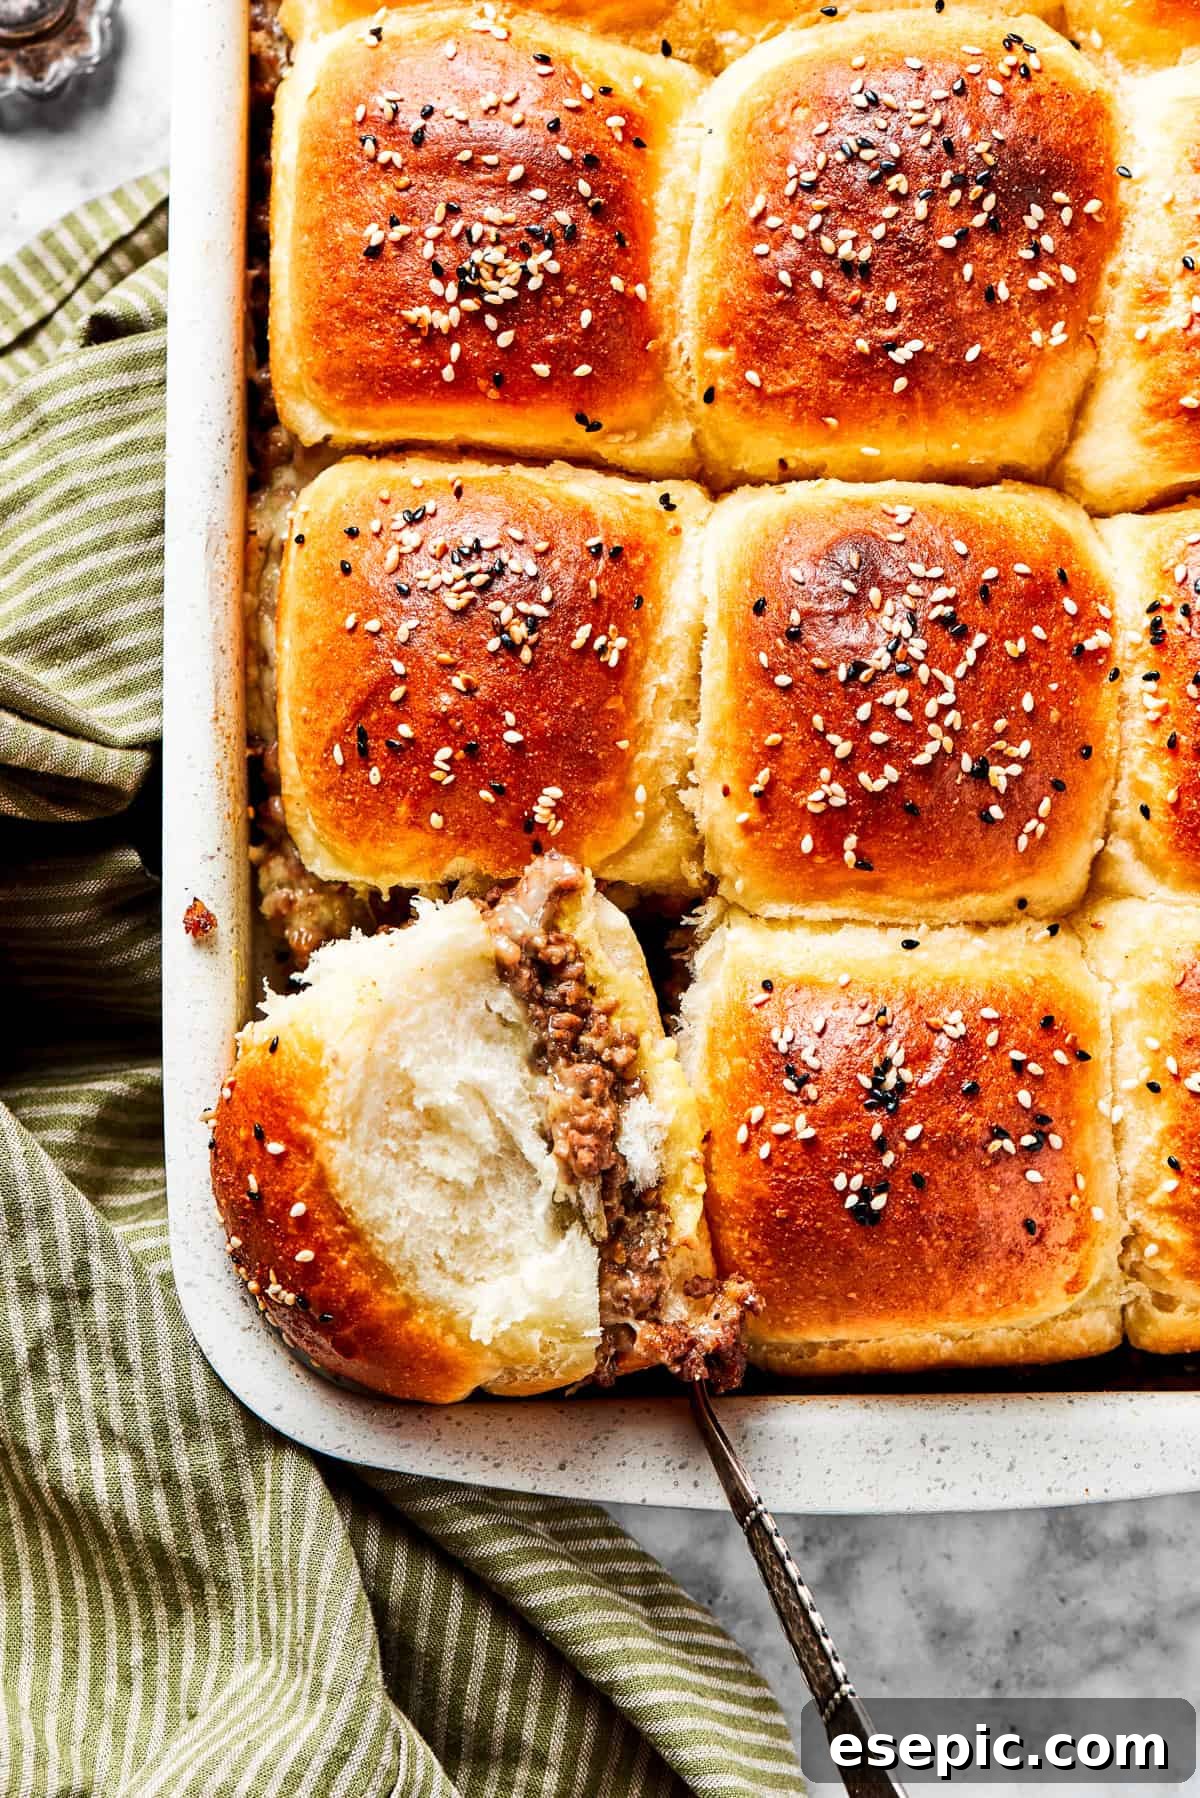
Mastering Your Sliders: Expert Tips for Success
Achieving cheeseburger slider perfection is easier than you think! Here are some invaluable tips to ensure your mini burgers are always a hit:
- Choosing the Right Dinner Rolls: While Hawaiian savory butter rolls are a fantastic choice, offering a slight sweetness that beautifully complements the savory filling, feel free to experiment. Kings Hawaiian sweet rolls will give you a distinctly sweeter profile, which some prefer. Brioche rolls offer a rich, buttery texture, while potato rolls provide a soft, slightly dense structure. The key is to select a soft, fresh roll that can hold up to the juicy filling without becoming soggy.
- Elevate Your Cheese Game: My recipe calls for a winning combination of American and Monterey Jack for ultimate meltiness and mild flavor. However, don’t hesitate to customize! Sharp or mild shredded cheddar can replace American cheese for a bolder taste. For a bit more adventure, try pepper jack for a spicy kick, blue cheese for a pungent, tangy note, or even Swiss cheese for a nutty, earthy depth. Mixing and matching cheeses allows you to create a unique flavor profile every time.
- Exploring Protein Alternatives: For a lighter option without sacrificing flavor, consider swapping out the ground beef for ground turkey or ground chicken. Simply prepare them exactly as you would the beef, ensuring they are fully cooked and seasoned well. If you’re looking for a richer taste, ground pork or a blend of beef and pork can also yield delicious results.
- Making Them Vegetarian-Friendly: It’s incredibly simple to transform these into delightful vegetarian cheeseburger sliders. Opt for plant-based ground meat alternatives like Beyond Meat or Impossible Burger. Prepare the plant-based “beef” exactly as described in the recipe, forming it into vegetarian patties or crumbling it like ground beef. The rich flavors of the onions, garlic, and Worcestershire sauce (ensure it’s vegetarian) will still shine through beautifully.
- Don’t Overcook the Beef: For the juiciest sliders, be mindful not to overcook your ground beef. Cook it until just browned, then drain any excess grease promptly. Overcooked beef can become dry and crumbly, detracting from the overall texture of your sliders.
- Pre-Slice Your Rolls Thoughtfully: Slicing the entire package of rolls horizontally through the middle, rather than separating them into individual buns, is a game-changer. This ensures uniform layers and makes the assembly process incredibly efficient, especially when preparing a large batch.
- The Magic of Garlic Butter: Don’t skip brushing the tops of the rolls with the melted garlic butter! This step is crucial for two reasons: it infuses the bread with an extra layer of savory flavor and helps the rolls achieve that coveted golden-brown, slightly crisp exterior during baking. It’s the finishing touch that truly elevates these sliders.
- Let Them Rest: After taking the sliders out of the oven, allow them to rest in the baking dish for 5-10 minutes. This brief resting period allows the cheese to set slightly and the juices from the beef to redistribute, making them easier to slice and preventing them from falling apart.
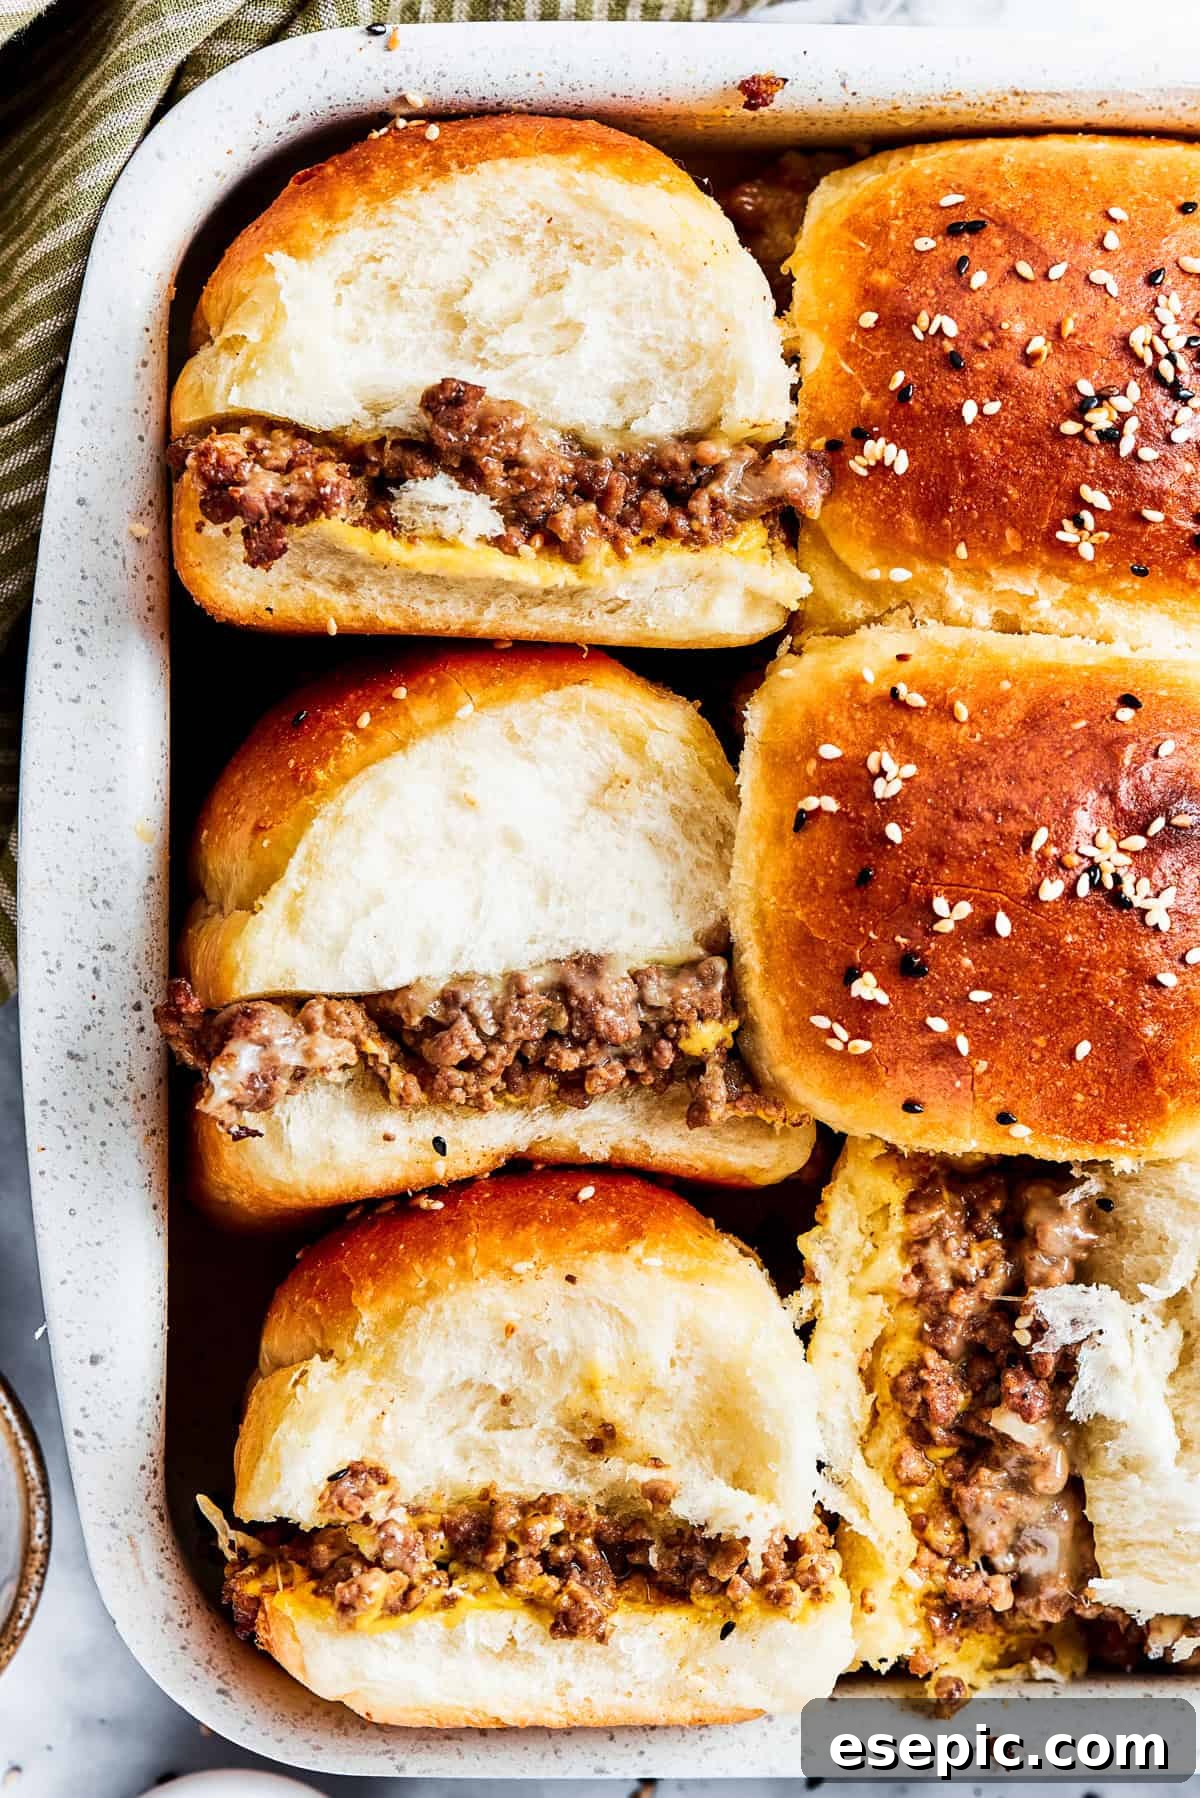
Delicious Variations to Try
Once you’ve mastered the classic cheeseburger slider, don’t be afraid to get creative and experiment with exciting variations:
- Spicy Southwest Sliders: Add a diced jalapeño or a pinch of cayenne pepper to the beef mixture. Top with pepper jack cheese and a drizzle of chipotle mayo before serving.
- BBQ Bacon Sliders: Mix a tablespoon of your favorite BBQ sauce into the cooked ground beef. Add crispy cooked bacon bits over the cheese layer and serve with extra BBQ sauce for dipping.
- Mushroom Swiss Sliders: Sauté sliced mushrooms with the onions, then add them to the beef mixture. Use Swiss cheese instead of American and Monterey Jack for a richer, earthy flavor.
- Breakfast Sliders: Transform them into a brunch favorite! Replace the ground beef with cooked breakfast sausage or crumbled bacon. Add a layer of scrambled eggs over the cheese, then bake as directed.
- Hawaiian Sliders: If using sweet Hawaiian rolls, add a thin slice of grilled pineapple and a drizzle of teriyaki sauce to the beef layer for a tropical twist.
Making It a Complete Meal: Perfect Pairings
These cheeseburger sliders are wonderfully satisfying on their own, but pairing them with the right sides can transform them into a truly unforgettable meal. Here are some fantastic suggestions to round out your spread:
Crispy & Crunchy Sides:
- Classic Fries: A must-have! Nothing complements a cheeseburger, mini or otherwise, quite like perfectly crisp fries. Try my zesty Garlic Fries for an extra flavor boost, or for a lighter take, whip up my recipes for crisp Air Fryer Zucchini Fries or oven-baked Parmesan Asparagus Fries.
- Onion Rings: Golden, crispy onion rings are another quintessential burger side that adds a satisfying crunch.
- Sweet Potato Fries: For a slightly sweeter and often healthier alternative, sweet potato fries are a fantastic option, especially with a sprinkle of smoked paprika.
Fresh & Healthy Additions:
- Vibrant Salads: A fresh, crisp salad cuts through the richness of the sliders beautifully. My Mexican Street Corn Salad offers a zesty, creamy, and slightly spicy counterpoint, while an Avocado Tomato Salad provides a refreshing and simple option.
- Crudités Platter: For a simple, no-cook side, arrange a platter of crunchy vegetables like sliced carrots, bell peppers, cucumber sticks, and broccoli florets, served with a favorite dip.
- Grilled Vegetables: A platter of various grilled vegetables, lightly seasoned with herbs and olive oil, adds a smoky depth and nutritional balance to the meal.
- Coleslaw: A creamy or tangy coleslaw is always a welcome side, offering a cool, crisp texture.
Beverages & Desserts:
- Refreshing Drinks: If you’re serving these cheeseburger sliders as an appetizer for a gathering, consider adding a vibrant cocktail. A pitcher of refreshing Strawberry Lemonade Sangria or a batch of frosty Frozen Pineapple Margaritas would perfectly complement the fun, casual vibe. For a family-friendly option, classic lemonade or iced tea is always a hit.
- Sweet Endings: After a satisfying savory meal, a light dessert like fruit skewers, mini cupcakes, or even a simple scoop of ice cream would be a delightful finish.
Proper Storage and Reheating Tips
One of the many advantages of these cheeseburger sliders is how well they store and reheat, making them perfect for meal prepping or enjoying delicious leftovers. You can easily keep them fresh for a later snack or another meal by following these simple guidelines:
- Storing Leftovers: Once the sliders have completely cooled to room temperature, transfer them to an airtight container. Alternatively, you can wrap them tightly in aluminum foil or plastic wrap. Store them in the refrigerator for up to 3 days. To maintain the best texture and prevent sogginess, it’s sometimes best to store the beef filling and rolls separately if you anticipate storing them for more than a day, although the assembled sliders generally hold up well.
- Reheating for Freshness:
- Oven Method (Recommended): This is the best method for restoring the sliders to their original glory, ensuring the rolls crisp up nicely and the cheese melts perfectly again. Preheat your oven to 350°F (175°C). Place the sliders on a baking sheet, ideally in a single layer. You can cover them loosely with foil to prevent the tops from browning too quickly, especially if they are already quite golden. Heat for 10-15 minutes, or until the patties are heated through and the cheese is beautifully melted and bubbly.
- Microwave Method (Quick Option): While quicker, the microwave won’t give you the same crispness as the oven, and the rolls might become a bit soft. Heat individual sliders for 30-60 seconds, or until warmed through. Be careful not to overheat, as this can make the beef rubbery.
- Freezing Instructions: If you want to prepare these sliders further in advance, you can freeze them! After baking and allowing them to cool completely, wrap individual sliders or small batches tightly in plastic wrap, then again in aluminum foil. Place them in a freezer-safe bag or container. They can be stored in the freezer for up to 1 month. To reheat from frozen, unwrap the sliders, place them on a baking sheet, and bake in a preheated oven at 350°F (175°C) for 20-30 minutes, or until thoroughly heated, covering with foil if needed to prevent over-browning.
Frequently Asked Questions (FAQ) About Cheeseburger Sliders
Here are some common questions and helpful answers to ensure your cheeseburger slider experience is flawless:
- Can I make cheeseburger sliders ahead of time?
Yes, absolutely! You can prepare the ground beef mixture a day in advance and store it in an airtight container in the refrigerator. Assemble the sliders just before baking. This makes them a perfect option for entertaining or busy weeknights. - What are the best types of rolls to use for sliders?
Soft dinner rolls are key. Hawaiian savory butter rolls are highly recommended for their texture and subtle sweetness. Brioche rolls or potato rolls are also excellent choices, offering a rich flavor and soft consistency that works wonderfully with the savory filling. - How do I prevent the rolls from getting soggy?
The most important step is to drain the excess grease from the cooked ground beef thoroughly before assembling. Additionally, brushing the tops of the rolls with melted garlic butter can create a slight barrier, helping them stay crispier during baking. Don’t overcook the beef, as dry beef can also lead to soggy buns. - Can I use different types of cheese?
Definitely! While American and Monterey Jack provide the ultimate melt, feel free to experiment. Cheddar, Swiss, provolone, or even a spicy pepper jack can offer unique flavor profiles. Choose cheeses that melt well for the best gooey effect. - What toppings or condiments can I add to these sliders?
The possibilities are endless! Offer a selection of classic burger toppings like sliced pickles, caramelized onions, crispy bacon bits, sliced tomatoes, lettuce, and various sauces such as ketchup, mustard, special burger sauce, or even a spicy aioli. Guests can customize their own! - Can I cook these on a grill instead of baking?
While this recipe is optimized for baking in a dish for convenience and melty cheese, you could technically cook individual slider patties on a grill. However, the assembly with melted cheese over a whole tray of rolls is best achieved in the oven. If grilling, you’d likely serve them open-faced or assemble after grilling.
Discover More Easy Beef Recipes
If you’ve enjoyed the savory goodness of these cheeseburger sliders, you’re sure to love these other simple and delicious beef recipes perfect for any weeknight meal or family gathering:
- Hearty Chopped Steak: A comforting classic that’s quick to prepare and incredibly flavorful, perfect with mashed potatoes.
- Sweet & Savory Brown Sugar Meatloaf: A family favorite meatloaf recipe with a delicious brown sugar glaze that adds a touch of sweetness.
- Easy Cheeseburger Casserole: All the flavors of a cheeseburger in a convenient, comforting casserole format, ideal for feeding a crowd.
- Unique Pizza Burger: A creative fusion that combines the best of a juicy burger with the delicious toppings of your favorite pizza.
Cheeseburger Sliders
by Katerina | Easy Weeknight Recipes
Cheeseburger Sliders feature juicy ground beef topped with two kinds of gooey melted cheese, all served on savory rolls brushed with aromatic garlicky melted butter.
Prep Time: 5 minutes
Cook Time: 25 minutes
Total Time: 30 minutes
Servings: 12 sliders
Ingredients
For the Ground Beef:
- 1 tablespoon olive oil
- 1 small yellow onion, finely diced
- 2 pounds ground beef (80/20 recommended)
- 2 cloves garlic, minced (or more, to taste)
- 1 tablespoon mustard (Dijon recommended)
- 1 teaspoon Worcestershire sauce
- 1½ teaspoons Kosher salt
- ½ teaspoon freshly ground black pepper
For the Burgers:
- 1 package dinner rolls, 12 count (Hawaiian Savory Butter Rolls or similar)
- 8 slices American cheese
- 8 ounces shredded Monterey Jack cheese
- 4 tablespoons unsalted butter, melted
- 1 teaspoon garlic powder
- 1 tablespoon white and black sesame seeds, optional
Instructions
Prepare the Ground Beef:
- In a large skillet, heat olive oil over medium heat. Add diced onions and sauté until translucent, about 3-5 minutes.
- Add ground beef to the skillet and cook until browned, breaking it apart with a spatula as it cooks. Drain any excess grease.
- Stir in the minced garlic, mustard, Worcestershire sauce, Kosher salt, and black pepper. Cook for an additional 2-3 minutes, allowing flavors to meld. Remove from heat and set aside.
Assemble and Bake the Sliders:
- Preheat the oven to 350°F (175°C). Grease a 9×13-inch baking dish or line it with parchment paper.
- Slice the dinner rolls in half horizontally, keeping them intact. Place the bottom half of the rolls in the prepared baking dish.
- Layer American cheese slices evenly over the bottom half of the rolls.
- Spread the prepared ground beef evenly over the American cheese layer.
- Sprinkle shredded Monterey Jack cheese over the ground beef layer.
- Place the top half of the dinner rolls over the cheese layer.
- In a small bowl, mix together the melted butter and garlic powder. Brush this butter mixture generously over the tops of the rolls.
- Sprinkle sesame seeds evenly over the top of the rolls, if desired.
- Cover the baking dish with aluminum foil and bake in the preheated oven for 15 minutes.
- Remove the foil and continue baking for an additional 5-7 minutes, or until the cheese is melted and bubbly, and the tops of the rolls are golden brown.
- Once done, remove from the oven and let cool for a few minutes before slicing and serving warm.
Nutritional information is an estimate and provided as a courtesy. Values may vary according to the ingredients and tools used. Please use your preferred nutritional calculator for more detailed information.
Did you make this recipe? Leave a rating and review!