
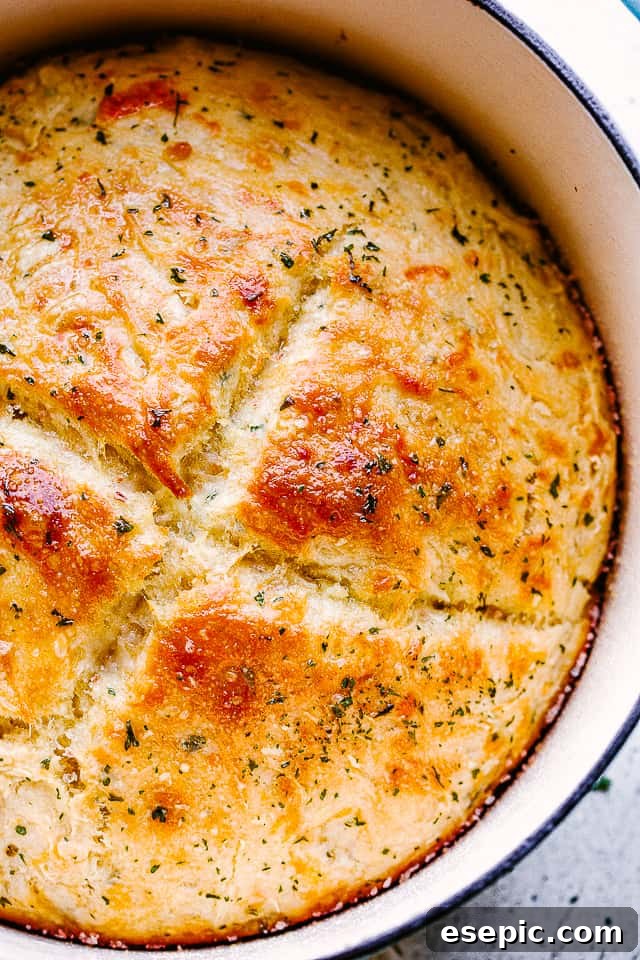
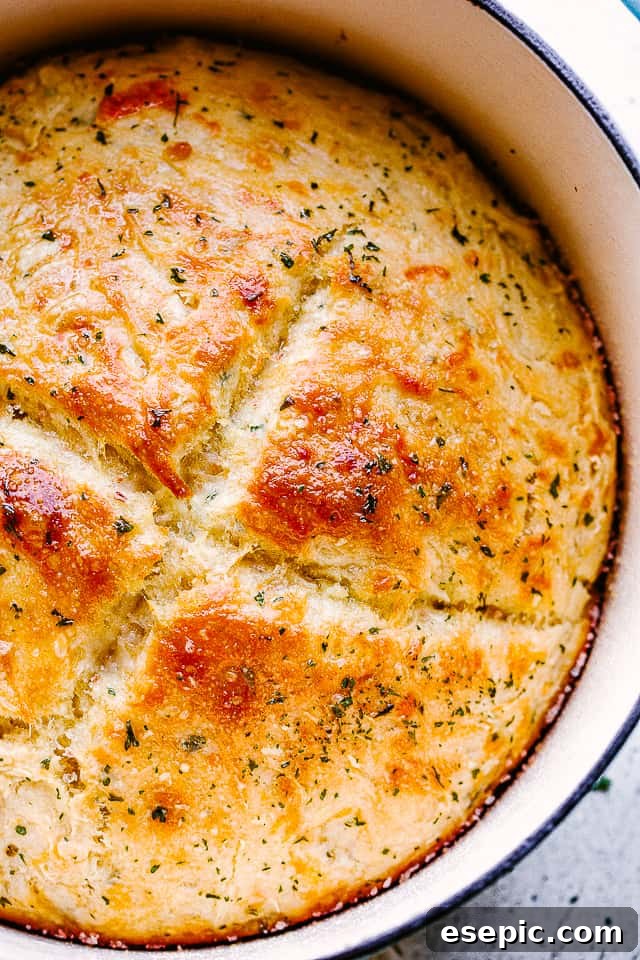
Imagine the aroma of freshly baked bread filling your kitchen, a golden crust giving way to a soft, tender interior, studded with savory cheese. Sounds like a daunting task, right? Think again! This No-Knead Skillet Cheese Bread recipe is here to revolutionize your baking experience, proving that homemade artisan-style bread is not only achievable but incredibly easy. Perfect for dipping into rich soups, pairing with hearty stews, or simply enjoying on its own, the delightful combination of cheese and a hint of parsley elevates this bread to a truly special treat.
For those who cherish the craft of bread-making, or even just the joy of eating it, you’ll find this recipe to be a game-changer. It’s a wonderful alternative to more traditional methods, requiring significantly less active time and no specialized equipment. If you’ve enjoyed other simple yet satisfying baked goods, like our popular homemade flatbread or the uniquely creamy spoon bread, you’re in for another delightful experience that promises to become a new family favorite.
Why This No-Knead Skillet Cheese Bread is a Must-Try
This isn’t just another bread recipe; it’s an invitation to experience the pure joy of baking without the fuss. Here’s why our No-Knead Skillet Cheese Bread stands out and why you’ll fall in love with it:
- Effortlessly Easy: If the thought of homemade bread has always seemed intimidating, this recipe is your perfect starting point. Forget about complicated kneading techniques, expensive bread machines, or a countertop full of specialized tools. All you need are basic kitchen essentials: a mixing bowl, a wooden spoon, and a reliable skillet. The magic happens with minimal active involvement, allowing time to do most of the work for you.
- Irresistibly Cheesy: For true cheese aficionados, this bread is a dream come true. Generous amounts of shredded cheddar are incorporated into the dough, melting into pockets of savory goodness throughout the loaf. Each bite delivers a burst of rich, cheesy flavor that makes this bread utterly satisfying and incredibly moreish.
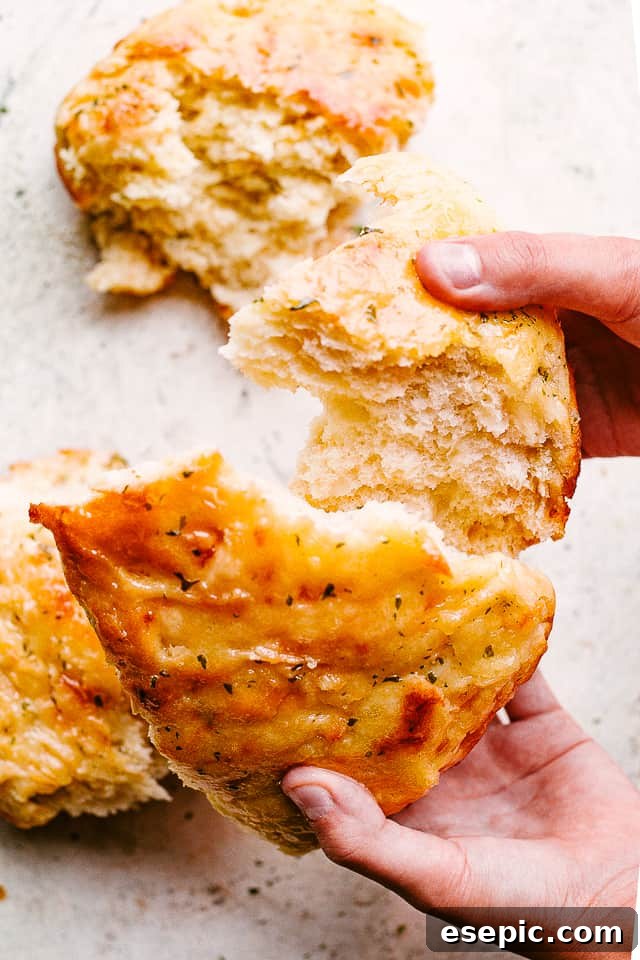
- The Perfect Crust and Crumb: Achieve that coveted artisan bread quality with a golden-brown, wonderfully crisp crust that crackles as you slice it. Beneath this delightful exterior lies a tender, airy crumb – soft yet sturdy enough to hold up to even the heartiest of dips and sauces. It’s a textural masterpiece that will impress everyone.
- Unbeatable Freshness & Aroma: There’s nothing quite like the experience of bread fresh from the oven. The intoxicating aroma alone is enough to make mouths water, transforming your home into a welcoming bakery. Beyond the scent, the taste of warm, homemade bread, still slightly steaming, is an unparalleled culinary delight that store-bought loaves simply cannot replicate.
- Minimal Active Time: While the dough requires a good amount of resting time, your actual hands-on involvement is surprisingly brief. This makes it an ideal project for busy weekends or even a slow weeknight, allowing you to focus on other tasks while your bread develops its fantastic flavor and texture.
- Impressive Results: Despite its simplicity, the end result looks and tastes incredibly sophisticated. Serve this bread to guests, and they’ll be convinced you spent hours slaving away in the kitchen. It’s a truly impressive loaf that belies its easy preparation.
Understanding the Magic of No-Knead Bread
No-knead bread is a revolutionary baking method that simplifies the traditional bread-making process by eliminating the labor-intensive kneading step. Instead of developing gluten through physical manipulation, this technique relies on a long, slow fermentation period. By allowing the dough to rest for an extended time (typically several hours or overnight), the flour naturally absorbs the water, and the yeast slowly works its magic, creating strong gluten strands without any effort from the baker.
This hands-off approach results in a dough that is typically wetter and stickier than conventional bread doughs. The high hydration content and the prolonged fermentation contribute to several desirable characteristics: a deeply complex flavor profile, an open and airy internal structure, and a remarkably crisp, chewy crust when baked at a high temperature, especially in a preheated cast iron skillet or Dutch oven. It’s a method that truly delivers artisan-quality bread with minimal fuss, making it accessible to even the most novice bakers.
Essential Ingredients for Your Skillet Cheese Bread
Crafting this delicious no-knead cheese bread requires just a handful of common ingredients. Each plays a crucial role in achieving that perfect texture and savory flavor:
- Luke Warm Water: The perfect temperature is key here! Water that is too hot will kill the active dry yeast, while water that is too cold won’t activate it sufficiently. Aim for a temperature between 105-115°F (40-46°C), which feels warm to the touch but not scalding. This temperature creates the ideal environment for the yeast to bloom and become active, ensuring your dough rises beautifully. You’ll need about 2 cups for this recipe.
- Active Dry Yeast: This is the leavening agent that makes your bread light and airy. When activated by the lukewarm water and fed by the flour, the yeast produces carbon dioxide, which creates bubbles in the dough, causing it to rise. Ensure your yeast is fresh for the best results; old yeast can lead to a flat loaf. A typical packet contains about 2¼ teaspoons.
- Salt: Far from being just a seasoning, salt is vital in bread making. It enhances the overall flavor of the bread, bringing out the sweetness of the flour and balancing the richness of the cheese. It also plays a critical role in controlling yeast activity, slowing down fermentation for a more complex flavor, and strengthening the gluten structure, contributing to a better crumb. About ½ teaspoon is usually sufficient for the dough.
- All-Purpose Flour: The backbone of your bread! All-purpose flour provides the necessary protein to form gluten, which gives the bread its structure and chewiness. While you can experiment with bread flour for a chewier texture, all-purpose flour works wonderfully for a light, tender crumb. For this recipe, plan on needing a little over 4 cups (specifically, 4⅓ cups) to achieve the right dough consistency.
- Garlic Powder: A fantastic addition for a savory depth! Garlic powder infuses the bread with a mild, aromatic garlic flavor that complements the cheese beautifully without the sharpness of fresh garlic. It integrates seamlessly into the dough. You’ll need about 1½ teaspoons to achieve that irresistible savory note.
- Onion Powder: Adds a subtle, sweet, and savory onion undertone that enhances the overall complexity of the bread’s flavor profile. Like garlic powder, it blends perfectly into the dough without adding moisture or texture. About ½ teaspoon is enough to make a difference.
- Shredded Cheddar Cheese: The star of our cheese bread! Shredded cheddar cheese melts into gooey pockets, adding incredible flavor and a delightful texture to every slice. Its sharp, savory notes are perfect for this bread. Feel free to experiment with other good melting cheeses like mozzarella, Gruyère, or even a blend of Italian cheeses for different flavor profiles. About 1 cup works perfectly. For the best flavor and melt, consider shredding your own cheese from a block.
- Olive Oil: Used strategically, olive oil serves multiple purposes. A tablespoon is used to coat the skillet, preventing sticking and contributing to a beautifully crisp, golden crust on the bottom of the loaf. Another tablespoon drizzled over the top before baking adds flavor, helps create a crispy top crust, and gives the bread a lovely sheen. You’ll need 2 tablespoons, divided.
- Coarse Salt: A sprinkle of coarse salt (like sea salt flakes or kosher salt) on top of the loaf before baking provides a delightful textural crunch and a burst of salty flavor in every bite. It elevates the bread from good to extraordinary.
- Dried Parsley: More than just a garnish, dried parsley adds a fresh, herbaceous note and visual appeal to the finished bread. Its mild flavor doesn’t overpower the cheese and garlic, instead offering a subtle brightness. Feel free to substitute with other dried herbs like oregano, Italian seasoning, or a mix of your favorites for a personalized touch.
Step-by-Step Guide: How to Make No-Knead Skillet Cheese Bread
Follow these simple steps to create a warm, crusty, and cheesy masterpiece that will impress everyone at your table. This method makes bread baking accessible and enjoyable, even for beginners.

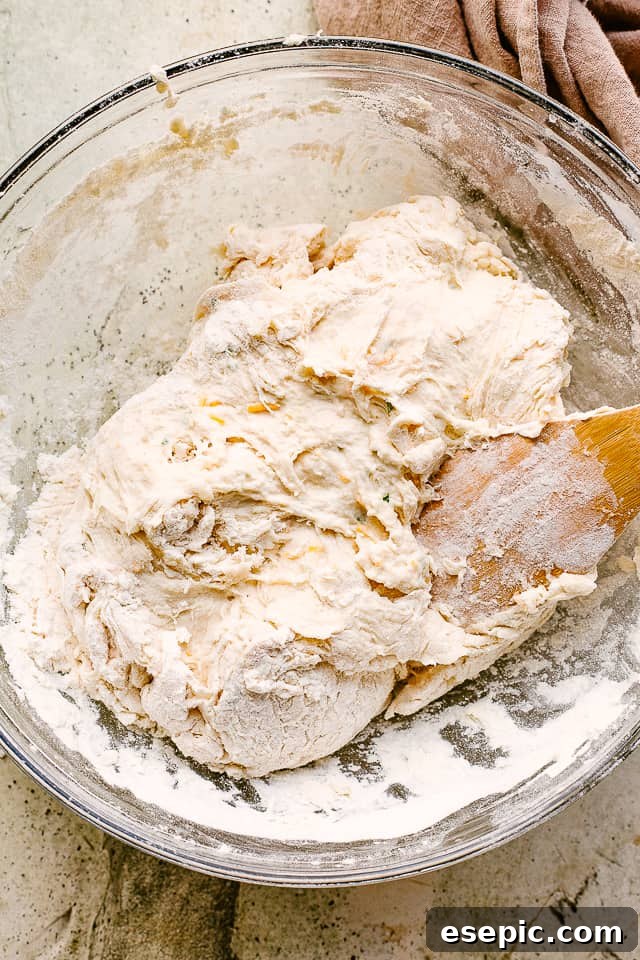
- Activate the Yeast: In a large mixing bowl, combine the lukewarm water and active dry yeast. Stir gently and let it sit for 5-10 minutes until foamy. This indicates the yeast is active and ready to work its magic.
- Combine Wet and Dry Ingredients: Add 1 cup of all-purpose flour and ½ teaspoon of salt to the yeast mixture. Stir well with a sturdy wooden spoon until just combined. Next, stir in the garlic powder, onion powder, and the shredded cheddar cheese.
- Form the Dough: Gradually add the remaining flour (the additional 3⅓ cups), one cup at a time, stirring until all the flour is incorporated and you have a shaggy, somewhat sticky dough. Avoid overmixing; a few lumps are fine. The dough should be well combined but not overworked.
- First Rise (Bulk Fermentation): Cover the bowl tightly with plastic wrap or a clean kitchen towel. Place it in a warm, draft-free spot in your kitchen and let the dough rise for a full 1 hour. During this time, the yeast will ferment, developing flavor and volume.
- Prepare the Skillet: While your dough is on its first rise, take an 8-inch cast iron skillet. Drizzle 1 tablespoon of olive oil into the skillet and use your hands or a paper towel to thoroughly coat the bottom and sides. This prevents sticking and contributes to the bread’s crispy crust.
- Shape and Second Rise (Proofing): Once the dough has risen for an hour, lightly flour your hands. Gently transfer the dough from the bowl into the prepared cast iron skillet. Don’t punch it down aggressively. Gently shape the dough into a round disk, filling the bottom of the skillet. Cover the skillet loosely with a clean kitchen towel and let it stand for an additional 30 minutes for its second rise. This allows the dough to relax and develop its final structure before baking.
- Preheat the Oven: During the last 15-20 minutes of the dough’s second rise, preheat your oven to 400°F (200°C). Ensuring your oven is fully preheated will help the bread achieve a beautiful crust and proper rise.
- Prepare for Baking: Just before placing the skillet in the oven, drizzle the remaining 1 tablespoon of olive oil over the top of the dough. Evenly sprinkle coarse salt and dried parsley over the oiled surface. Finally, using a sharp knife or a bread lame, score the top of the loaf with a criss-cross pattern or a single deep cut. This scoring allows the bread to expand predictably during baking and creates an attractive finish.
- Bake to Golden Perfection: Carefully place the skillet in the preheated oven. Bake for approximately 30 minutes, or until the top of the bread is a deep golden brown and the crust looks firm and crispy. You can also tap the bottom of the loaf; it should sound hollow.
- Cool and Serve: As soon as the cheese bread is baked, remove it from the oven. Immediately and carefully turn the bread out of the hot skillet onto a wire cooling rack. This crucial step prevents the bottom crust from becoming soggy due to trapped steam. Let the bread cool completely on the rack before attempting to slice it. While it’s tempting to cut into warm bread, cooling allows the internal structure to set properly, resulting in a better texture. Once cooled, slice and serve with your favorite soup, stew, or pasta!
Expert Tips for No-Knead Bread Success
While this recipe is incredibly forgiving, a few simple tips can elevate your No-Knead Skillet Cheese Bread from good to absolutely spectacular:
- Cool on a Wire Rack is Non-Negotiable: This is arguably the most important tip for achieving that desirable crisp bottom crust. As soon as your bread comes out of the oven, transfer it immediately from the hot skillet to a wire cooling rack. Leaving it in the skillet or on a flat surface will trap steam underneath, leading to a soggy bottom crust, which nobody wants! Allowing air to circulate all around the loaf ensures it stays crusty.
- Skillet or Baking Dish? You Have Options!: Don’t have a cast iron skillet? No problem! While a cast iron skillet is excellent for heat retention and producing a superb crust, it’s not strictly necessary. You can easily use a round stoneware baking dish or even a regular oven-safe pie plate. The key is to use a heavy, oven-safe vessel that can hold and distribute heat evenly. Just ensure whatever you use is well-oiled to prevent sticking.
- Quality Cheese Makes a Difference: The type and quality of your cheddar cheese significantly impact the flavor of your bread. Opt for a good quality sharp or extra-sharp cheddar for a more pronounced, savory cheese flavor. For the best melting and flavor, consider buying a block of cheese and shredding it yourself. Pre-shredded cheeses often contain anti-caking agents that can slightly alter their melt and taste.
- Don’t Rush the Rise: Patience is a virtue in no-knead bread making. The long fermentation periods are what develop the complex flavors and open crumb structure. Resist the urge to shorten the rising times, especially the initial bulk fermentation. If your kitchen is particularly cool, you might even need a little extra time for the dough to double in size. A warm, draft-free spot is ideal.
- Score with Confidence: Don’t be shy when scoring the top of your loaf! A deep, confident cut (or criss-cross pattern) with a very sharp knife or a bread lame allows the steam to escape evenly during baking, resulting in a more uniform rise and a more visually appealing loaf. Shallow cuts may not be as effective.
- Customizing Your Flavors: This cheese bread recipe is a fantastic base for customization. Feel free to experiment! Add a pinch of red pepper flakes for a subtle kick, dried Italian herbs for an aromatic twist, or even some caramelized onions for extra sweetness and depth. Chopped sun-dried tomatoes or olives could also be delicious additions.
- Consider Doubling the Recipe: This bread is so popular, it tends to disappear quickly! If you’re feeding a crowd or simply want to have extra on hand (it freezes beautifully!), consider doubling the recipe. Just remember, you’ll need a larger vessel for baking, ideally a 12-inch cast iron skillet or a correspondingly larger baking dish, to accommodate the increased dough volume.
Perfect Pairings: Serving Suggestions for Your Cheese Bread
The beauty of this No-Knead Skillet Cheese Bread lies in its incredible versatility. Its savory, cheesy flavor and wonderful texture make it an ideal accompaniment to a wide range of dishes. Here are some delectable serving suggestions to inspire your next meal:
- Soup’s Best Friend: This bread is practically made for dunking! Its sturdy crust and absorbent crumb are perfect for soaking up every last drop of your favorite soups. It pairs wonderfully with our creamy ravioli soup, a comforting butternut squash soup with Italian sausage, or any rich, tomato-based or cream-based soup.
- Hearty Stews & Roasts: Imagine tearing off a piece of warm cheese bread to accompany a robust Guinness beef stew or a tender pot roast. The bread’s ability to absorb flavorful gravies and sauces makes it an indispensable addition to any slow-cooked, savory meal.
- Pasta Perfection: Move over, garlic knots! This cheese bread is a fantastic side for almost any pasta dish. Whether it’s our creamy chicken bacon ranch pasta, a luxurious creamy seafood pasta, or a simple marinara, the cheesy notes and crusty texture of the bread complement the richness of pasta sauces beautifully.
- Salad Enhancer: Transform a simple salad into a more substantial meal by serving it alongside warm slices of this bread. It pairs wonderfully with a fresh salmon BLT salad, adding a comforting, savory element.
- Brunch & Breakfast: Don’t limit this bread to dinner! Slice it thick and serve it toasted with eggs, bacon, or a dollop of cream cheese for a delightful breakfast or brunch.
- Appetizer or Snack: Cut the loaf into smaller pieces and serve it with a variety of dips like hummus, spinach dip, or a vibrant pesto for an easy and impressive appetizer. It’s also simply wonderful as a standalone snack.
- With Grilled Meats: The savory notes of the cheese bread are a fantastic match for grilled chicken, steaks, or sausages. It acts as a perfect counterpoint to smoky, charred flavors.
Basically, if it’s saucy, hearty, or just plain delicious, this No-Knead Skillet Cheese Bread is the perfect companion. Its versatile flavor profile makes it suitable for almost any occasion, turning an ordinary meal into an extraordinary one.
Storage and Reheating Tips for Leftover Cheese Bread
While it’s unlikely you’ll have much left of this delicious bread, knowing how to store and reheat it properly ensures every last slice is as enjoyable as the first. Homemade bread, especially with cheese, benefits from proper storage to maintain its freshness and texture.
- Short-Term Storage (Room Temperature): To keep your No-Knead Skillet Cheese Bread fresh for up to 3 days, store it in an airtight container or a zip-top bag. Make sure the bread has completely cooled down before storing to prevent condensation, which can make the crust soggy. Keep it in a cool, dry place on your kitchen counter; refrigeration is not recommended for short-term storage as it can dry out bread more quickly.
- Long-Term Storage (Freezing): For extended freshness, this cheese bread freezes beautifully for up to 3 months.
- To Freeze a Baked Loaf: Once the bread is completely cool, wrap the entire loaf (or individual slices) tightly in plastic wrap, then an additional layer of aluminum foil, or place it in a freezer-safe zip-top bag. This double layer of protection helps prevent freezer burn.
- To Freeze Dough: If you want to get ahead, you can freeze the dough! Follow the recipe instructions to make the dough and let it complete its first 1-hour rise. After the rise, gently form the dough into a ball, wrap it securely in plastic wrap, and then place it in a freezer-friendly container or bag. Freeze for up to one month. When you’re ready to bake, thaw the frozen dough overnight in the refrigerator, or for several hours at room temperature until it’s soft and pliable. Then, proceed with step 5 (preparing the skillet) of the baking instructions.
- Reheating Leftovers:
- For a whole loaf or large pieces: Preheat your oven to 350°F (175°C). Place the bread directly on the oven rack (or wrap loosely in foil to prevent excess browning) and heat for 10-15 minutes, or until warmed through and the crust has re-crisped.
- For individual slices: You can toast slices in a toaster oven or a regular toaster until golden and crispy. Alternatively, warm them in a skillet over medium heat for a few minutes per side. Microwaving is generally not recommended as it can make the bread chewy and soggy.
With these storage and reheating tips, you can enjoy the delightful taste and texture of your homemade No-Knead Skillet Cheese Bread for days or even weeks to come!
Explore More Homemade Bread Recipes
If you’ve enjoyed the simplicity and deliciousness of this No-Knead Skillet Cheese Bread, you’ll be thrilled to discover a world of other fantastic homemade bread recipes. Expand your baking repertoire with these comforting and flavorful options, perfect for any occasion:
- Challah Bread: A rich, egg-based braided bread, known for its beautiful golden crust and soft, slightly sweet interior. Perfect for Shabbat or as a special treat.
- Homemade Cornbread: A classic Southern staple, offering a wonderfully moist and tender crumb with a rustic corn flavor. Excellent with chili, stews, or barbecue.
- Amish Friendship Bread: A delightful, sweet sourdough-style bread with a unique starter, often flavored with cinnamon and sugar. A lovely tradition to share with friends.
- Star Bread: A visually stunning, pull-apart bread, often sweet and spiced, perfect for sharing. Its intricate shape makes it a showstopper at any gathering.
- Monkey Bread: A fun, pull-apart treat made from small pieces of dough coated in butter, cinnamon, and sugar, baked together in a Bundt pan. Irresistible for breakfast or dessert.
- Homemade Pizza Dough: Master the basics of creating your own fresh, chewy pizza crust right at home for endless pizza night possibilities.
- Garlic Knots: Soft, savory knots of dough, brushed with garlic butter and herbs, perfect for serving with Italian meals.
Each of these recipes offers a unique baking experience and a delicious result, proving that homemade bread is always worth the effort (even if that effort is minimal!). Happy baking!
Recipe Card: No-Knead Skillet Cheese Bread
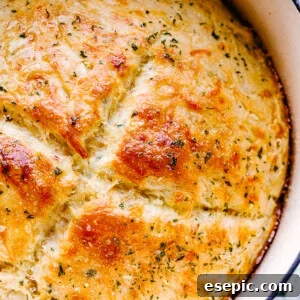
No-Knead Skillet Cheese Bread
by Katerina | Easy Weeknight Recipes
Preparing warm, crusty homemade bread is simpler than you think with this No-Knead Skillet Cheese Bread. Ideal for dipping in your favorite warm soup, the added cheese and parsley kick up the flavor!
Prep Time: 1 hour 30 minutes
Cook Time: 30 minutes
Cooling Time: 1 hour
Total Time: 3 hours
Servings: 10 slices
Ingredients
- 2 cups lukewarm water
- 2¼ teaspoons active dry yeast
- ½ teaspoon salt
- 4⅓ cups all-purpose flour
- 1½ teaspoons garlic powder
- ½ teaspoon onion powder
- 1 cup shredded cheddar cheese
- 2 tablespoons olive oil, divided
- Coarse salt, for sprinkling
- Dried parsley, for sprinkling
Instructions
- Combine water and yeast in a large mixing bowl.
- Add 1 cup flour and ½ teaspoon salt to the yeast mixture; stir with a wooden spoon until combined. Stir in the garlic powder, onion powder, and cheese.
- Add remaining flour, one cup at a time, stirring until well combined. Cover the bowl with plastic wrap and let it rise for 1 hour.
- In the meantime, add 1 tablespoon of olive oil to an 8-inch cast iron skillet and coat the bottom and sides of the skillet with the oil.
- Lightly flour your hands and transfer the dough to the skillet. Shape the dough into a round disk; cover with a towel and let it stand for 30 minutes.
- Preheat the oven to 400˚F (200°C).
- Drizzle 1 tablespoon of olive oil over the top of the dough and sprinkle it with salt and parsley. Then, score the top of the loaf with a knife.
- Bake for 30 minutes or until the top is golden brown.
- Remove the bread from the oven and immediately turn it out onto a cooling rack.
- Let it completely cool before cutting into it.
Equipment
- Measuring Cups and Spoons
- 8-inch Cast Iron Skillet
Notes
- To freeze the dough: Make the dough as instructed and let it rise for 1 hour, per the recipe. Once risen, form the dough into a ball, wrap it in plastic wrap, and then place it in a freezer-friendly container and keep it frozen for up to a month. When ready, thaw the frozen dough on the kitchen counter, let it rise, and bake as directed.
Nutrition
Serving: 1 slice | Calories: 278kcal | Carbohydrates: 43g | Protein: 10g | Fat: 7g | Saturated Fat: 3g | Cholesterol: 12mg | Sodium: 189mg | Potassium: 100mg | Fiber: 2g | Sugar: 1g | Vitamin A: 113IU | Calcium: 90mg | Iron: 3mg
Nutritional info is an estimate and provided as courtesy. Values may vary according to the ingredients and tools used. Please use your preferred nutritional calculator for more detailed info.
Recipe Video
A step-by-step video guide demonstrating the process of making this delightful No-Knead Skillet Cheese Bread would typically be embedded here, offering visual instructions to enhance your baking experience.