
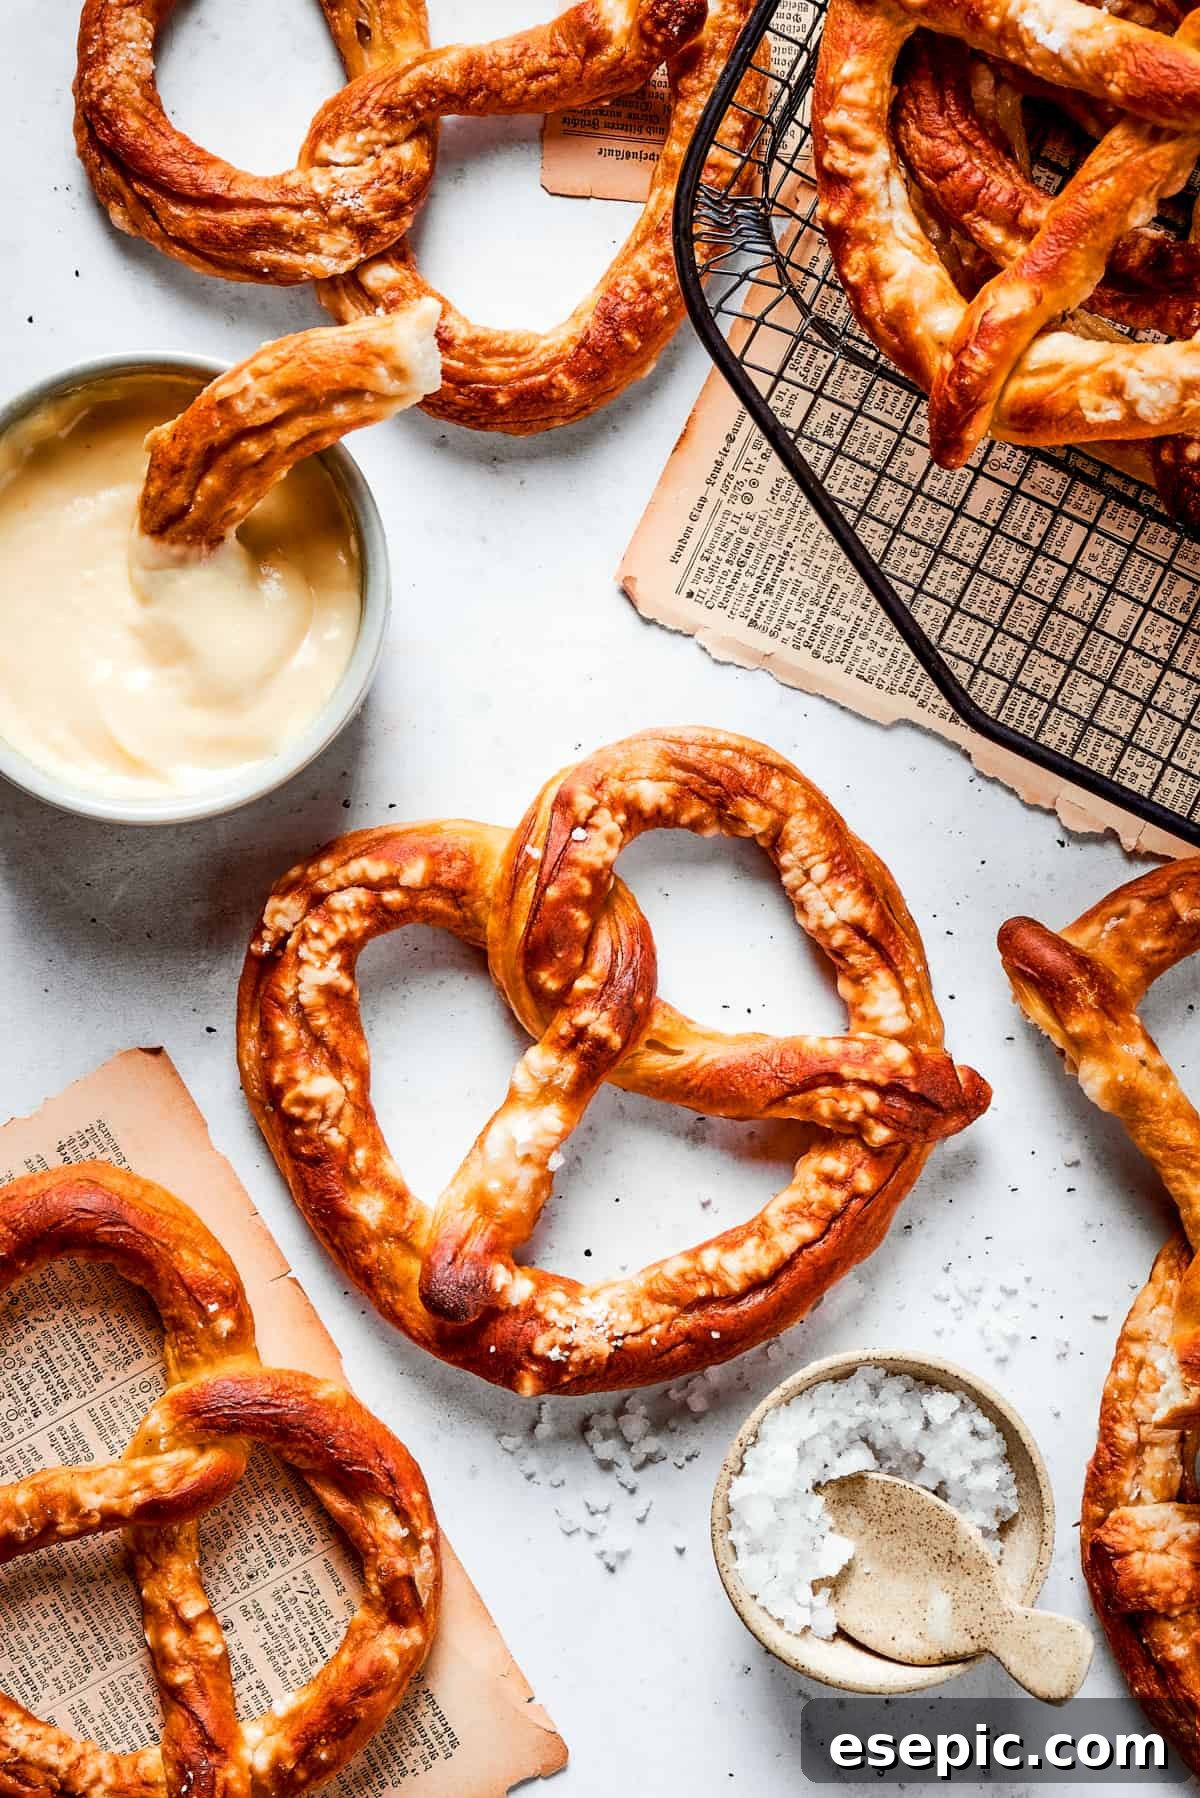
Irresistible Homemade Soft Pretzels with Creamy Cheese Dip: Your Ultimate Guide
There’s nothing quite like the comforting aroma of freshly baked bread, and when that bread takes the form of a warm, chewy soft pretzel, it’s pure magic. Forget the stale, store-bought versions – learning how to make homemade Soft Pretzels from scratch is a game-changer. These delightful, golden-brown twists boast a perfectly chewy interior and that signature slightly crisp, savory exterior, making them an unparalleled snack. And what’s a perfect soft pretzel without an equally perfect dipping companion? Our recipe elevates this classic by pairing it with an incredibly smooth, mustard-spiked cheese sauce that will have everyone reaching for more. Get ready to impress your family and friends with this surprisingly simple yet utterly satisfying treat!

Homemade soft pretzels are more than just a snack; they’re an experience. They bring a touch of bakery-fresh indulgence right into your kitchen, and the best part is, they’re far less complicated to prepare than you might imagine. This recipe is designed for home bakers of all skill levels, ensuring a rewarding journey from a simple ball of dough to a tray of warm, golden perfection. Every member of my family, from the pickiest eaters to the most seasoned foodies, absolutely adores these, making them a consistent hit for afternoon treats, party appetizers, or even a fun weekend baking project. Let’s dive into why this recipe will become a cherished favorite in your culinary repertoire.
Why This Homemade Soft Pretzel Recipe Will Become Your Favorite
We believe that cooking should be enjoyable, and the results should be nothing short of delicious. This soft pretzel recipe hits all the right notes, combining simplicity with an authentic taste experience. Here’s what makes it truly special:
- Effortless Preparation: Don’t be intimidated by yeast dough! Our method requires just about 20 minutes of active prep time to bring the pretzel dough together. You’ll work with common pantry staples like all-purpose flour, active dry yeast, milk, and olive oil, transforming them into soft, pliable dough with minimal fuss. The steps are straightforward, making this recipe perfect for a fun family activity or a relaxing baking session.
- Authentic Pretzel Flavor and Texture: The secret to that signature chewy bite and distinct pretzel taste lies in a simple yet crucial step: the baking soda bath. Before baking, each pretzel takes a quick dip in a boiling solution of water and baking soda. This alkaline bath is what creates the deep golden-brown crust, the unique malty flavor, and the wonderfully chewy texture that defines a classic soft pretzel. It’s a small step that yields a huge difference in authenticity and satisfaction.
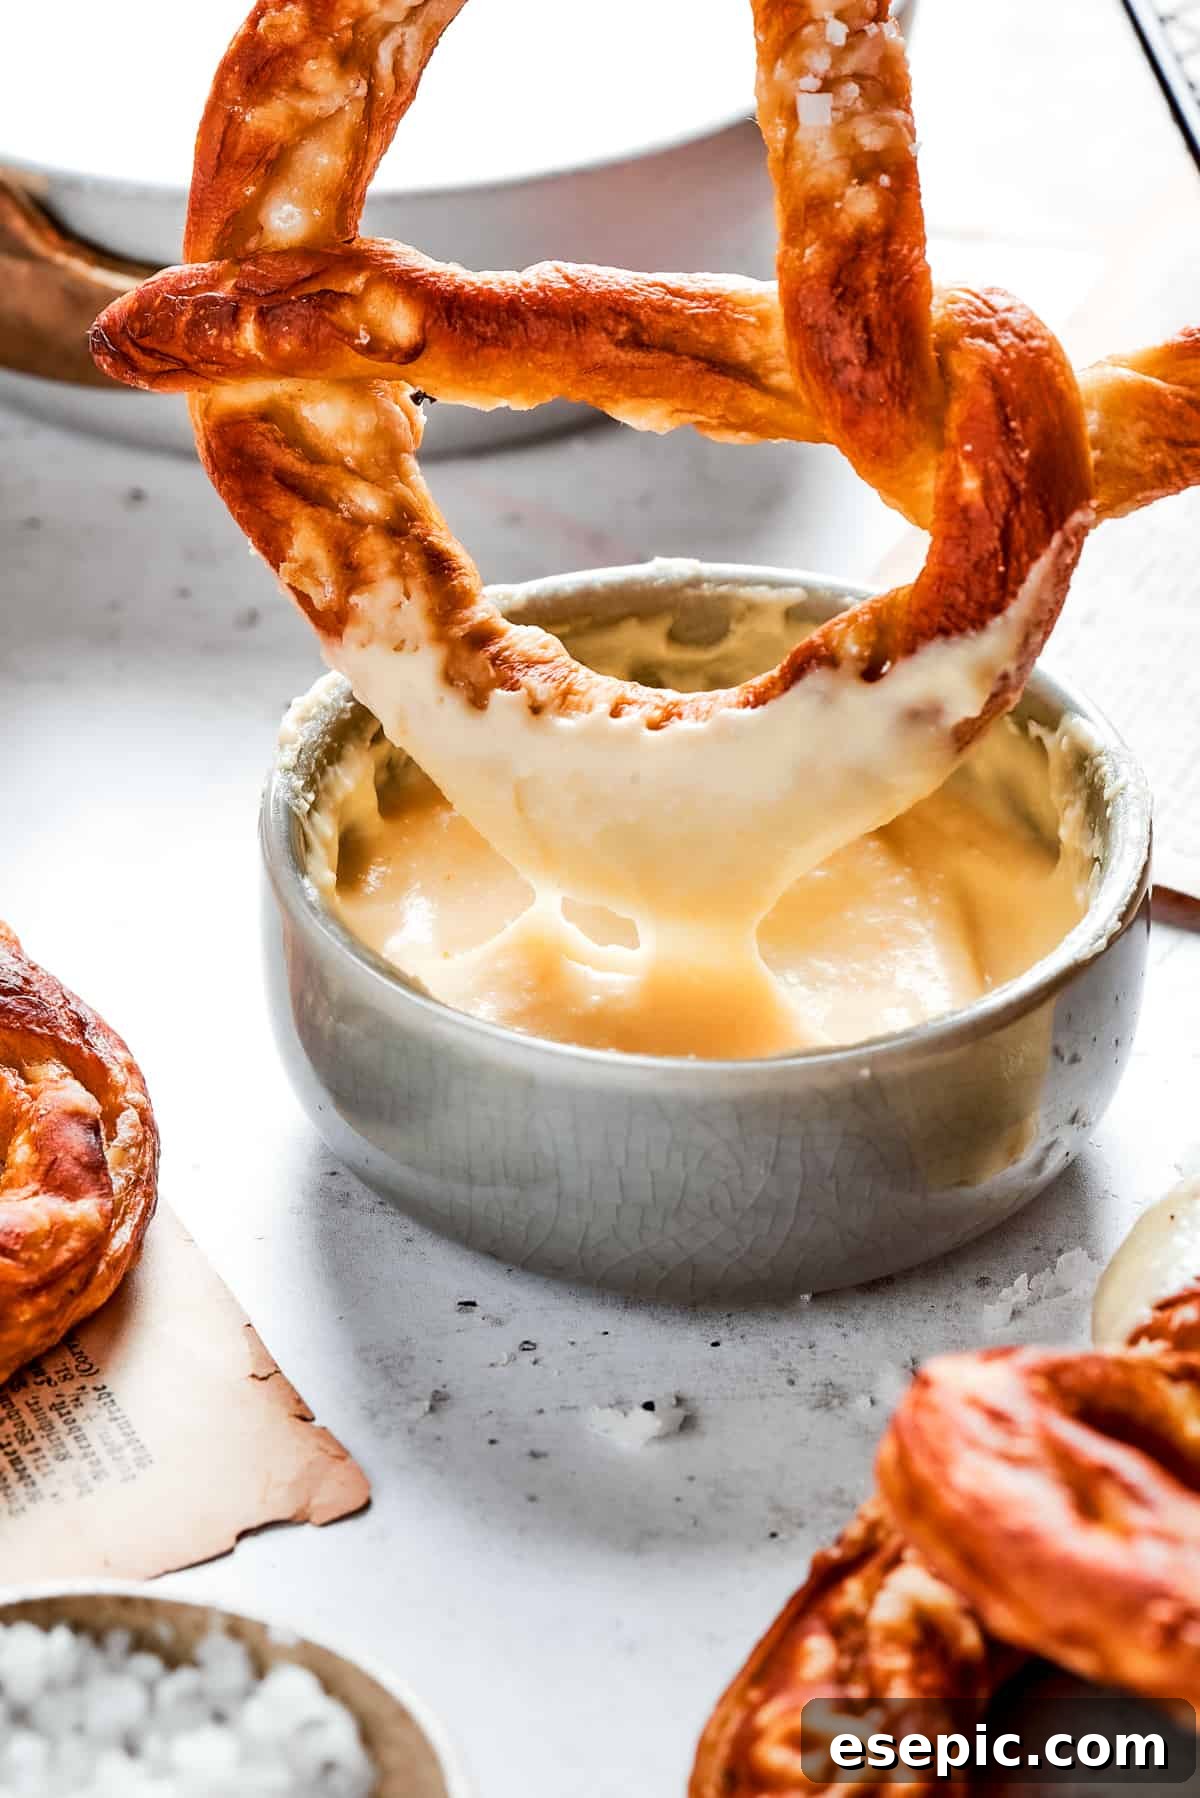
- An Irresistible Homemade Cheese Dip: While the pretzels are fantastic on their own, our homemade cheese dip is truly the star that elevates this snack to gourmet levels. This rich and creamy sauce blends the sharpness of cheddar with the nutty sweetness of Gouda, creating a complex flavor profile. A hint of cayenne pepper adds a gentle warmth, while a generous spoonful of Dijon mustard introduces a tangy, sophisticated kick. It’s a perfectly balanced, utterly addictive accompaniment that complements the savory pretzels beautifully.
Gather Your Ingredients: Essential Components for Perfect Pretzels and Dip
Successful baking begins with having all your ingredients prepped and ready. Here’s a detailed look at what you’ll need to create these fantastic soft pretzels and their accompanying luscious cheese dip.
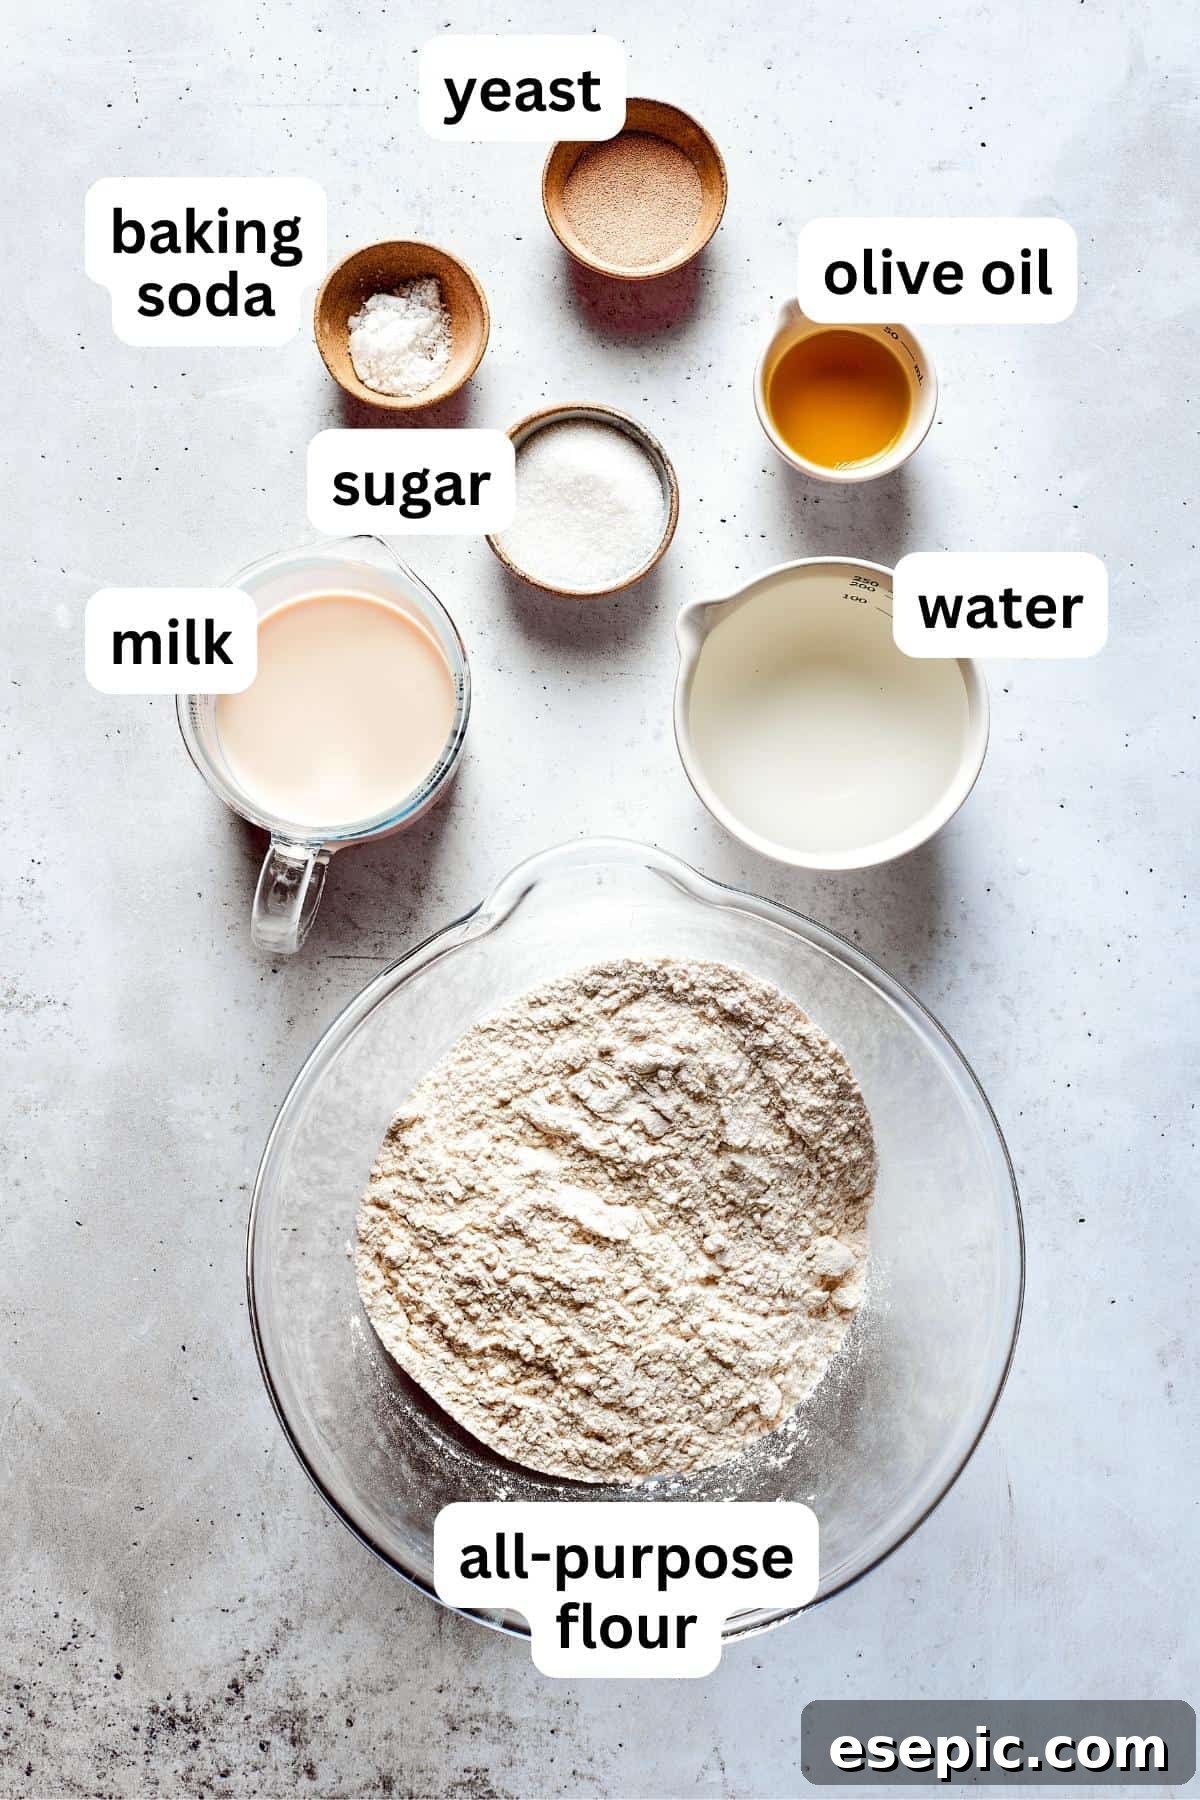
Ingredients For The Perfect Soft Pretzels
- All-Purpose Flour: The foundation of our chewy pretzel dough. Ensure it’s fresh for best results.
- Active Dry Yeast: This is crucial for the dough’s rise and light texture. Please note, this recipe specifically calls for active dry yeast, not instant yeast, which has different activation requirements.
- Granulated Sugar: A small amount of sugar helps to activate the yeast and adds a subtle sweetness that balances the savory notes of the pretzel.
- Milk: You can use either whole milk or 2% milk. Whole milk will yield a slightly richer dough, but both work beautifully. The milk also contributes to a softer crumb.
- Water: Used in conjunction with milk to create the ideal liquid content for the dough.
- Olive Oil: I recommend using extra virgin olive oil for its rich flavor and ability to make the dough more pliable and tender.
- Baking Soda Bath Components: Simply water and baking soda. This is the magical solution that gives pretzels their distinctive color, flavor, and texture.
- Topping: Coarse kosher salt or sea salt is essential for that classic pretzel finish. The large crystals provide a satisfying crunch and bursts of savory flavor.
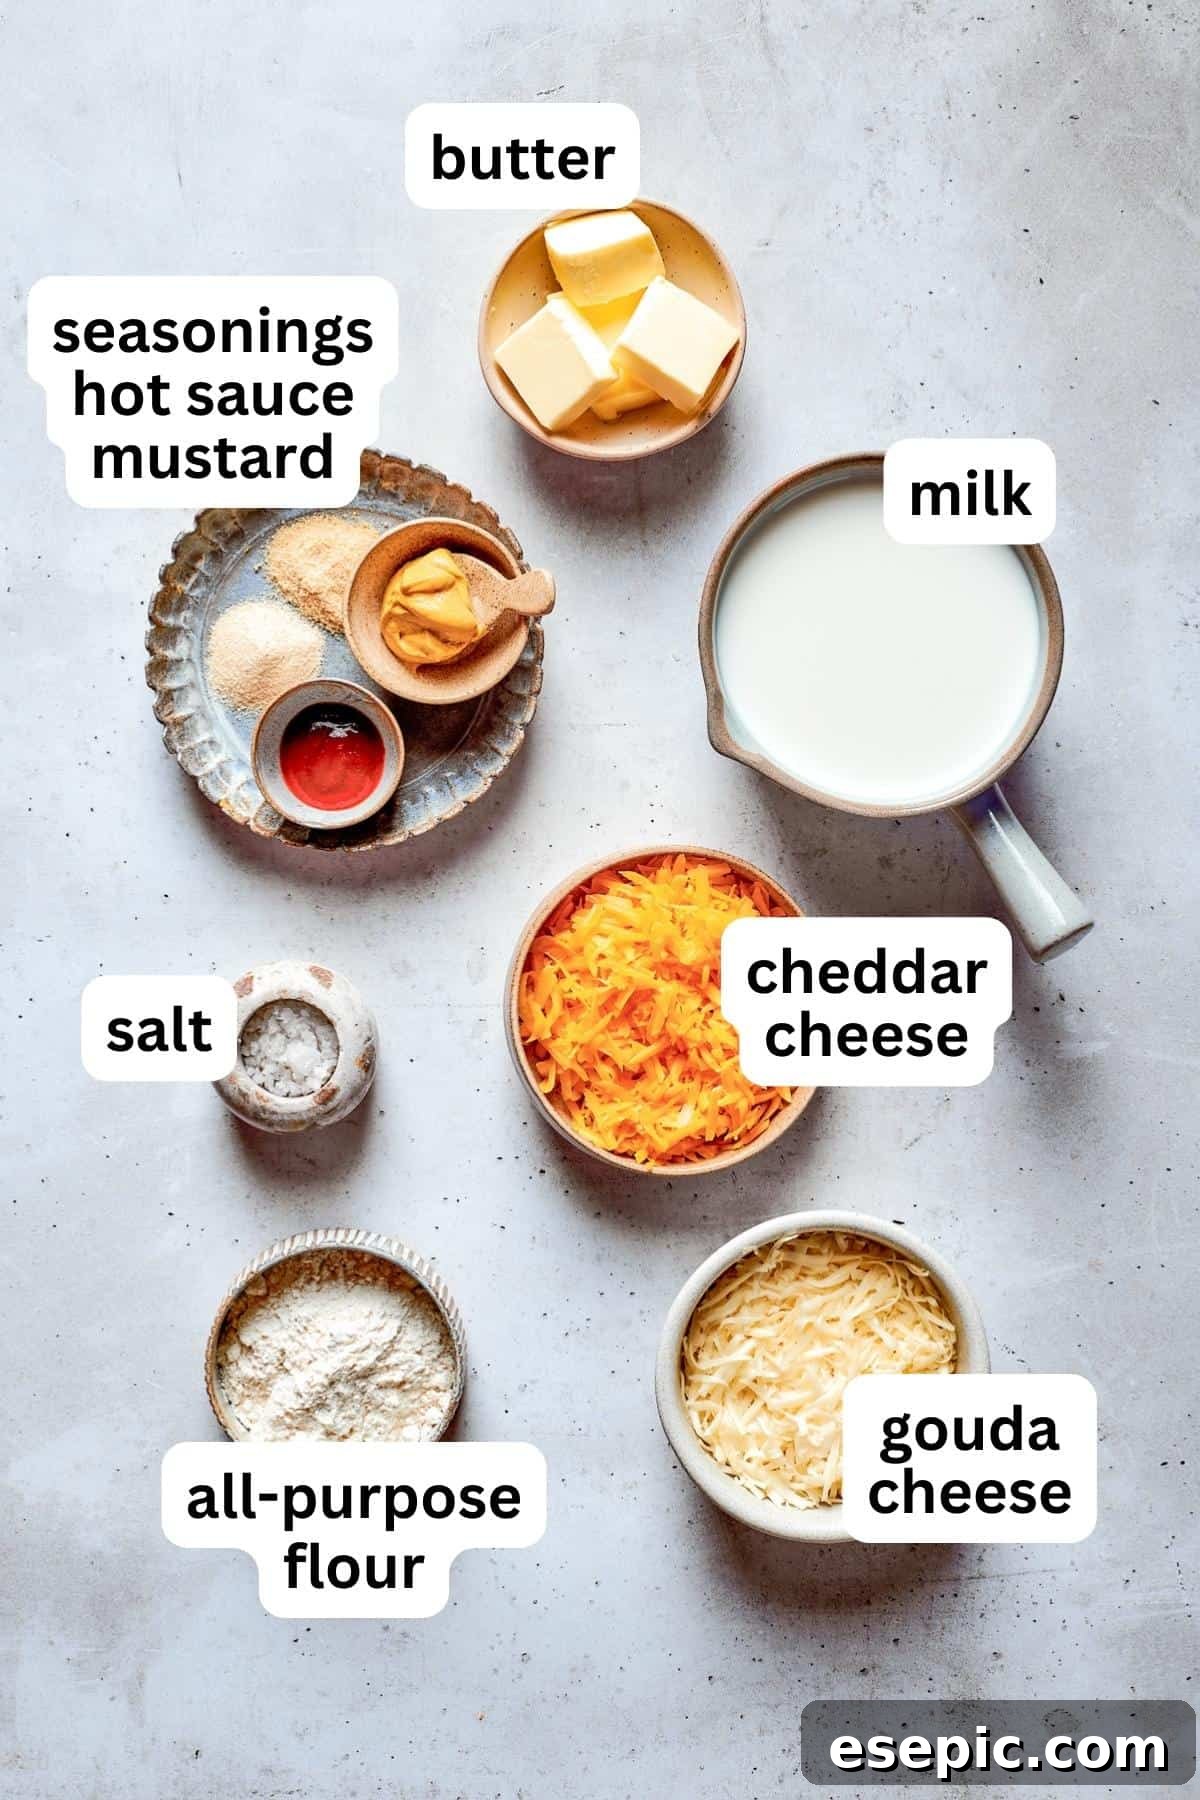
Ingredients For The Irresistible Pretzel Dip
- Unsalted Butter: The base for our roux, providing richness and flavor. Using unsalted butter allows you to control the overall saltiness of the dip.
- All-Purpose Flour: Combined with butter to create a roux, which thickens our sauce to a creamy consistency.
- Salt: Essential for seasoning and enhancing the flavors of the cheese.
- Whole Milk: For a truly decadent and rich dip, whole milk is recommended. Its higher fat content contributes to a smoother, more luxurious sauce.
- Cheddar Cheese: Sharp cheddar is my go-to for this sauce, offering a robust and tangy flavor that stands out. Freshly shredded cheese melts much better than pre-shredded.
- Gouda Cheese: Adds a wonderful creamy texture and a slightly sweet, nutty flavor that complements the sharpness of the cheddar beautifully. Again, fresh is best.
- Dried Garlic Powder and Onion Powder: These provide aromatic depth and savory complexity without adding moisture.
- Dijon Mustard: A key ingredient that adds a tangy, slightly pungent kick, cutting through the richness of the cheese and elevating the overall flavor.
- Hot Sauce: A dash of your favorite hot sauce is optional but highly recommended for a subtle warmth and extra layer of flavor. Omit if you prefer a milder dip.
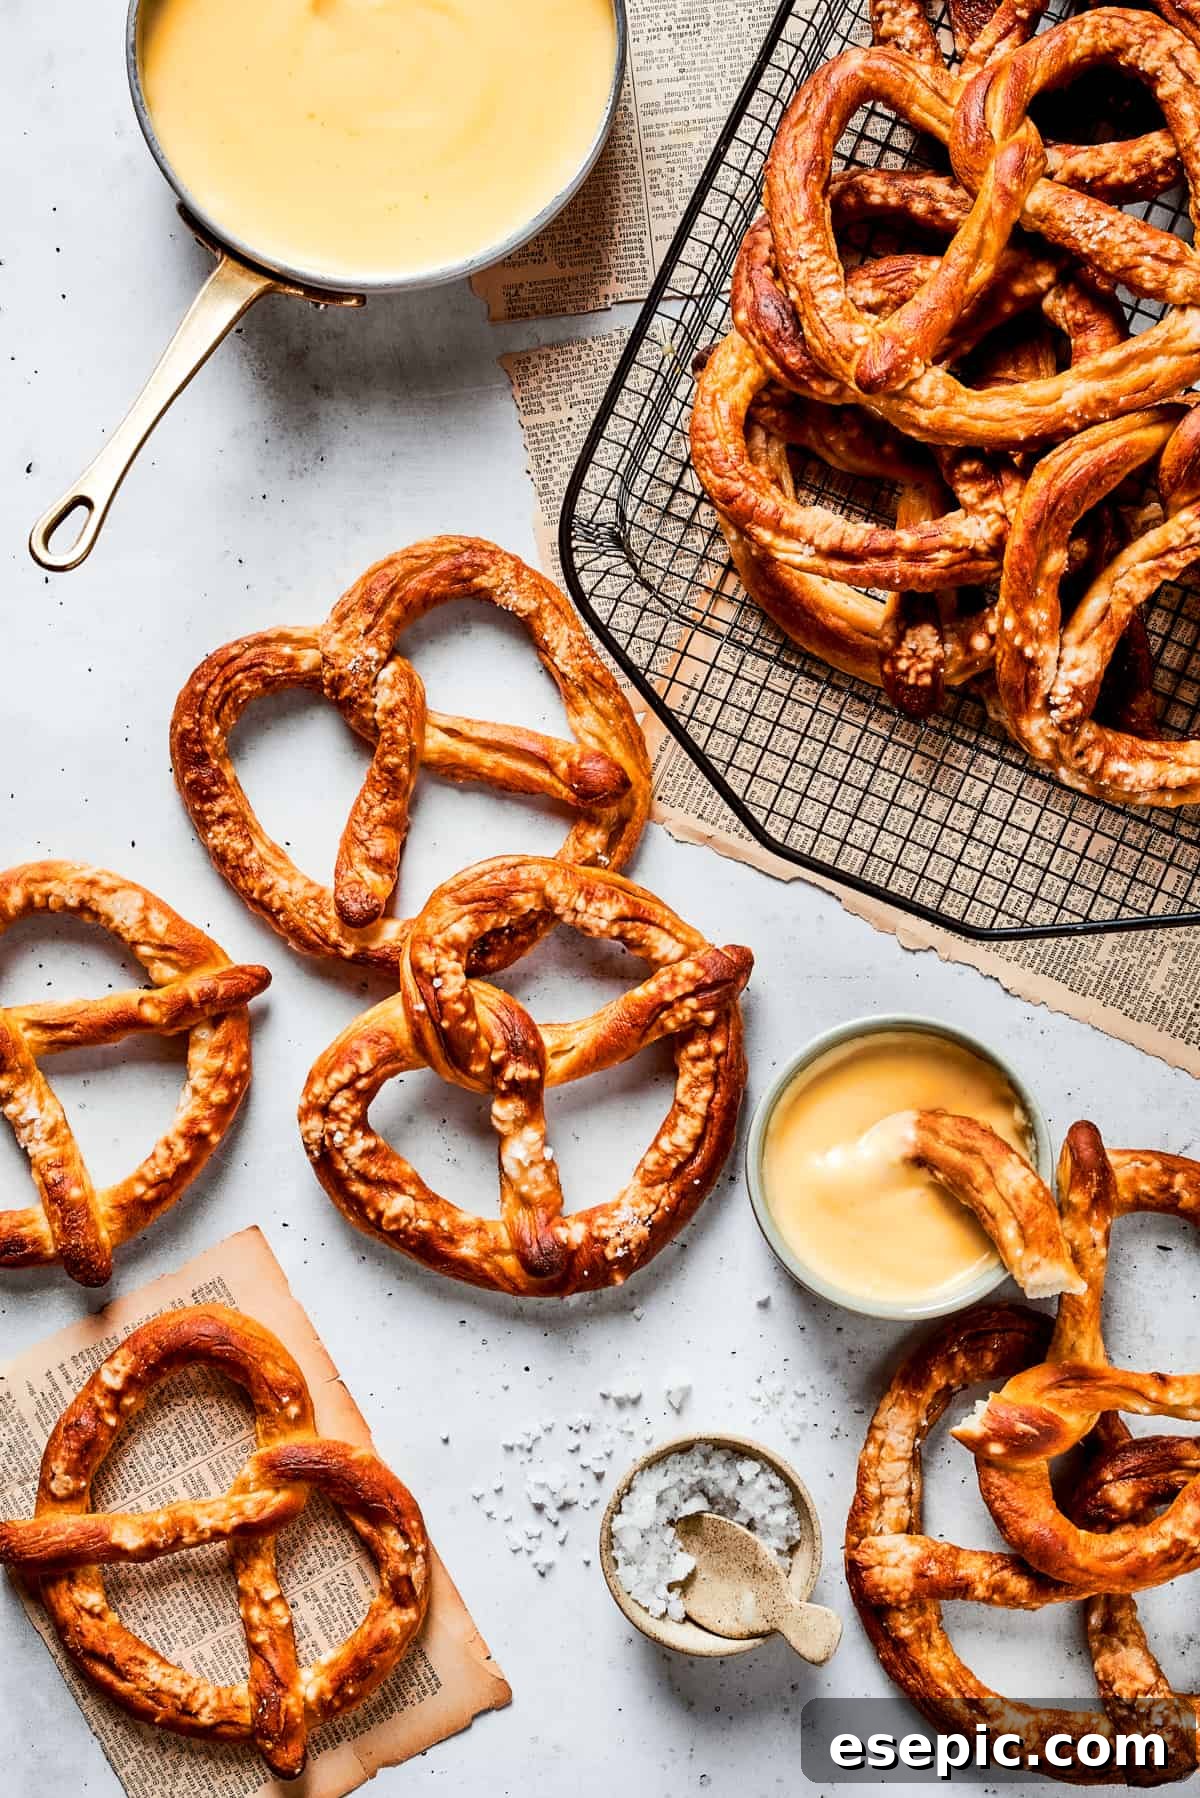
Step-by-Step Guide: Crafting Your Soft Pretzels and Creamy Dip
Creating these delectable soft pretzels and their accompanying dip is a straightforward process when you follow these easy steps. We’ll guide you through each stage, from activating the yeast to the final savory stir of the cheese sauce.
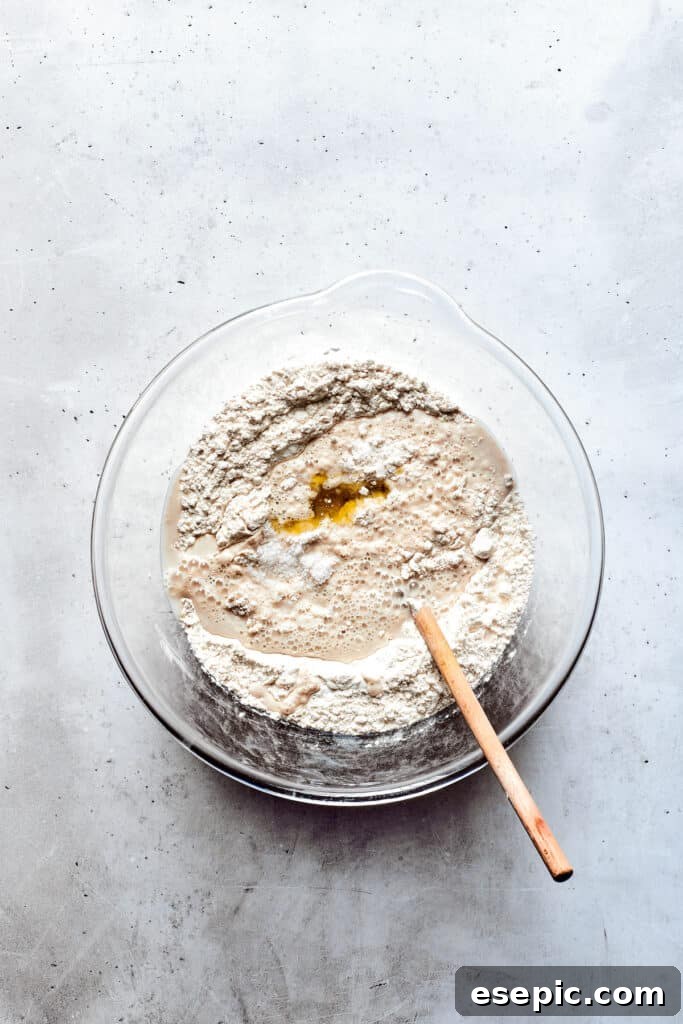
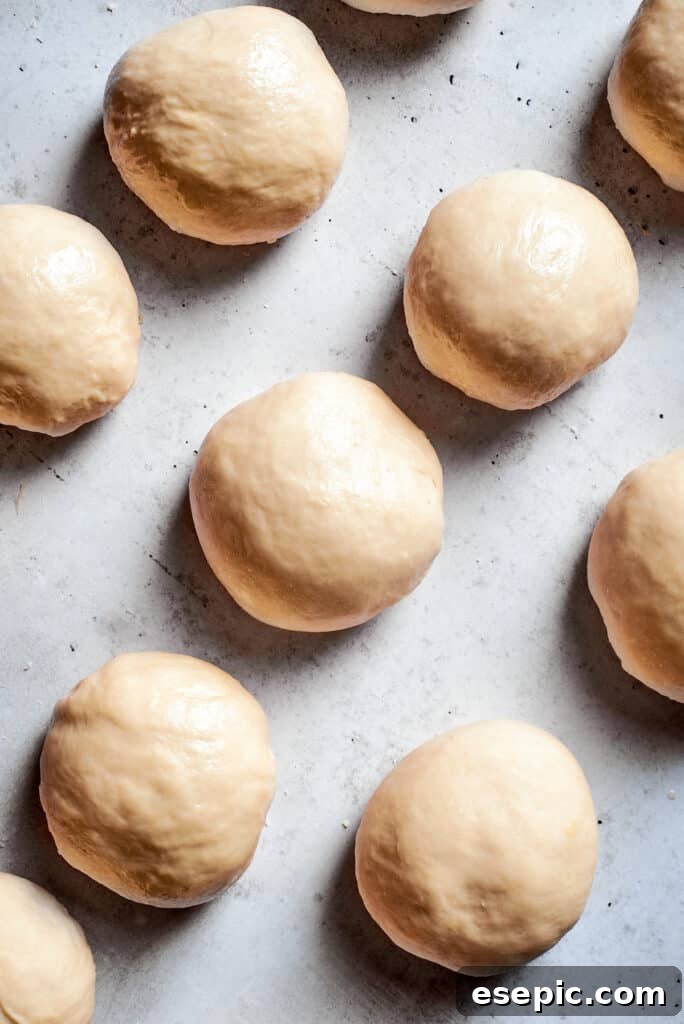
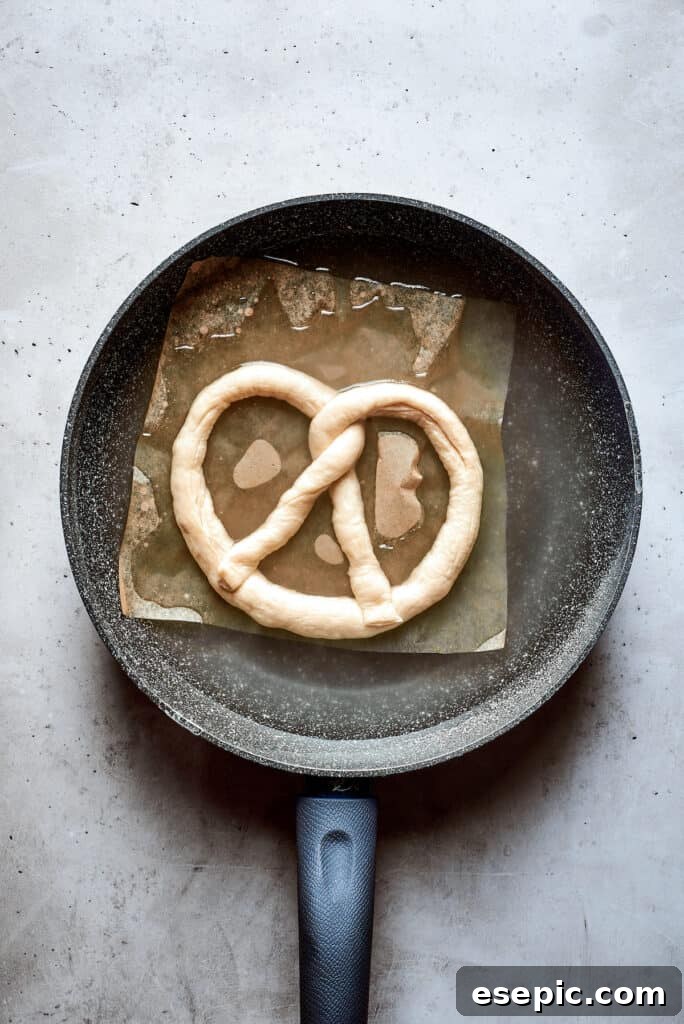
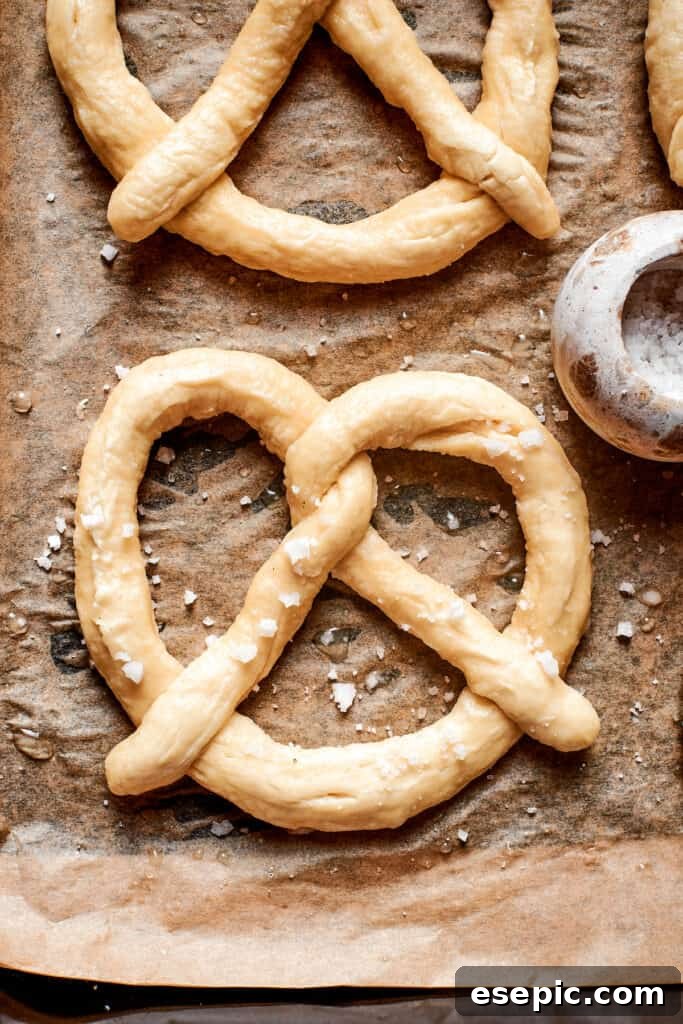
- Activate the Yeast (Proofing): Begin by gently warming the milk and water in a small saucepan over low heat until it reaches approximately 110°F (43°C). This temperature is ideal for activating active dry yeast without killing it. Once warm, remove from heat.
- Form the Dough: In a large mixing bowl, combine the active dry yeast, granulated sugar, and all-purpose flour. Pour the warm milk and water mixture over the dry ingredients, then add the olive oil. Stir everything together with a sturdy spoon or a dough whisk until a shaggy dough begins to form.
- Knead for Elasticity: Turn the dough out onto a lightly floured surface. Knead the dough for about 8-10 minutes, or until it becomes smooth, elastic, and no longer sticky. This process develops the gluten, which is essential for that perfect chewy pretzel texture.
- First Rise (Proofing): Lightly grease a clean bowl with olive oil. Place the kneaded dough in the bowl, turning it once to coat. Cover the bowl with a clean kitchen towel or plastic wrap and let it rise in a warm place for about 1 hour, or until the dough has visibly doubled in size.
- Prepare for Baking: While the dough rises, preheat your oven to 450°F (230°C) and line a large baking sheet with parchment paper.
- Prepare the Baking Soda Bath: In a large, wide pot, bring 1 gallon of water to a rolling boil. Carefully stir in ½ cup of baking soda. This creates the alkaline solution crucial for pretzel browning and flavor.
- Shape the Pretzels: Once the dough has risen, gently punch it down to release the air. Divide the dough into 12 equal portions. Roll each portion into a long rope, about 18-20 inches long and ½ inch thick. Shape each rope into a classic pretzel form (see “How to Shape Pretzels” below for detailed instructions).
- Boil the Pretzels: Working in batches (typically 2-3 at a time) to avoid overcrowding, carefully dip each shaped pretzel into the boiling baking soda bath for about 30 seconds. Use a slotted spoon to flip them halfway through. The pretzels will puff up slightly. Remove them, allowing excess water to drain, and place them on the prepared baking sheet.
- Season and Bake: Immediately after boiling and placing on the baking sheet, sprinkle coarse kosher or sea salt generously on top of each pretzel. Bake in the preheated oven for 12-15 minutes, or until the pretzels are a deep golden brown and look deliciously inviting.
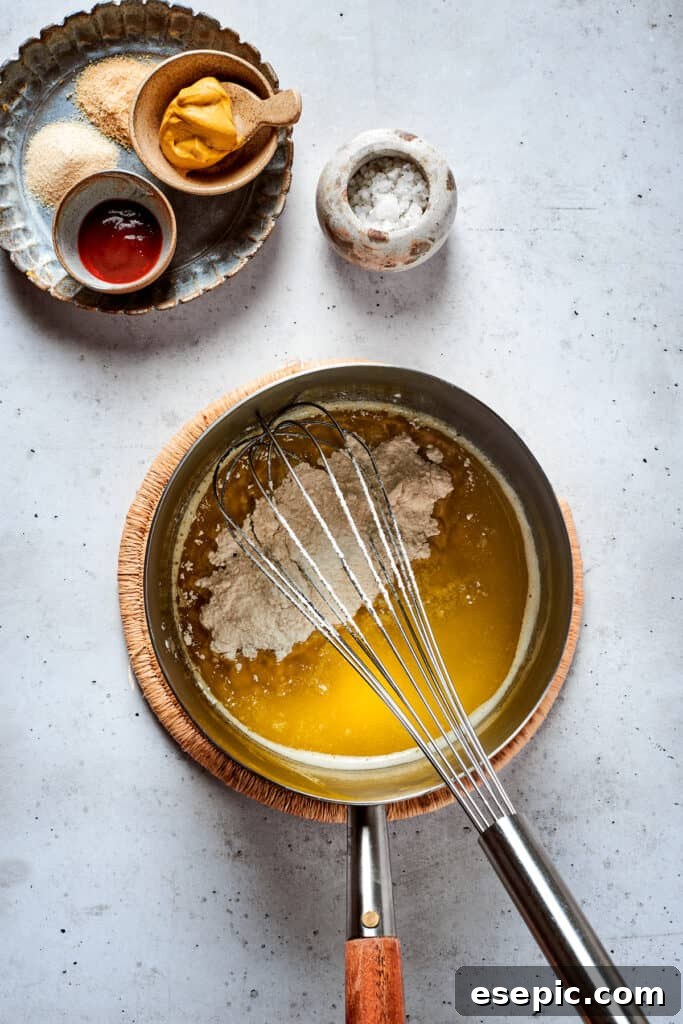
- Begin the Pretzel Dip: While the pretzels are baking, start on your dip. In a saucepan over medium heat, melt the unsalted butter. Add the all-purpose flour and cook, stirring constantly, for 1-2 minutes to create a roux. This step cooks out the raw flour taste.
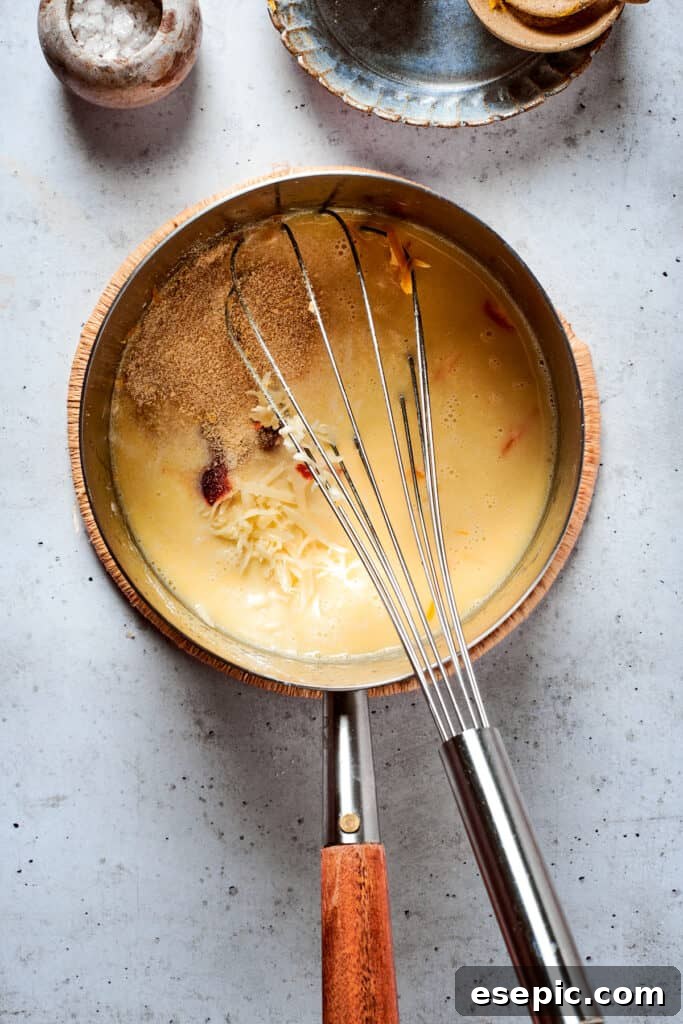
- Thicken the Sauce: Gradually whisk in the whole milk to the roux. Continue to cook and whisk the mixture constantly. It will thicken into a smooth, creamy sauce over about 4-5 minutes.
- Add the Cheeses and Seasonings: Remove the saucepan from the heat. Stir in the shredded cheddar and Gouda cheeses until they are completely melted and the sauce is smooth and luxurious. Stir in the garlic powder and onion powder.
- Finish the Dip: Finally, stir in the Dijon mustard and hot sauce (if using). Taste and adjust seasoning as needed.
- Serve Warm: Serve the creamy, warm pretzel dip immediately with your freshly baked soft pretzels. Enjoy the perfect harmony of flavors and textures!
Mastering the Art of Pretzel Shaping
Shaping pretzels is a fun and iconic part of the process. While it might seem intricate, it’s quite simple once you get the hang of it. You’ll be forming 12 individual pretzels from your dough. Here’s how to create that classic twist:
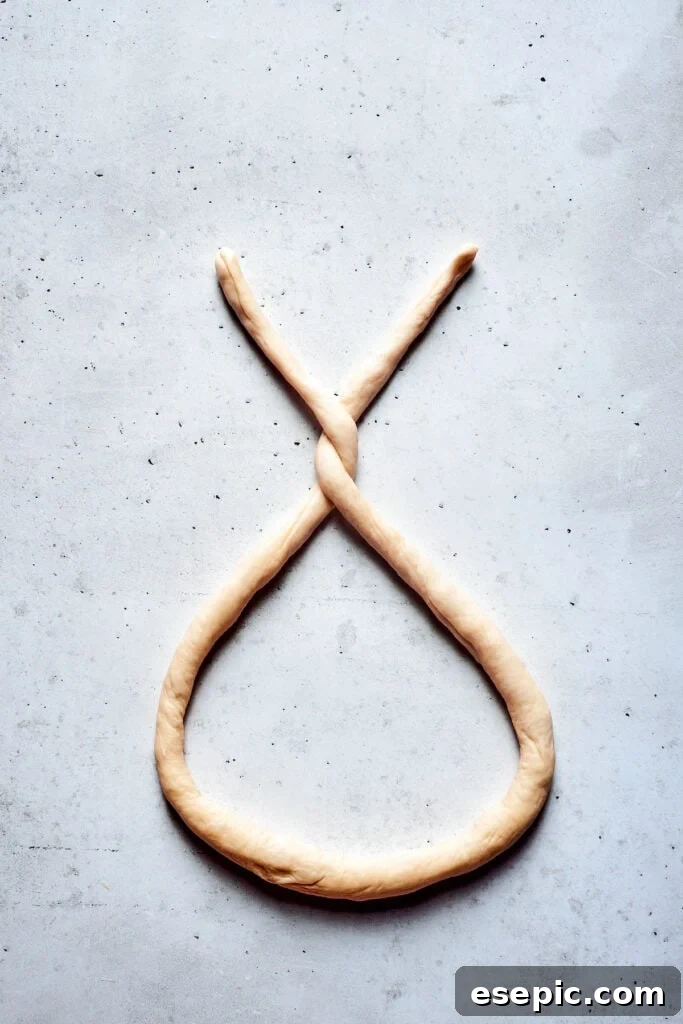
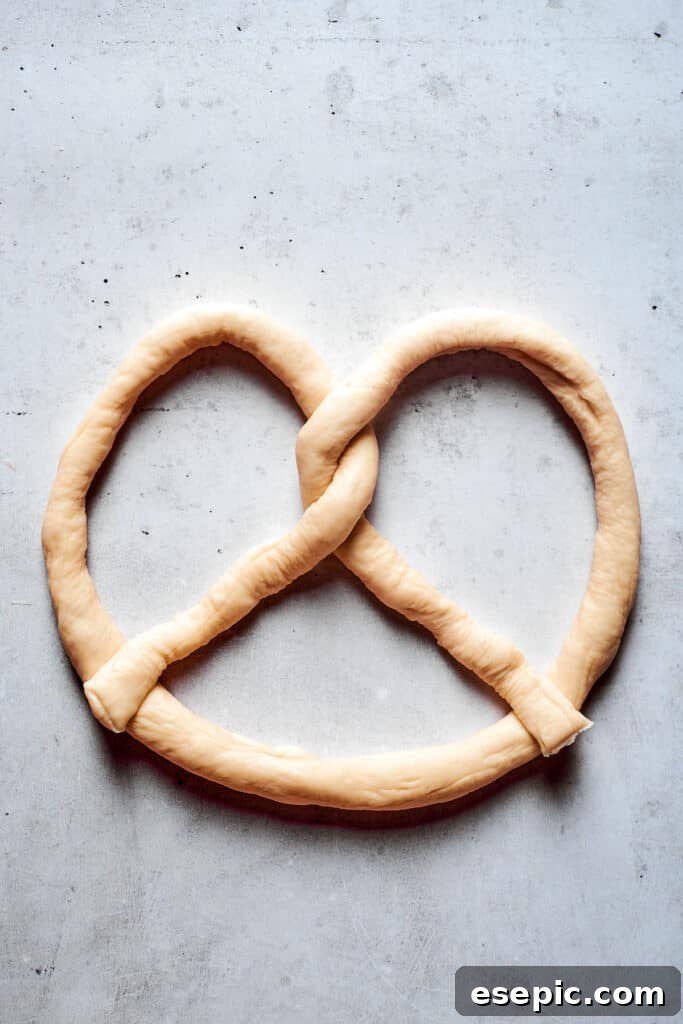
Once you have your 12 portions of dough, take one piece and roll it gently on your lightly floured surface. You want to create a long, thin rope, approximately 18-20 inches (45-50 cm) in length and about ½ inch (1.2 cm) in thickness. The key is to keep the thickness as even as possible for uniform baking.
Next, form this rope into a “U” or horseshoe shape on your countertop. Take the two ends of the “U” and cross them over each other twice, creating a tight twist. After twisting, bring those twisted ends down and firmly press them into the bottom curve of the “U.” This secures the pretzel shape and ensures it holds together during the boiling and baking process. Repeat with the remaining dough portions, and you’ll have a tray of beautifully shaped pretzels ready for their bath!
Expert Tips & Creative Variations for Your Soft Pretzels
Achieving pretzel perfection is all about a few key techniques and knowing how to adapt the recipe to your taste. Here are some invaluable tips and exciting variations to explore:
- Ensuring a Proper Dough Rise: The first rise (proofing) is crucial for a light and airy interior. Your dough should roughly double in size. If your kitchen is cool, finding a warm spot can be tricky. A great trick is to preheat your oven to its lowest setting (around 110°F or 43°C), then turn it OFF. Place the covered bowl of dough inside the slightly warm, turned-off oven to proof. This creates an ideal, consistent environment for yeast activation.
- Make Ahead for Convenience: This recipe is fantastic for preparing in advance. You can make the dough up to 24 hours ahead of time. After the initial rise, simply place the dough in an airtight container in the refrigerator. When you’re ready to bake, you can shape the soft pretzels directly from the chilled dough. However, for the best results, allow the shaped pretzels to sit at room temperature for about 1 hour to warm up slightly before they go into the baking soda bath. This helps them achieve a better texture.
- Embrace Sweet Variations: While classic pretzels are savory, a sweet version is equally delightful. Instead of coarse salt, combine cinnamon and granulated sugar for a sweet topping. Alternatively, after baking, you can brush the warm pretzels with melted butter and then sprinkle with cinnamon sugar, or drizzle a little honey, maple syrup, or a simple glaze made from powdered sugar and milk over them.
- The Importance of the Baking Soda Bath: I cannot stress enough how vital the baking soda bath is for that characteristic chewy pretzel texture and deep mahogany crust. It’s the step that truly distinguishes a pretzel. However, if you are genuinely short on time and need a quicker option, you *can* skip this step. If you opt to bake them without the bath, brush the tops of the shaped pretzels with a little beaten egg (an egg wash) before placing them in the oven. This will still give them a nice golden color, but the texture will be closer to a breadstick than a traditional pretzel.
- Experiment with Toppings: Beyond coarse salt, consider other savory toppings. Everything bagel seasoning, grated Parmesan cheese, garlic powder, or even a sprinkle of poppy seeds or sesame seeds can add a unique twist.
- Flavor Your Dough: For an extra layer of flavor, try incorporating dried herbs like rosemary or thyme into the dough, or a teaspoon of garlic powder.
Beyond the Dip: Creative Serving Suggestions
While our mustard-spiked cheese dip is a match made in heaven for these homemade soft pretzels, they’re incredibly versatile and pair well with a variety of dishes. Here are some ideas to inspire your next meal or snack time:
- Comforting Soups: Pretzels are fantastic for dipping into hearty soups. Imagine dunking a warm pretzel into a rich Loaded Baked Potato Soup, a deeply flavorful French Onion Soup, or a bright and aromatic Roasted Tomato Soup. The chewy texture is perfect for soaking up every last drop.
- Unique Side Dishes: Serve them alongside fresh salads for a satisfying crunch. They would be an excellent accompaniment to my crisp Asian Cabbage Slaw or even as a unique carb component with a robust Big Mac Salad.
- Heartier Mains: Pretzels can also stand proudly next to more substantial meals. Try them with savory Grilled Chicken Shawarma Skewers or as a delightful alternative to cornbread with a spicy bowl of Chili Con Carne.
- Other Appetizers & Bites: Round out a snack platter with other crowd-pleasing bites. They’re wonderful with creamy Mac and Cheese Bites or crispy Parmesan Crusted Potatoes.
- Sweet Options: As mentioned in variations, sweet pretzels are also divine! Serve them with chocolate sauce, caramel dip, or even a simple cream cheese glaze for a dessert-like treat.
Storing & Reheating Your Homemade Pretzels
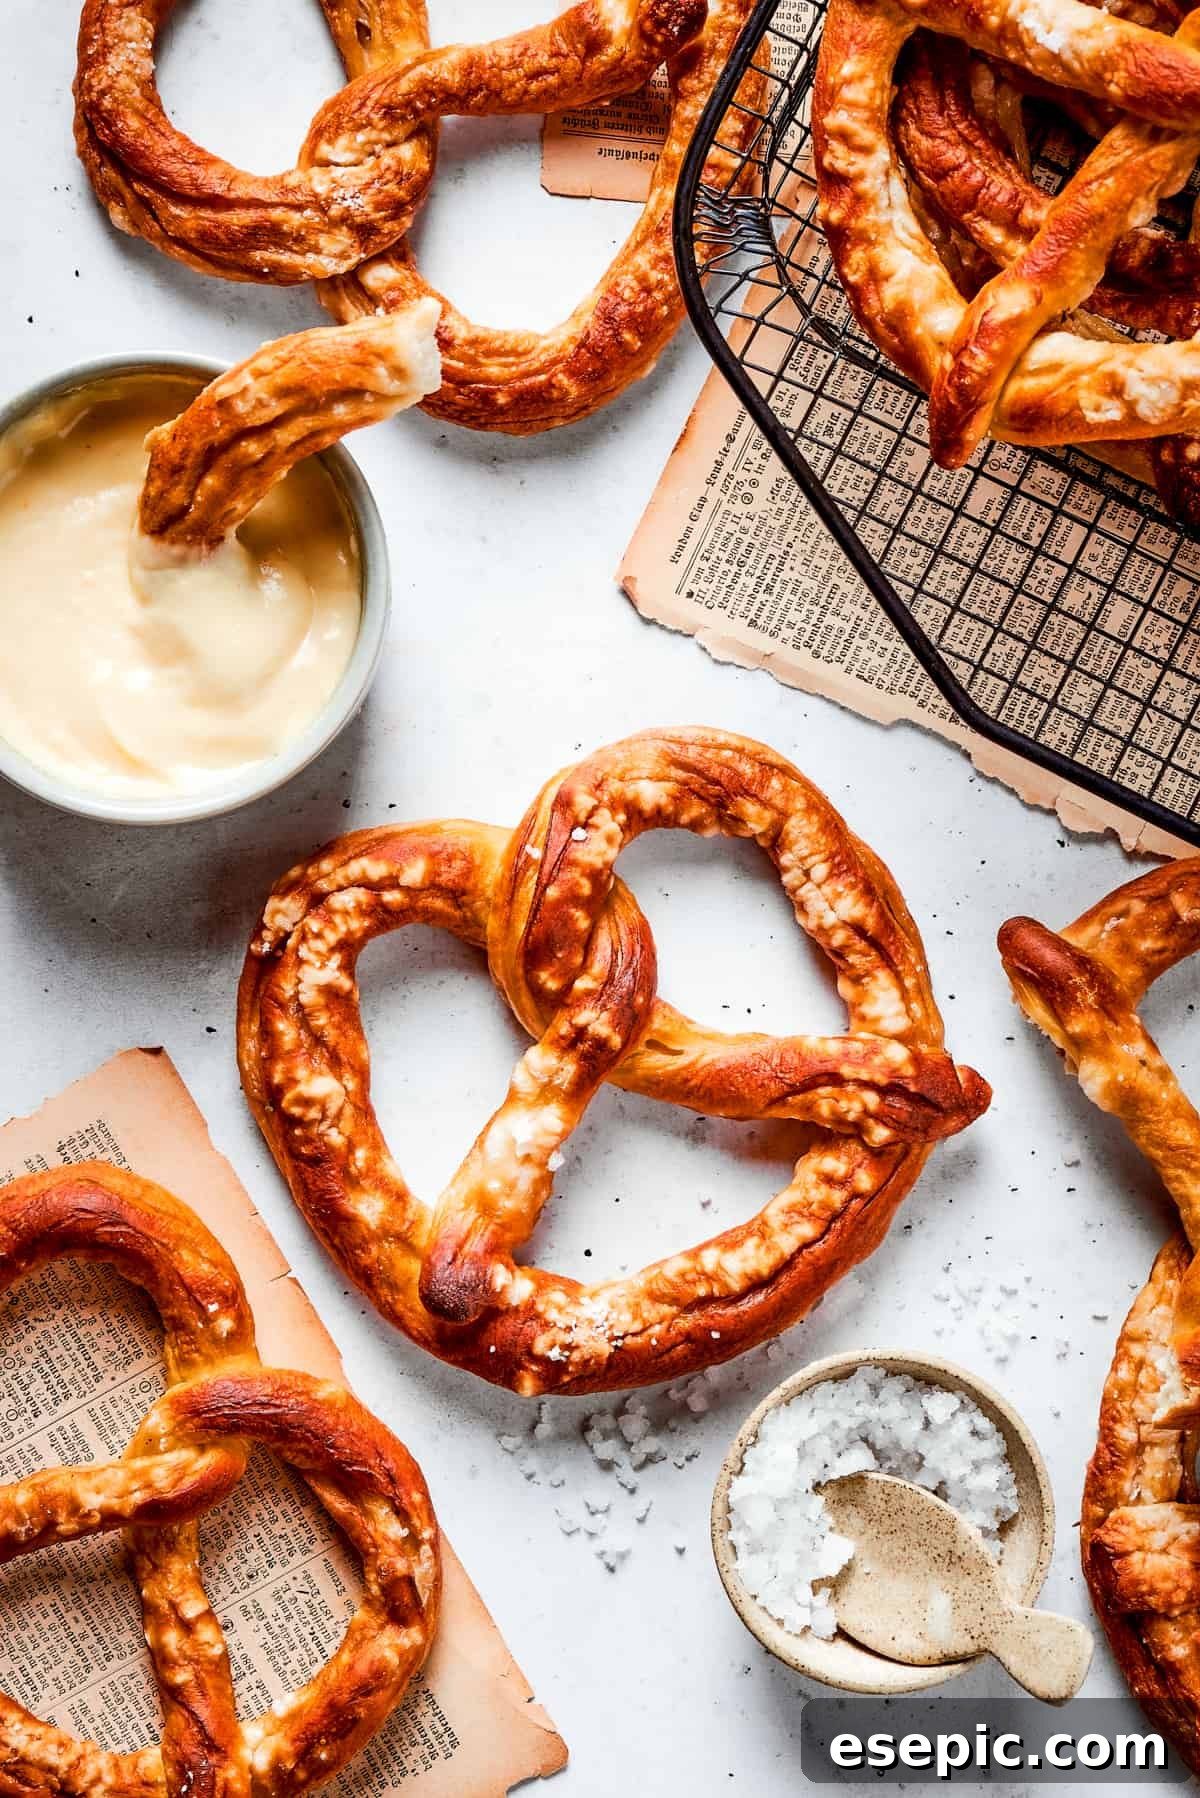
While freshly baked pretzels are undoubtedly the best, you can certainly enjoy your homemade soft pretzels for a few days after baking, or even freeze them for longer storage. Proper storage and reheating will ensure they maintain their deliciousness.
- Countertop Storage (Short Term): Once completely cooled, place your leftover soft pretzels in an airtight container or a resealable plastic bag. They will stay fresh and soft at room temperature on your kitchen counter for up to 3 days.
- Reheating for Freshness:
- Microwave: For a quick reheat, place a pretzel in the microwave for about 10-20 seconds. Be careful not to overcook, as this can make them tough.
- Oven: For a crispier exterior, place pretzels on a baking sheet and reheat them in a preheated oven at 350°F (175°C) for approximately 5 minutes, or until warmed through.
- Freezing for Long-Term Storage: To freeze baked pretzels, ensure they are completely cooled. Place them in a single layer on a baking sheet and freeze until solid (this prevents them from sticking together). Once solid, transfer the frozen pretzels to a freezer-safe, sealable bag or an airtight container. If stacking, place a piece of parchment paper between each pretzel to prevent sticking. They can be stored in the freezer for up to 3 months.
- Reheating from Frozen: No need to thaw! You can reheat frozen pretzels directly from the freezer. Place them on a baking sheet and bake in a preheated oven at 350°F (175°C) for about 15-20 minutes, or until they are thoroughly heated and lightly crisped. Alternatively, microwave frozen pretzels in 30-second intervals until warm, though the oven method yields a better texture.
More Easy Snack Recipes to Love
If you enjoy making delicious snacks at home, here are a few other easy recipes that are sure to become family favorites:
- Crispy Homemade Bagel Chips
- Irresistible Chili Cheese Fries
- Sweet and Creamy Fruit Sando
- Flavorful Garlic Fries

Pin
Soft Pretzels with Pretzel Dip
Ingredients
For the Soft Pretzels
- 4½ cups all-purpose flour
- 2¼ teaspoons active dry yeast
- 3 tablespoons granulated sugar
- 1½ cups milk
- ½ cup water
- 2 tablespoons olive oil
For the Baking Soda Bath
- 1 gallon water
- ½ cup baking soda
For the Topping
- coarse kosher or sea salt for topping
For the Pretzel Dip
- 3 tablespoons unsalted butter
- 3 tablespoons all-purpose flour
- 1 teaspoon salt
- 2 cups whole milk
- 1 cup cheddar cheese,, shredded
- 1 cup gouda Cheese,, shredded
- ½ teaspoon garlic powder
- ½ teaspoon onion powder
- 1 teaspoon Dijon mustard
- 1 teaspoon hot sauce
Instructions
Soft Pretzels
-
In a small saucepan, warm the milk and water over low heat until it reaches around 110°F (43°C). Use a kitchen thermometer to ensure accuracy. Remove from heat.
-
In a large mixing bowl, combine the active dry yeast and granulated sugar with all-purpose flour. Pour the warm milk and water mixture over it, add olive oil and stir with a sturdy spoon or dough whisk until a shaggy dough forms.
-
Knead the dough on a lightly floured surface for about 10 minutes until it becomes smooth, elastic, and no longer sticky. The dough should spring back when lightly poked.
-
Place the dough in a greased bowl, turning to coat. Cover it with a clean kitchen towel or plastic wrap and let it rise in a warm place for about 1 hour or until it has doubled in size.
-
While the dough is rising, preheat your oven to 450°F (230°C). Line a baking sheet with parchment paper.
-
In a large pot, bring 1 gallon of water to a rolling boil over high heat. Carefully add the ½ cup of baking soda to create the pretzel bath.
-
Gently punch down the risen dough and divide it into 12 equal portions. Roll each portion into a long rope (18-20 inches) and shape it into a classic pretzel.
-
Carefully dip each pretzel into the boiling baking soda water for about 30 seconds, using a slotted spoon to turn once. Remove, drain excess water, and place on the prepared baking sheet. Work in batches to avoid overcrowding.
-
Generously sprinkle coarse kosher or sea salt on top of each pretzel immediately after its bath.
-
Bake the pretzels in the preheated oven for 12-15 minutes or until they are a beautiful golden brown color.
Pretzel Dip
-
In a separate saucepan over medium heat, melt the unsalted butter. Add the flour and cook, stirring constantly, for 1-2 minutes to create a smooth roux.
-
Gradually whisk in the whole milk. Continue to cook and whisk until the mixture thickens to a smooth, creamy sauce, about 4-5 minutes.
-
Remove from heat. Stir in the shredded Cheddar and Gouda cheeses until they are fully melted and the sauce is smooth. Incorporate the garlic powder and onion powder.
-
Finally, stir in the Dijon mustard and hot sauce (if using) until well combined.
-
Serve the pretzel dip warm with the freshly baked soft pretzels.
Equipment
-
Measuring Cups and Spoons
-
Saucepan
-
Mixing Bowls
-
Baking Sheet
Notes
- To shape the pretzels, roll each piece of dough into a rope about 18-20 inches long. Form it into a “u” or horseshoe shape, twist the ends together twice, then press them firmly into the bottom of the “u” to secure.
- For optimal dough rise, ensure your dough doubles in size. If your kitchen is cool, preheat your oven to 110°F (43°C), turn it off, and place the covered bowl of dough inside to proof in a warm environment.
- Prepare the dough in advance by storing it in an airtight container in the fridge for up to 24 hours after its first rise. Shape the cold dough, then let the shaped pretzels sit at room temperature for about an hour before boiling and baking to warm up.
- To make sweet pretzels, substitute coarse salt with a cinnamon-sugar mixture as a topping, or drizzle honey/glaze over the baked pretzels.
- If you’re short on time and skip the baking soda bath, brush the tops of the shaped pretzels with a beaten egg (egg wash) before baking to achieve a golden-brown crust. Note that the texture will be less traditional.
- Store baked pretzels in an airtight container at room temperature for up to 3 days. They can also be frozen for up to 3 months.
- Reheat stored pretzels in the microwave for 10-20 seconds or in an oven at 350°F (175°C) for 5 minutes. Frozen pretzels can be reheated directly from frozen in the oven for 15-20 minutes.
Nutrition
Nutritional info is an estimate and provided as courtesy. Values may vary according to the ingredients and tools used. Please use your preferred nutritional calculator for more detailed info.
Did you make a recipe? Leave a rating
Frequently Asked Questions About Homemade Soft Pretzels
Making pretzels at home might bring up a few questions. Here are answers to some common queries to help you on your baking journey:
- Why is a baking soda bath necessary for pretzels? The baking soda bath is crucial because it creates an alkaline environment on the surface of the dough. This pH change promotes the Maillard reaction during baking, which is responsible for the pretzel’s signature dark, mahogany crust, distinctive malty flavor, and wonderfully chewy texture. Without it, your pretzels would taste more like regular breadsticks.
- Can I use instant yeast instead of active dry yeast? While it’s possible, this recipe is specifically formulated for active dry yeast, which needs to be proofed in warm liquid. If you only have instant yeast, you can mix it directly with the dry ingredients without proofing, and then add the warm milk and water. However, for best results and consistency with this recipe, active dry yeast is recommended.
- My dough isn’t rising. What went wrong? Several factors can inhibit yeast activity. The most common issues are: 1) The liquid (milk and water) was too hot and killed the yeast, or too cold and didn’t activate it. Aim for 105-115°F (40-46°C). 2) The yeast is old or expired. Always check the expiration date. 3) Your kitchen is too cold. Find a warmer spot for proofing, like a turned-off oven that was briefly warmed.
- How do I know if I’ve kneaded the dough enough? Properly kneaded dough should be smooth, elastic, and pass the “windowpane test.” To perform this, pinch off a small piece of dough and gently stretch it. If you can stretch it thin enough to see light through it without tearing, it’s ready. If it tears easily, keep kneading.
- Can I make these pretzels gluten-free? This recipe is designed for all-purpose wheat flour and its gluten structure. Adapting it to be gluten-free would require significant modifications and likely a blend of gluten-free flours and binders, potentially changing the texture and rise considerably. It’s best to look for a dedicated gluten-free soft pretzel recipe.
- My cheese dip is too thick/thin. How can I fix it? If your dip is too thick, gradually whisk in a tablespoon or two of warm milk until it reaches your desired consistency. If it’s too thin, return it to low heat and cook, stirring constantly, for a few more minutes until it thickens. Be careful not to boil it vigorously once the cheese is added, as this can cause it to separate.
Conclusion: Savor the Joy of Homemade Pretzels
Embarking on the journey of making homemade soft pretzels is a truly rewarding experience, transforming simple ingredients into a delightful treat that far surpasses any store-bought alternative. From the satisfying process of kneading the dough to the crucial baking soda bath that imparts that iconic chew and deep golden hue, every step is a part of creating something truly special. And when these warm, perfectly seasoned pretzels are dipped into our rich, tangy, and slightly spicy cheese sauce, you’ll discover a flavor combination that is simply irresistible.
Whether you’re looking for a fun weekend baking project, an impressive appetizer for your next gathering, or just a comforting snack for a quiet afternoon, this recipe for homemade soft pretzels with creamy cheese dip is your ticket to culinary success. So roll up your sleeves, gather your ingredients, and prepare to savor the incredible taste and texture of these bakery-worthy delights, crafted with love in your very own kitchen. Happy baking!