
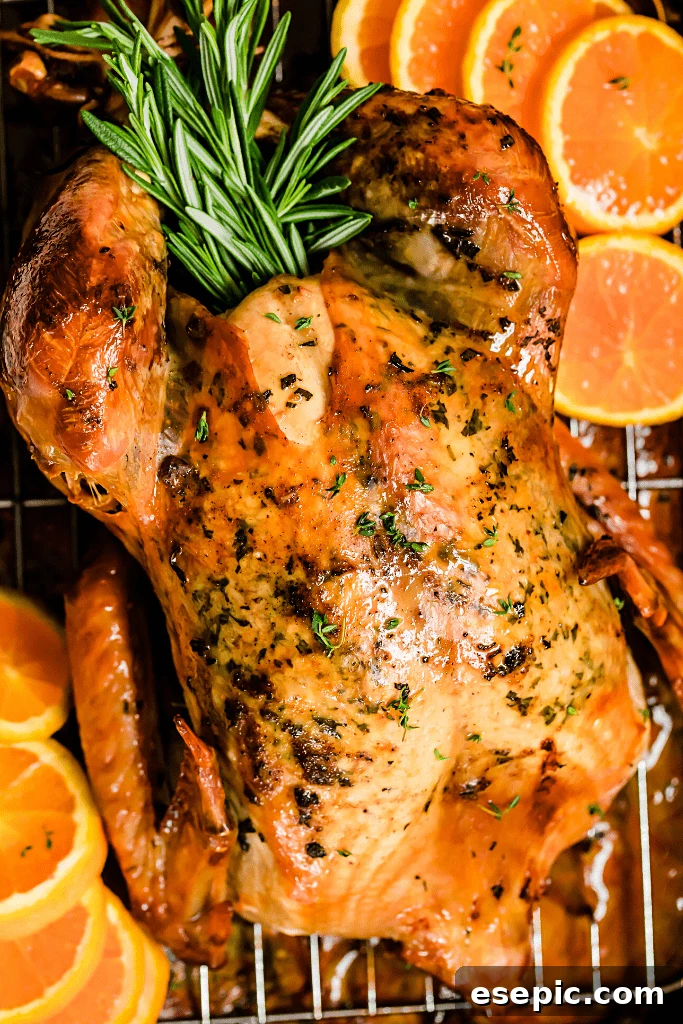
Thanksgiving, Christmas, or any special occasion calls for a showstopping centerpiece, and nothing delivers quite like a perfectly roasted Whole Roast Turkey. This classic recipe is designed to be incredibly easy to follow, yet it yields a supremely juicy turkey with incredibly tender meat that’s bursting with flavor. Thanks to generous amounts of fresh lemon, fragrant rosemary, rich butter, and aromatic garlic, your kitchen will smell divine, and your guests will be raving about your culinary skills. Prepare to delight your friends and family with a meal they won’t soon forget!
Crafting the Perfect Thanksgiving Turkey: A Simplified Approach
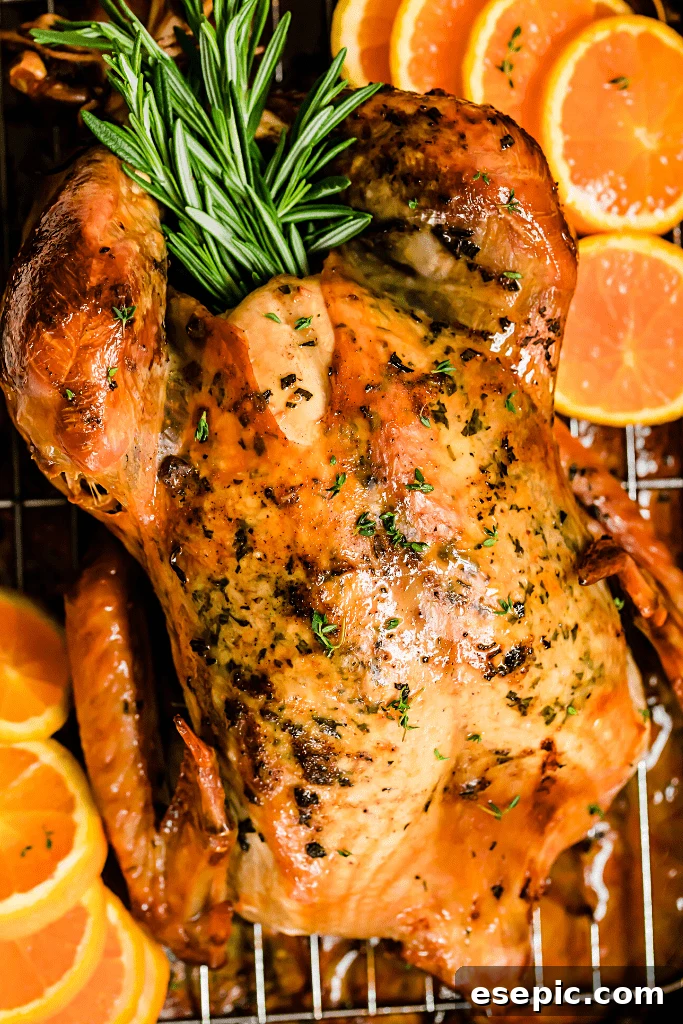
While countless roast turkey recipes exist, each with its own unique spin, my personal preference leans towards this traditional, yet refreshingly light and straightforward method. The beauty of this recipe lies in allowing the turkey itself to be the undisputed star of the meal. Its natural richness is elegantly enhanced by a carefully balanced trio of creamy butter, bright fresh lemon, and aromatic rosemary. This harmonious flavor profile not only guarantees a delicious taste but also fills your home with an intoxicating aroma, creating an inviting and festive atmosphere that will impress everyone at your table.
This approach focuses on simplicity without sacrificing gourmet results. It’s about creating a turkey that is consistently moist, wonderfully flavorful, and presents beautifully. Forget complicated techniques or obscure ingredients; this recipe brings the joy back to holiday cooking, ensuring a stress-free experience that culminates in a truly memorable feast.
Selecting Your Perfect Turkey: A Comprehensive Guide
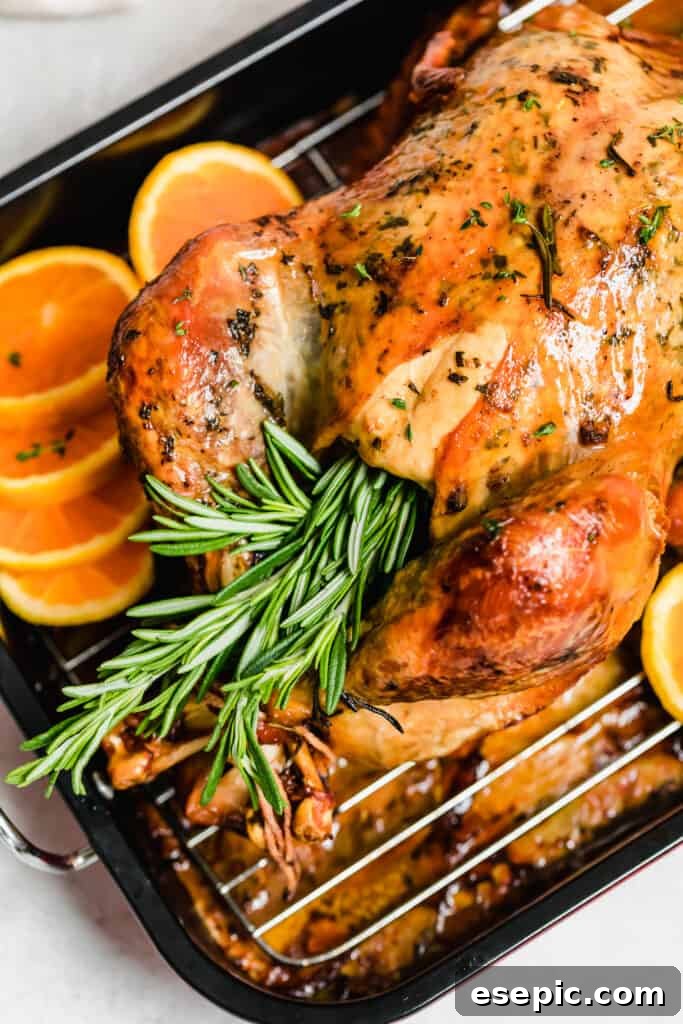
Choosing the right turkey is the foundational step to a successful holiday feast. Navigating the poultry aisle can be daunting with various options, but these key tips will help you make an informed decision with confidence.
- Weight Matters: How Much Turkey Do You Need? A general rule of thumb is to budget approximately one pound of turkey per person. However, it’s always a good idea to factor in a couple of extra pounds to account for hearty eaters and, perhaps more importantly, the highly anticipated leftovers. For example, if you’re feeding 10 people, a 10-pound turkey is a good starting point, but aiming for 12-14 pounds ensures everyone gets enough and leaves some for delicious turkey sandwiches the next day.
- Frozen vs. Fresh: What’s the Best Choice for You? The primary considerations when deciding between a frozen and a fresh turkey are cost and convenience.
- Frozen Turkeys: These are typically more budget-friendly and widely available. The main drawback is the significant thawing time required. Allow a full 24 hours of thawing for every five pounds of turkey when defrosting in the refrigerator. This means a 15-pound bird will need at least three days to thaw completely. If you have ample time for preparation, a frozen turkey offers a cost-effective option.
- Fresh Turkeys: While often a bit more expensive, fresh turkeys offer unparalleled convenience as they don’t require thawing. This saves valuable time, particularly during the busy holiday season. If your schedule is tight, opting for a fresh turkey can significantly reduce pre-cooking stress.
- Understanding Special Labels: What Do They Mean? The array of labels on turkey packaging can be confusing. Here’s a quick breakdown of some common terms to help you choose a turkey that aligns with your preferences:
- Organic: This label signifies that the turkey was raised on organic feed, without antibiotics, and with access to the outdoors.
- Free-Range: Turkeys labeled free-range have had some access to the outdoors, though the extent of that access can vary.
- Kosher: Kosher turkeys have been processed according to Jewish dietary laws, including salting to draw out blood. This process often results in a naturally brined, flavorful bird.
- All-Natural: This label typically means the turkey contains no artificial ingredients, colors, or chemical preservatives. It doesn’t necessarily imply anything about how the animal was raised.
- Heritage: Heritage turkeys are traditional breeds that grow slower and often have a more robust, gamey flavor and leaner meat.
Understanding these labels empowers you to choose a turkey that best suits your taste, ethical considerations, and budget.
Essential Turkey Preparation Steps for a Flawless Feast!
Proper preparation is key to a succulent and flavorful turkey. These steps, taken well in advance or on the day of cooking, will set you up for success:
- Thawing Your Frozen Turkey Safely: If you’ve chosen a frozen bird, adequate thawing time is paramount. The safest method is in the refrigerator. As a rule, allow 24 hours of thawing for every 5 pounds of turkey. So, a 10-pound turkey needs about 48 hours, while a 20-pound turkey requires approximately 4 full days. Plan this well in advance, placing the turkey in its original packaging on a rimmed baking sheet or in a large pan to catch any drips, and store it on the lowest shelf of your refrigerator. A faster alternative is the cold water method: submerge the wrapped turkey in cold water, changing the water every 30 minutes. This method requires about 30 minutes per pound but is more labor-intensive and still needs careful planning.
- To Wash or Not to Wash? The Debate Settled: Contrary to popular belief, it is generally recommended NOT to wash your turkey before cooking. Rinsing raw poultry under a faucet can easily spread bacteria like salmonella and campylobacter to your sink, countertops, and other kitchen surfaces through splashing water. This poses a significant risk of cross-contamination. Instead, simply remove the turkey from its packaging, discard the giblets and neck from the cavity, and thoroughly pat the entire surface dry with paper towels. A dry skin is crucial for achieving that coveted crispy, golden-brown exterior.
- Brine Away! The Secret to Extra Juicy Meat: Brining is an optional but highly recommended step that significantly enhances both the moisture and flavor of your turkey. It involves submerging the turkey in a solution of salted water, often infused with herbs, spices, and aromatics, for several hours or overnight. The salt helps the turkey absorb moisture through osmosis, resulting in a juicier, more tender bird, and carries flavor deep into the meat. You can opt for a simple salt and water brine, or add ingredients like peppercorns, bay leaves, citrus slices, and fresh herbs like rosemary and thyme for added complexity. If you’re short on time, a dry brine (rubbing salt and seasonings directly onto the turkey skin) can also be effective.
- Trussing Your Turkey for Even Cooking and Presentation: Trussing refers to tying the turkey’s legs together and tucking its wings close to the body. This seemingly small step offers several benefits:
- Even Cooking: By holding the legs and wings compactly, the turkey cooks more evenly, preventing the breast meat from drying out before the dark meat is fully cooked.
- Improved Presentation: A trussed turkey has a neat, compact shape that looks much more appealing when brought to the table.
For this recipe, a simple truss is sufficient: after placing the cavity ingredients inside, use kitchen twine to tie the drumsticks together. Then, tuck the wing tips underneath the turkey’s body to prevent them from burning.
Essential Ingredients for Your Flavorful Roast Turkey
Gathering high-quality ingredients is the first step to a truly delicious roast. This recipe calls for fresh, aromatic components that infuse the turkey with incredible flavor:
- Whole Turkey: For this recipe, we recommend a 10-12 pound bird, thoroughly thawed if previously frozen. This size is ideal for feeding 8-10 people and typically roasts beautifully.
- Unsalted Butter: You’ll need ½ cup (one stick) of unsalted butter, softened to room temperature. This allows it to be easily mixed with herbs and spread under the turkey skin, creating a rich, flavorful, and moist crust.
- Fresh Rosemary: Acquire one large sprig of fresh rosemary. Strip the leaves from the tough, woody stem and finely chop 1 tablespoon for the butter mixture. Keep the remaining sprigs whole for aromatic infusion in the turkey cavity and stock.
- Fresh Garlic: Mince 3 cloves of fresh garlic for the herbed butter, or press them for convenience. Reserve 5 whole cloves, gently smashed, to be placed inside the turkey cavity for deep flavor.
- Lemon Zest: The zest of one fresh lemon adds a bright, tangy note that cuts through the richness of the butter and complements the rosemary beautifully.
- Onion: You’ll need one medium-sized onion. Cut it in half for placement in the turkey cavity. Additionally, prepare 2 tablespoons of finely minced onion to be added to the roasting pan stock for an extra layer of savory depth.
- Chicken Stock: Four cups of chicken stock are essential for basting and creating a flavorful base in the roasting pan. You can use low-sodium store-bought broth, homemade chicken stock, or even bone broth for richer flavor.
- Seasoning Salt: Two tablespoons of your favorite seasoned salt will provide an all-around flavor boost. Feel free to use a store-bought blend or create your own custom mix with salt, pepper, paprika, garlic powder, and onion powder.
To Stuff or Not to Stuff: A Thanksgiving Dilemma
The question of whether to stuff your turkey’s cavity is a long-standing debate among cooks, with valid arguments on both sides. Ultimately, the decision rests on your preference and commitment to food safety.
Arguments for Stuffing: Some argue that stuffing cooked inside the bird absorbs delicious turkey juices, resulting in a more flavorful and moist stuffing. It can also save oven space, as you’re cooking two dishes at once.
Arguments Against Stuffing (and My Recommendation): I personally prefer to prepare stuffing separately, and here’s why. The main concern with stuffing the turkey is food safety. For the stuffing to reach a safe internal temperature of 165°F (74°C), the turkey itself often needs to cook longer, which can lead to the breast meat becoming overcooked and dry. Additionally, ensuring both the turkey and the stuffing reach their respective safe temperatures simultaneously can be challenging. Cooking stuffing on the side ensures it cooks more evenly and quickly, allowing you to remove the turkey from the oven as soon as it reaches its optimal internal temperature.
Cooking stuffing separately also offers better presentation control and makes carving the turkey significantly easier. If you do choose to stuff your turkey, ensure the stuffing is moist but not dense, and use a food thermometer to verify that the center of the stuffing reaches 165°F (74°C). For added safety, consider using a pre-cooked or par-cooked stuffing mixture before placing it in the bird.
Mastering the Art of Roasting a Thanksgiving Turkey
Follow these detailed steps to achieve a perfectly roasted, golden-brown, and exceptionally juicy turkey:
- Step 1: Prepare the Turkey and Oven. Begin by preheating your oven to 350°F (175°C). While the oven preheats, remove the turkey from its packaging. Discard any giblets and the neck found in the cavity. Using paper towels, thoroughly pat the entire turkey dry, both inside and out. A dry surface is crucial for crisp skin. Place the prepared turkey on a sturdy rack set inside a large roasting pan.
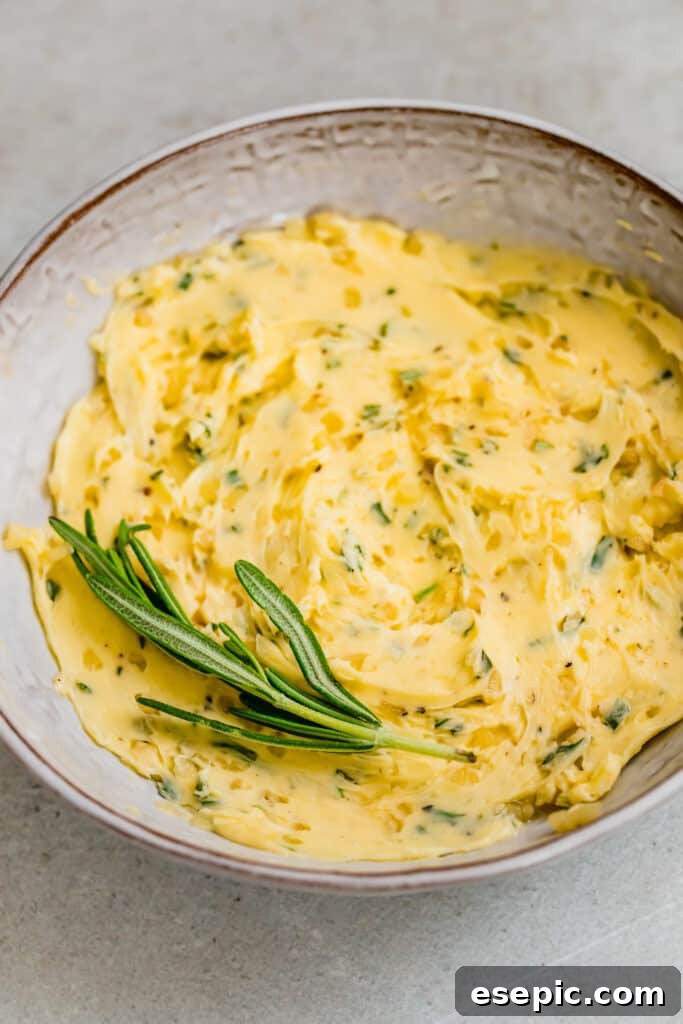
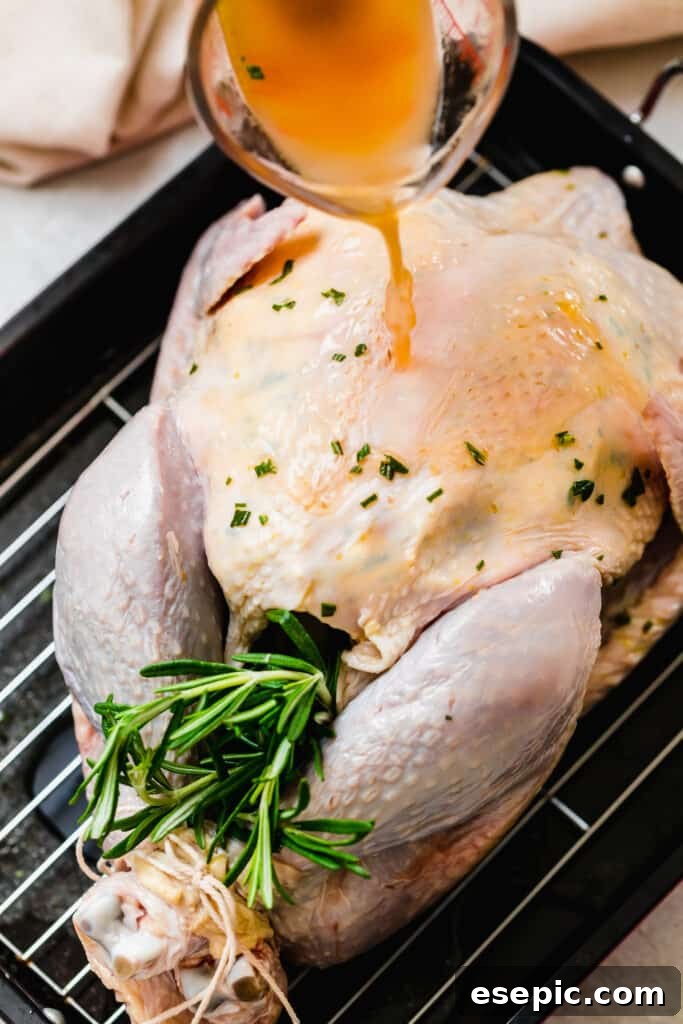
- Step 2: Infuse the Breast with Herbed Butter. In a small bowl, combine the softened unsalted butter with the finely chopped fresh rosemary, minced garlic, and bright lemon zest. This aromatic butter mixture is key to a moist and flavorful breast. Carefully separate the turkey skin from the breast meat by gently sliding your fingers underneath, creating small pockets. Distribute the herbed butter evenly into these pockets, pushing it as far back towards the thighs as possible. You can also rub some butter directly onto the outside of the skin.
- Step 3: Fill the Cavity and Truss. Place the halved onion, the 5 whole smashed garlic cloves, and the remaining whole rosemary sprigs into the turkey’s main cavity. These aromatics will infuse the turkey with flavor from the inside out. Next, use kitchen twine to tie the drumsticks securely together. Tuck the wing tips underneath the turkey’s body to prevent them from burning during roasting and ensure a compact, even shape.
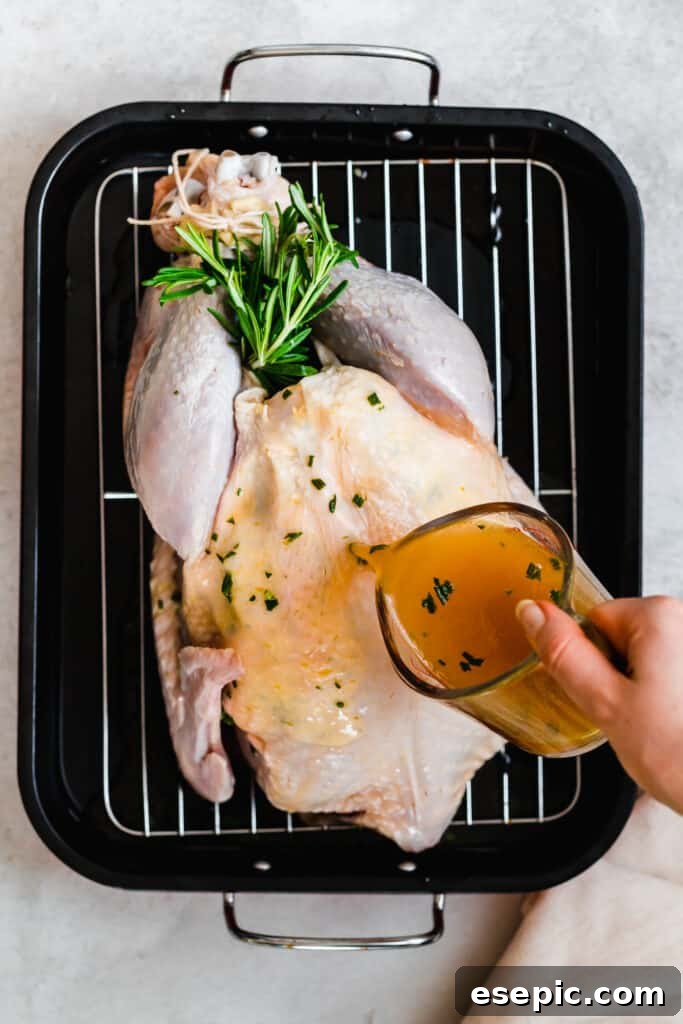
- Step 4: Create a Flavorful Basting Liquid and Season. In a medium bowl, combine the 4 cups of chicken stock with the remaining chopped fresh rosemary and the 2 tablespoons of minced onion. This mixture will serve as both a flavorful basting liquid and a base for your pan drippings. Pour this stock mixture into the bottom of the roasting pan around the turkey. Finally, sprinkle the 2 tablespoons of seasoning salt generously over the entire exterior of the turkey, ensuring an even coating for a flavorful crust.
- Step 5: Begin Roasting. Cover the roasting pan tightly with aluminum foil. Place the covered turkey in your preheated oven and roast at 350°F (175°C) for approximately 3½ to 4 hours. The roasting time will vary significantly based on the size of your turkey. The turkey is done when an instant-read meat thermometer registers an internal temperature of 170°F (77°C) in the thickest part of the thigh (without touching the bone) and 160°F (71°C) in the thickest part of the breast. (Refer to the roasting time chart below for specific guidance.)
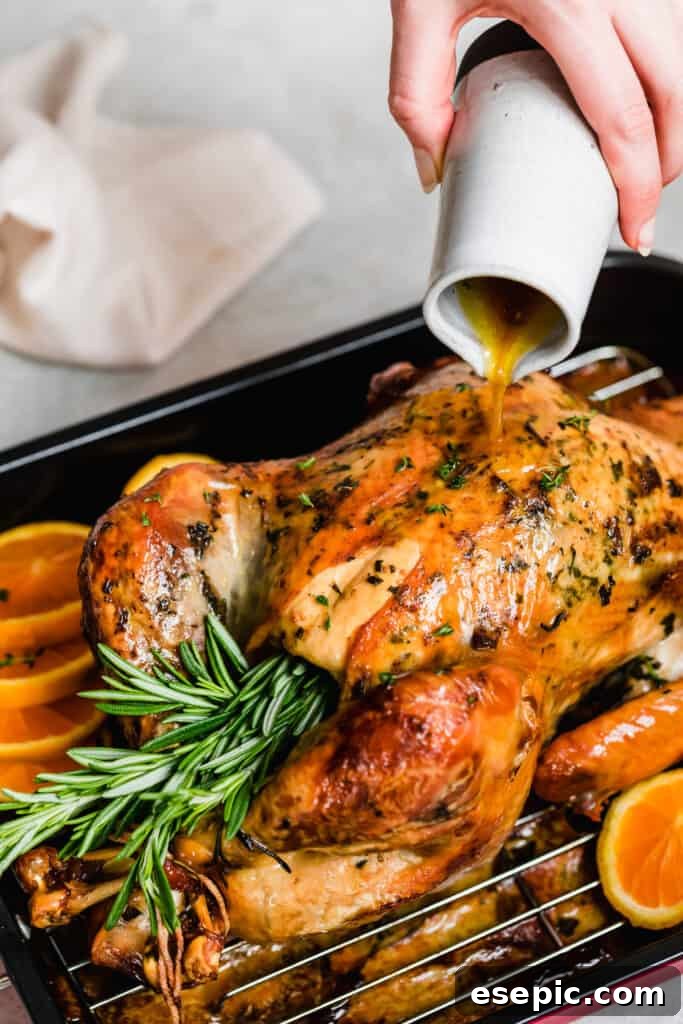
- Step 6: Baste Regularly. After the initial 40 minutes of roasting, carefully remove the turkey from the oven (close the oven door quickly to retain heat). Using a baster, spoon the flavorful juices from the bottom of the pan over the turkey. This moistens the skin, adds flavor, and helps achieve a beautiful golden color. Re-cover the turkey tightly with foil and return it to the oven. Repeat this basting process every 40 minutes throughout the remainder of the covered roasting period.
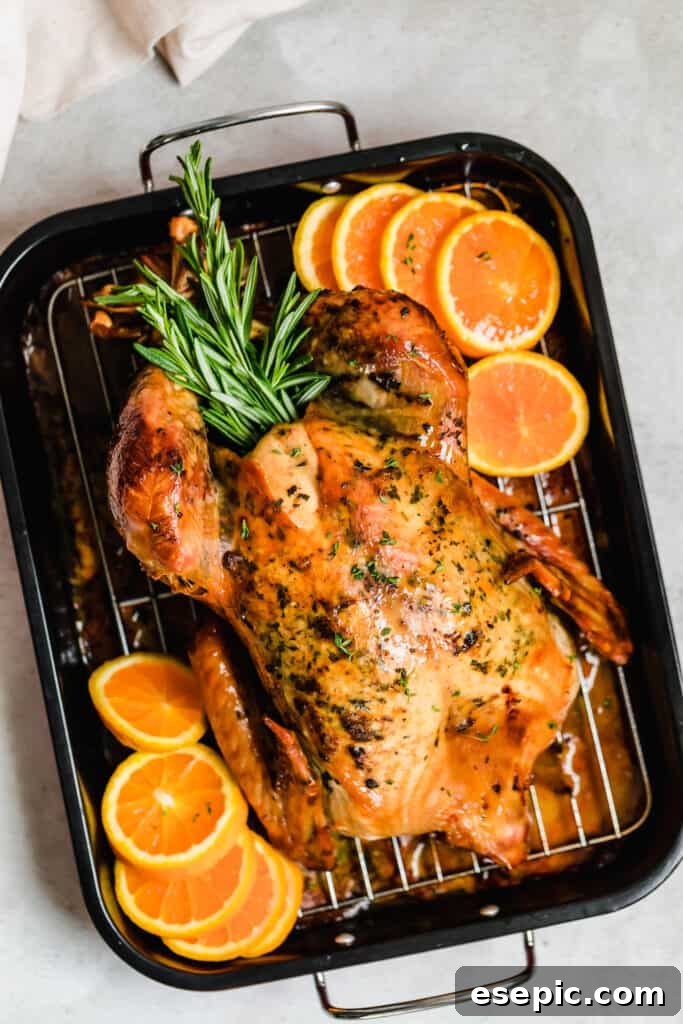
- Step 7: Achieve Golden Brown Skin. For the final 45 minutes to an hour of roasting, remove the aluminum foil completely. This allows the turkey skin to crisp up and develop that irresistible deep golden-brown hue. Monitor it closely to prevent over-browning.
- Step 8: The Crucial Resting Period. Once your turkey has reached the target internal temperatures (170°F in the thigh, 160°F in the breast), remove it from the oven. Do NOT carve it immediately. Instead, loosely tent the turkey with aluminum foil and let it rest on your countertop for at least 30 minutes, and up to an hour for larger birds. This resting period is critical: it allows the juices to redistribute throughout the meat, ensuring every slice is incredibly moist and tender. Skipping this step will result in dry turkey as all the delicious juices will run out when you cut into it.
Determining Roasting Times and Doneness for Your Turkey
The total time required to roast a turkey is highly dependent on its size. A widely cited general guideline is approximately 20 minutes per pound for an unstuffed turkey roasted at 350°F (175°C). However, several factors can influence this, including whether the turkey is stuffed, your oven’s calibration, and the turkey’s starting temperature. It’s always best to rely on a meat thermometer for accuracy rather than just time.
Approximate Roasting Times for an Unstuffed Turkey at 350°F (175°C)
This chart provides estimated roasting times for turkeys that have NOT been stuffed:
- 6-8 lbs: 2.5 to 3 hours
- 8-12 lbs: 3 to 4 hours
- 12-16 lbs: 4 to 5 hours
- 16-20 lbs: 5 to 5.5 hours
- 20-24 lbs: 5.5 to 6 hours
Approximate Roasting Times for a Stuffed Turkey at 350°F (175°C)
If you choose to stuff your turkey, remember that it will require longer cooking times:
- 6-8 lbs: 3 to 3.5 hours
- 8-12 lbs: 3.5 to 4.5 hours
- 12-16 lbs: 4.5 to 5.5 hours
- 16-20 lbs: 5.5 to 6 hours
- 20-24 lbs: 6 to 6.5 hours
How to Accurately Tell Your Turkey is Done
The most reliable way to ensure your turkey is perfectly cooked and safe to eat is by using a high-quality meat thermometer. An instant-read thermometer is highly recommended for its speed and accuracy. Begin checking the temperature starting around the 3-hour mark for smaller birds or later for larger ones.
The turkey is safely cooked when the internal temperature reaches:
- 160°F (71°C) in the thickest part of the turkey breast.
- 170°F (77°C) in the thickest part of the thigh.
Important Note: When inserting the thermometer, make sure the tip is in the deepest part of the meat, avoiding contact with any bones, as bones heat faster and can give a false reading.
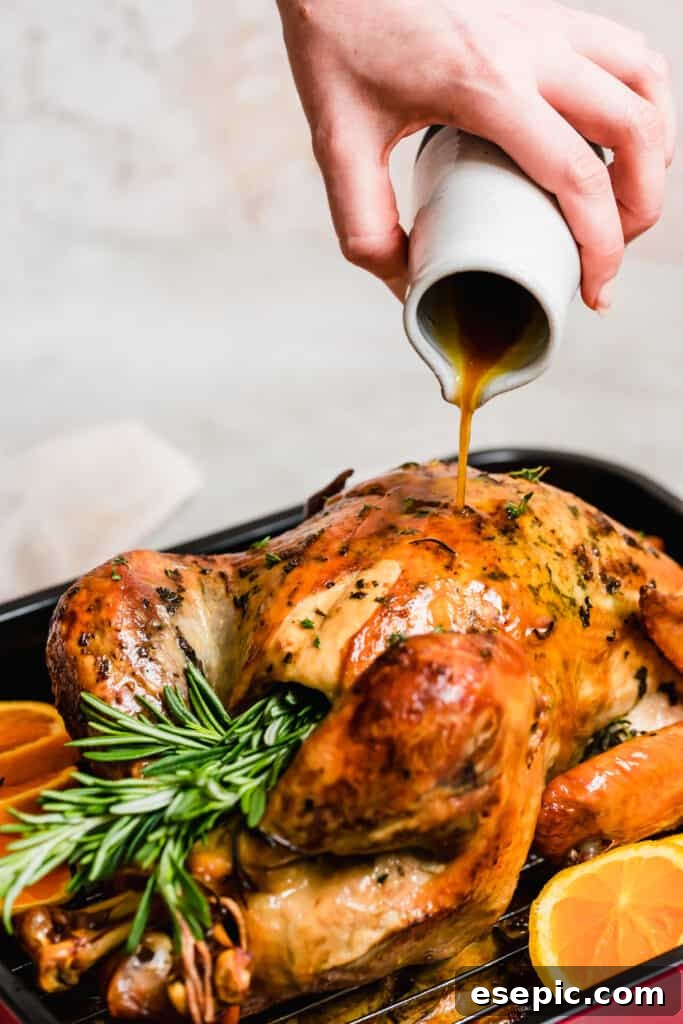
Expert Tips for Your Juiciest and Most Flavorful Thanksgiving Turkey
Elevate your roast turkey from good to unforgettable with these simple yet impactful tips:
- No Roasting Rack? No Problem! Create a Flavorful Veggie Rack: If your roasting pan doesn’t come with a rack, or you simply want to add extra depth of flavor, you can easily create a natural roasting rack using hearty vegetables. Line the bottom of your roasting pan with thick wedges of aromatic onions, whole washed carrots, and sturdy celery sticks. These vegetables elevate the turkey, allowing hot air to circulate evenly underneath, promoting even cooking and crispy skin. As a bonus, they infuse the pan drippings with wonderful flavors, perfect for making gravy later.
- The Golden Rule: Rest, Rest, Rest! (For Both You and the Turkey): Preparing a Thanksgiving or holiday dinner is indeed a marathon, not a sprint, and you, the chef, deserve a well-earned rest! But equally important is allowing the turkey to rest once it comes out of the oven. This step is non-negotiable for a truly juicy bird. After removing the turkey, loosely tent it with aluminum foil and let it sit undisturbed for a minimum of 30 minutes, and for larger birds, up to an hour. During this crucial resting period, the muscle fibers relax, allowing the internal juices to redistribute throughout the meat. If you carve immediately, all those precious juices will simply run out, leaving you with dry meat. Resting ensures that every slice is succulent and tender, making carving significantly easier too.
Effortless Turkey Carving: A Step-by-Step Guide
Carving a whole turkey might seem intimidating, but with a sharp knife and a bit of practice, it becomes a straightforward process. Here’s how to carve your beautifully roasted bird:
- Remove the Legs: Place the turkey on a sturdy cutting board. Locate where the thigh meets the body. Slice through the skin and joint to remove each leg (drumstick and thigh together). Gently pull the leg away from the body; it should separate easily. Once removed, you can separate the drumstick from the thigh by cutting through the joint. Slice the rich thigh meat into portions. Drumsticks can be served whole, especially popular with kids, or reserved for future use.
- Carve the Breast Meat: Next, focus on the breast. Position your knife along the center breastbone and slice downwards, following the contour of the bone until you reach the rib cage. Continue slicing along the rib bones to remove one entire breast half. Repeat this process for the other breast. Once both breast halves are removed, place them skin-side up on the cutting board. Slice the breast meat against the grain into uniform, thick slices. Arrange these elegant slices on your serving platter.
- Detach the Wings: Finally, locate the wing joints where they connect to the turkey’s body. Cut through the joint to detach each wing. Wings can be served whole as a tasty snack or saved for making flavorful turkey stock or soup.
Remember to use a sharp carving knife and a large cutting board with a well to catch any juices. This methodical approach ensures clean cuts and maximizes the yield of delicious meat.
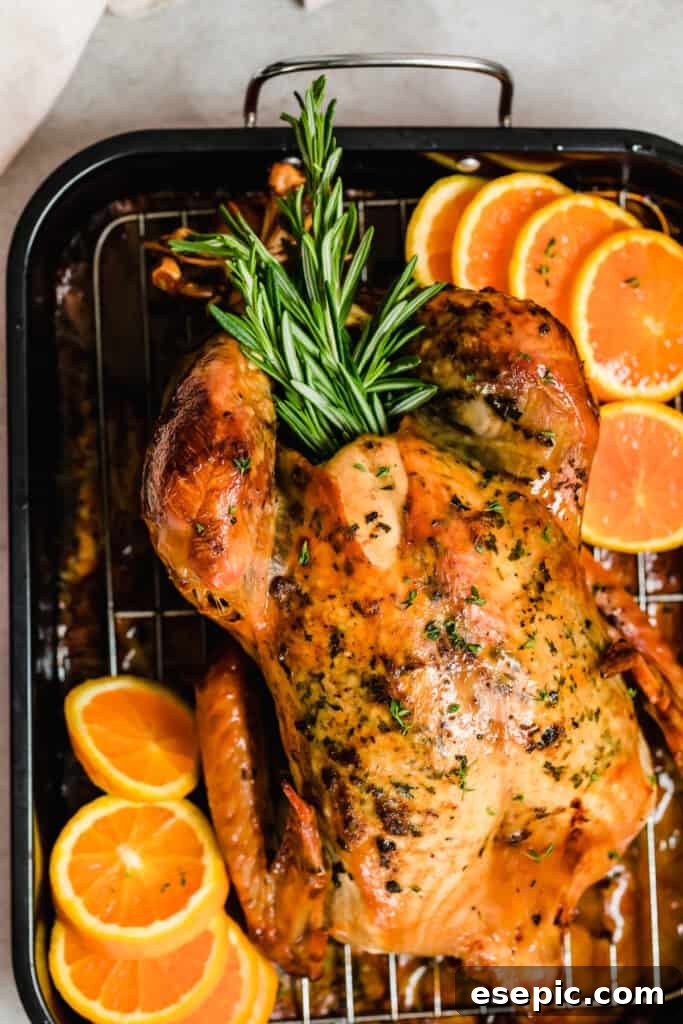
Perfect Pairings: What to Serve with Your Juicy Roasted Turkey
A magnificent roast turkey deserves an equally impressive supporting cast of side dishes. Here are some delectable ideas that complement the rich flavors of your holiday centerpiece:
- Roasted Vegetables: A medley of tender, caramelized roasted vegetables is always a crowd-pleaser. Imagine carrots, Brussels sprouts, parsnips, and bell peppers tossed with olive oil, herbs, salt, and pepper, then roasted until tender-crisp. Their natural sweetness and earthy flavors beautifully balance the savory turkey.
- Potatoes, Glorious Potatoes: Potatoes are a staple for any holiday feast. While creamy mashed potatoes are a classic, consider something a little different, like crispy roasted potatoes. Imagine potatoes scored to create crunchy edges, perfectly seasoned and baked until golden brown. They offer a delightful textural contrast to the soft turkey meat.
- Sweet Endings: A Decadent Dessert: After the savory main course, a comforting and sweet dessert is the perfect conclusion. A moist and flavorful carrot sheet cake, perhaps with a rich cream cheese frosting, offers a delightful combination of spices and sweetness. It’s easy to make for a crowd and ensures everyone leaves with a satisfied sweet tooth.
Maximizing Your Leftovers: Storage and Reheating Tips
One of the greatest joys of a holiday turkey is the abundance of delicious leftovers! Proper storage and reheating techniques are essential to enjoy them safely and deliciously for days to come:
- Proper Storage: As soon as the turkey has cooled down to room temperature (within 2 hours of cooking), carve any remaining meat off the bones. Store the turkey meat tightly wrapped in airtight containers or heavy-duty freezer bags. This prevents air exposure, which can lead to dryness and spoilage.
- Refrigeration and Freezing: Leftover turkey will stay fresh in the refrigerator for up to three to four days. For longer storage, freeze the cooked turkey meat. Properly stored, it can remain fresh in the freezer for up to two months. Label your containers with the date to keep track of freshness.
- Reheating for Optimal Flavor and Moisture: To reheat, place the desired amount of turkey in a shallow, oven-safe baking dish. Add a splash of chicken stock, turkey broth, or even water to the dish. This helps to reintroduce moisture and prevent the turkey from drying out during reheating. Cover the dish tightly with foil and bake in a preheated oven at 300-325°F (150-160°C) until the turkey is heated through to an internal temperature of 165°F (74°C). You can also gently reheat smaller portions in the microwave with a little liquid, covered, stirring occasionally. Avoid overheating, as this is the quickest way to dry out the meat.
Whole Roast Turkey
Ingredients
- 1 10 to 12 pound whole turkey, thawed
- ½ cup unsalted butter, softened
- 1 tablespoon fresh rosemary, chopped
- 3 cloves garlic, minced
- Zest of 1 lemon
- 1 onion, halved
- 5 garlic cloves
- 3 sprigs of rosemary
- 4 cups chicken stock
- 1 tablespoon fresh rosemary, chopped
- 2 tablespoons minced onion
- 2 tablespoons seasoning salt
Instructions
- Preheat oven to 350°F (175°C).
- Pat dry the turkey and discard the giblets. Place turkey on a rack set in a roasting pan.
- In a small bowl, combine the softened butter, 1 tablespoon fresh rosemary, minced garlic, and lemon zest. Mix until well combined.
- Carefully separate the skin over the breast to make pockets and fill with the butter mixture. Rub any excess butter mixture all around and onto the thighs.
- Place the halved onion, the 5 whole garlic cloves, and the 3 rosemary sprigs into the turkey cavity.
- Tie the legs together with kitchen twine and tuck the wings under the turkey.
- In a medium bowl, combine the chicken stock, the remaining 1 tablespoon chopped rosemary, and the 2 tablespoons minced onion.
- Pour the stock mixture into the bottom of the roasting pan around the turkey. Then, sprinkle the 2 tablespoons seasoning salt generously over the entire turkey.
- Cover the turkey with foil, and bake at 350°F (175°C) for 3½ to 4 hours, or until the internal temperature of the turkey reaches 170˚F (77°C) at the thigh and 160˚F (71°C) at the breast. (Roasting time will depend on turkey size – refer to the chart in the post above or notes below for specific guidance.)
- After approximately 40 minutes of roasting, remove the turkey from the oven (close the door to keep the heat in) and baste with the juices collected in the pan. Cover with foil again and return the turkey to the oven. Repeat basting every 40 minutes throughout the covered roasting period.
- For the last 45 minutes to an hour of roasting, remove the foil completely so the turkey skin can brown and crisp up.
- Once the turkey has reached the desired internal temperature as tested with a meat thermometer (170˚F (77°C) in the thigh and 160˚F (71°C) in the breast), remove it from the oven. Cover loosely with foil and let it rest for at least 30 minutes before carving. Do not cut the turkey before resting, as this will cause all the flavorful juices to escape, resulting in dry turkey meat.
Notes
- 6-8 lbs = 2.5 to 3 hours
- 8-12 lbs = 3 to 4 hours
- 12-16 lbs = 4 to 5 hours
- 16-20 lbs = 5 to 5.5 hours
- 20-24 lbs = 5.5 to 6 hours
Roasting Times for a Stuffed Turkey at 350°F (175°C):
- 6-8 lbs = 3 to 3.5 hours
- 8-12 lbs = 3.5 to 4.5 hours
- 12-16 lbs = 4.5 to 5.5 hours
- 16-20 lbs = 5.5 to 6 hours
- 20-24 lbs = 6 to 6.5 hours
Nutrition
Carbohydrates: 3g |
Protein: 72g |
Fat: 28g |
Saturated Fat: 11g |
Cholesterol: 256mg |
Sodium: 1866mg |
Potassium: 828mg |
Fiber: 1g |
Sugar: 1g |
Vitamin A: 476IU |
Vitamin C: 2mg |
Calcium: 49mg |
Iron: 3mg
Nutritional info is an estimate and provided as courtesy. Values may vary according to the ingredients and tools used. Please use your preferred nutritional calculator for more detailed info.