
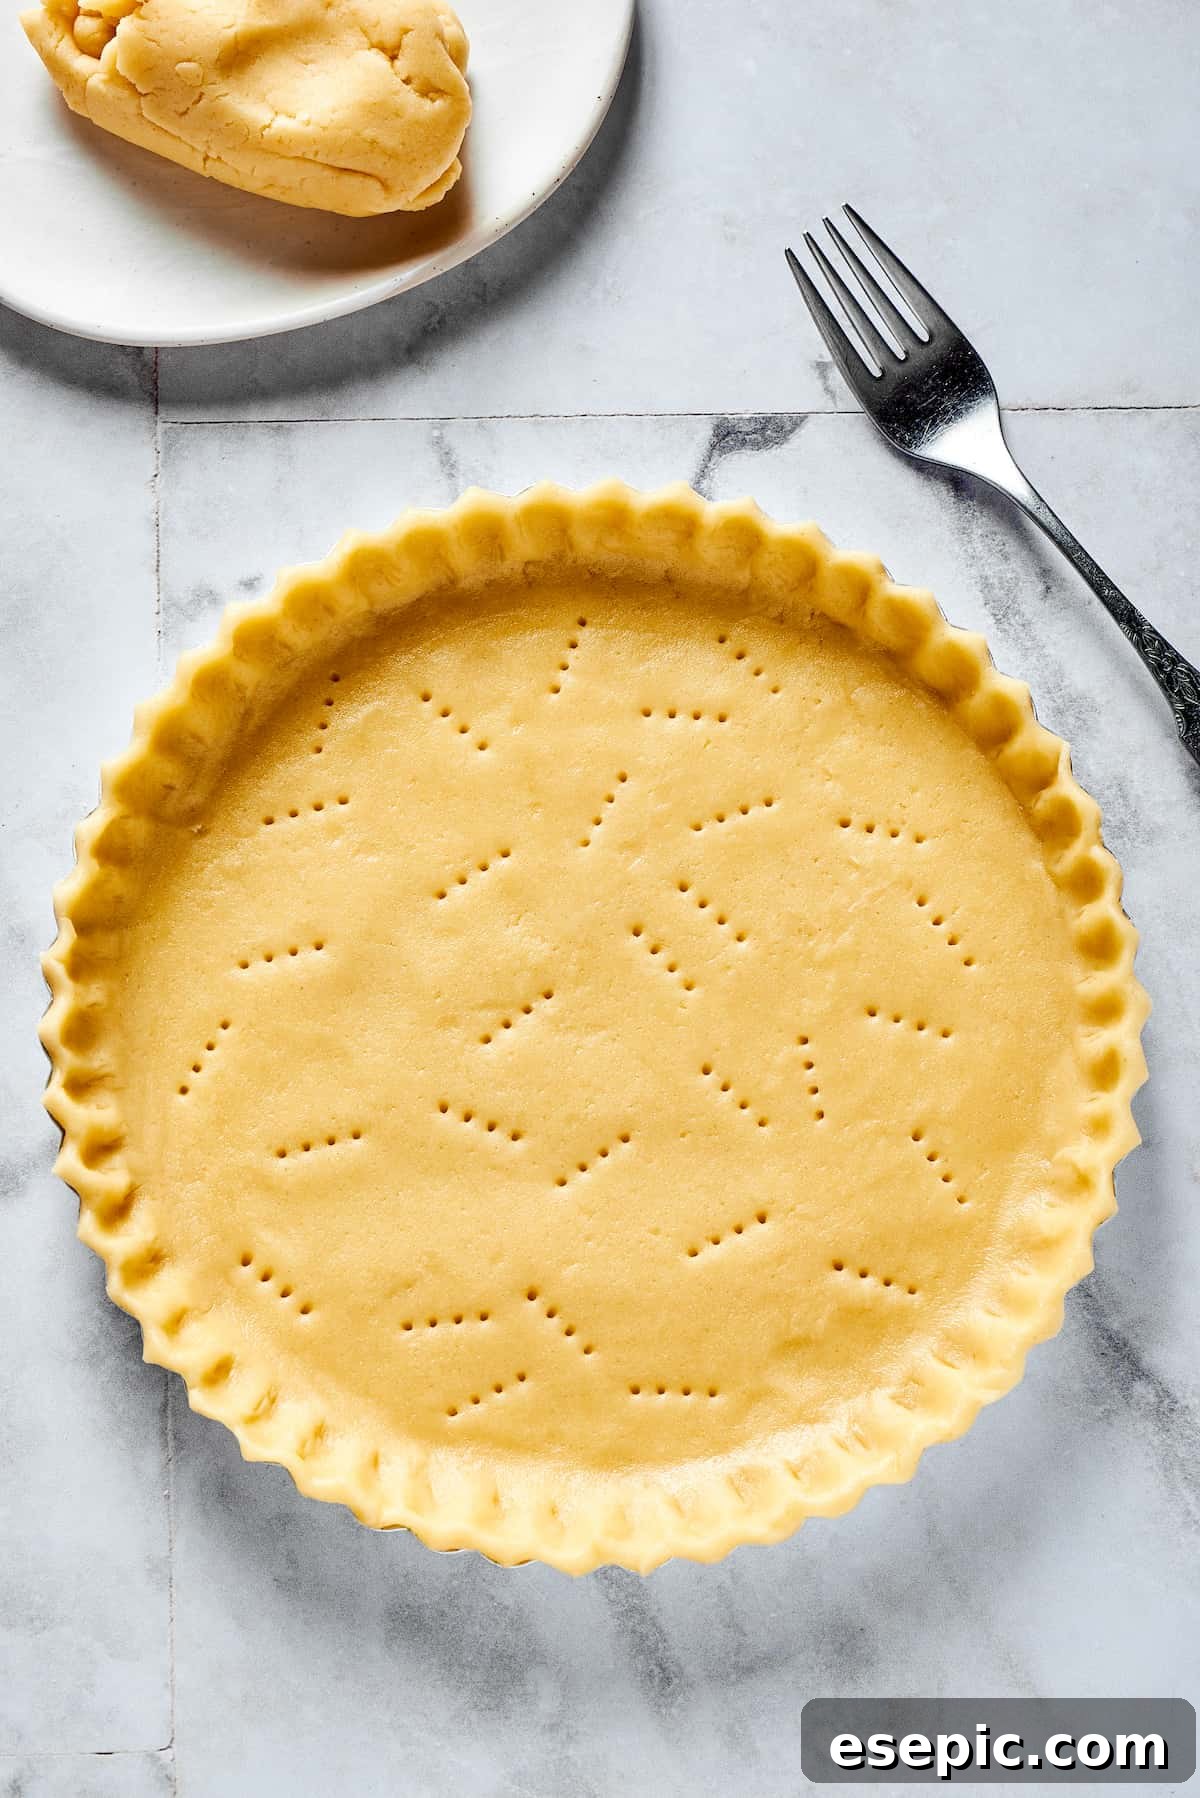
Mastering the Art of Flaky All-Butter Homemade Pie Crust
Embark on a culinary journey to create the most incredible Homemade Pie Crust you’ve ever tasted! Forget the stress and blandness of store-bought alternatives; this easy, all-butter recipe promises a consistently flaky, tender, and utterly delicious foundation for any pie filling imaginable. Whether you’re a seasoned baker or new to the kitchen, achieving a perfect pie crust from scratch is a rewarding experience that elevates your desserts to a new level of homemade perfection. Imagine sinking your teeth into classics like a rich Pumpkin Pie or a comforting Apple Pie, knowing that every layer of that golden, buttery crust was crafted by your own hands. It’s the ultimate touch for any dessert table, making every bite unforgettable!
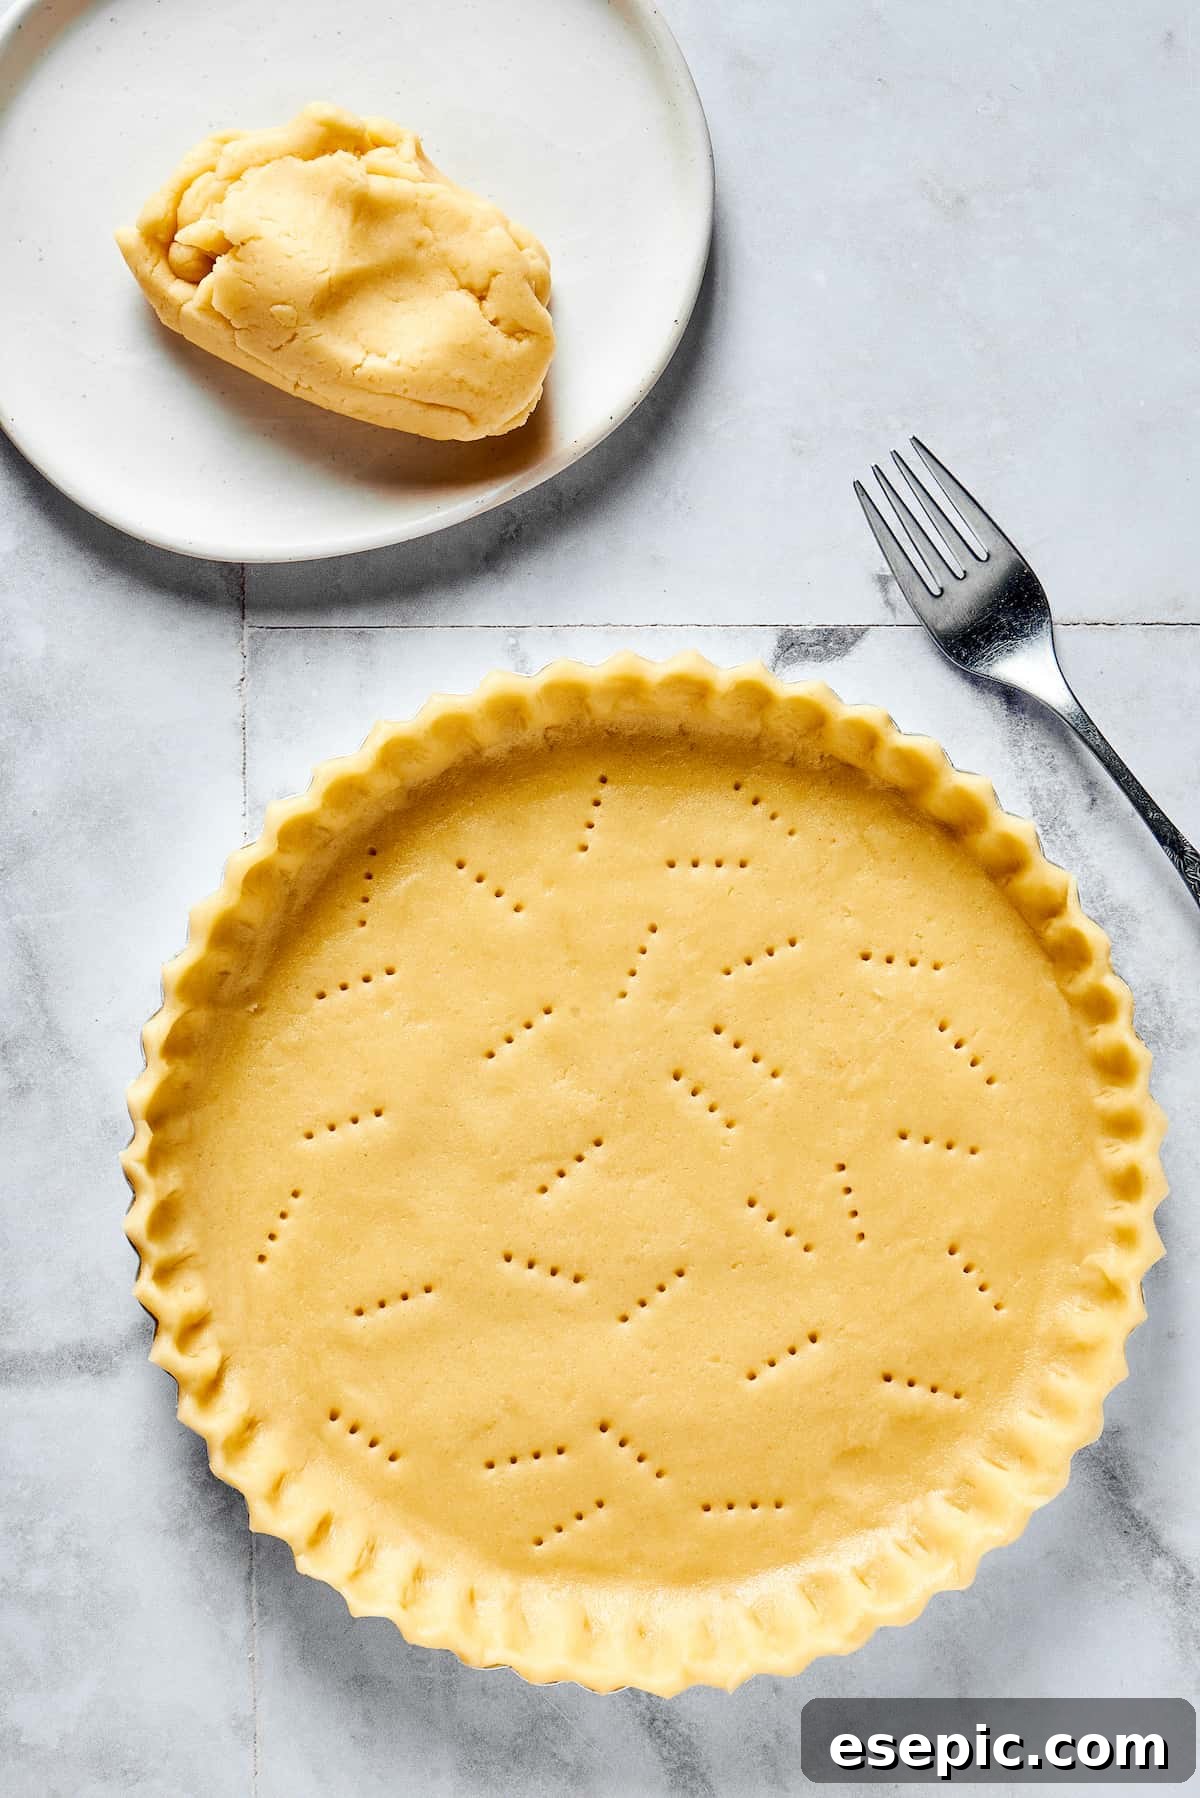
Unlock the Secret to Perfect, Easy, and Scrumptious Pie Crust
There’s a special kind of magic that fills the air when the seasons change, and with it, the irresistible aroma of freshly baked pie. Around here, pie isn’t just a dessert; it’s a celebration! From hearty savory creations like a classic Chicken Pot Pie to the sweet, vibrant flavors of summer in a Fresh Strawberry Pie, and of course, our cherished holiday staple, The Best Pecan Pie – if it boasts a golden, flaky crust and a luscious filling, we’re absolutely captivated. While the convenience of store-bought crusts is undeniable, there’s an unparalleled satisfaction and superior taste that comes from baking with homemade pastry. The rich, buttery notes and delicate flakiness of a handcrafted crust truly transform any pie into a masterpiece. And here’s the best part: it’s surprisingly straightforward to achieve! Don’t let intimidation hold you back. This simple, foolproof recipe will guide you through every step, and you might just find yourself falling head over heels for the unmatched quality of homemade pie crust. It truly is that good!
Why Choose All-Butter for Your Pie Crust?
The debate between butter and shortening in pie crusts is a long-standing one among bakers. While some swear by the higher melting point of vegetable shortening for achieving a super flaky crust, I am a firm believer in the unparalleled flavor and tender texture that an all-butter crust delivers. Butter brings a richness and depth of flavor that shortening simply cannot replicate. The key to an exceptionally flaky all-butter crust lies not in the fat itself, but in two critical techniques: keeping your ingredients very cold and handling the dough as little as possible. These methods ensure that small pockets of butter remain intact within the dough, creating those delightful layers of flakiness as the butter melts and releases steam during baking. If you are inclined to use shortening, you can substitute roughly half of the butter with shortening, but I encourage you to try this all-butter version first to experience its superior taste and texture.
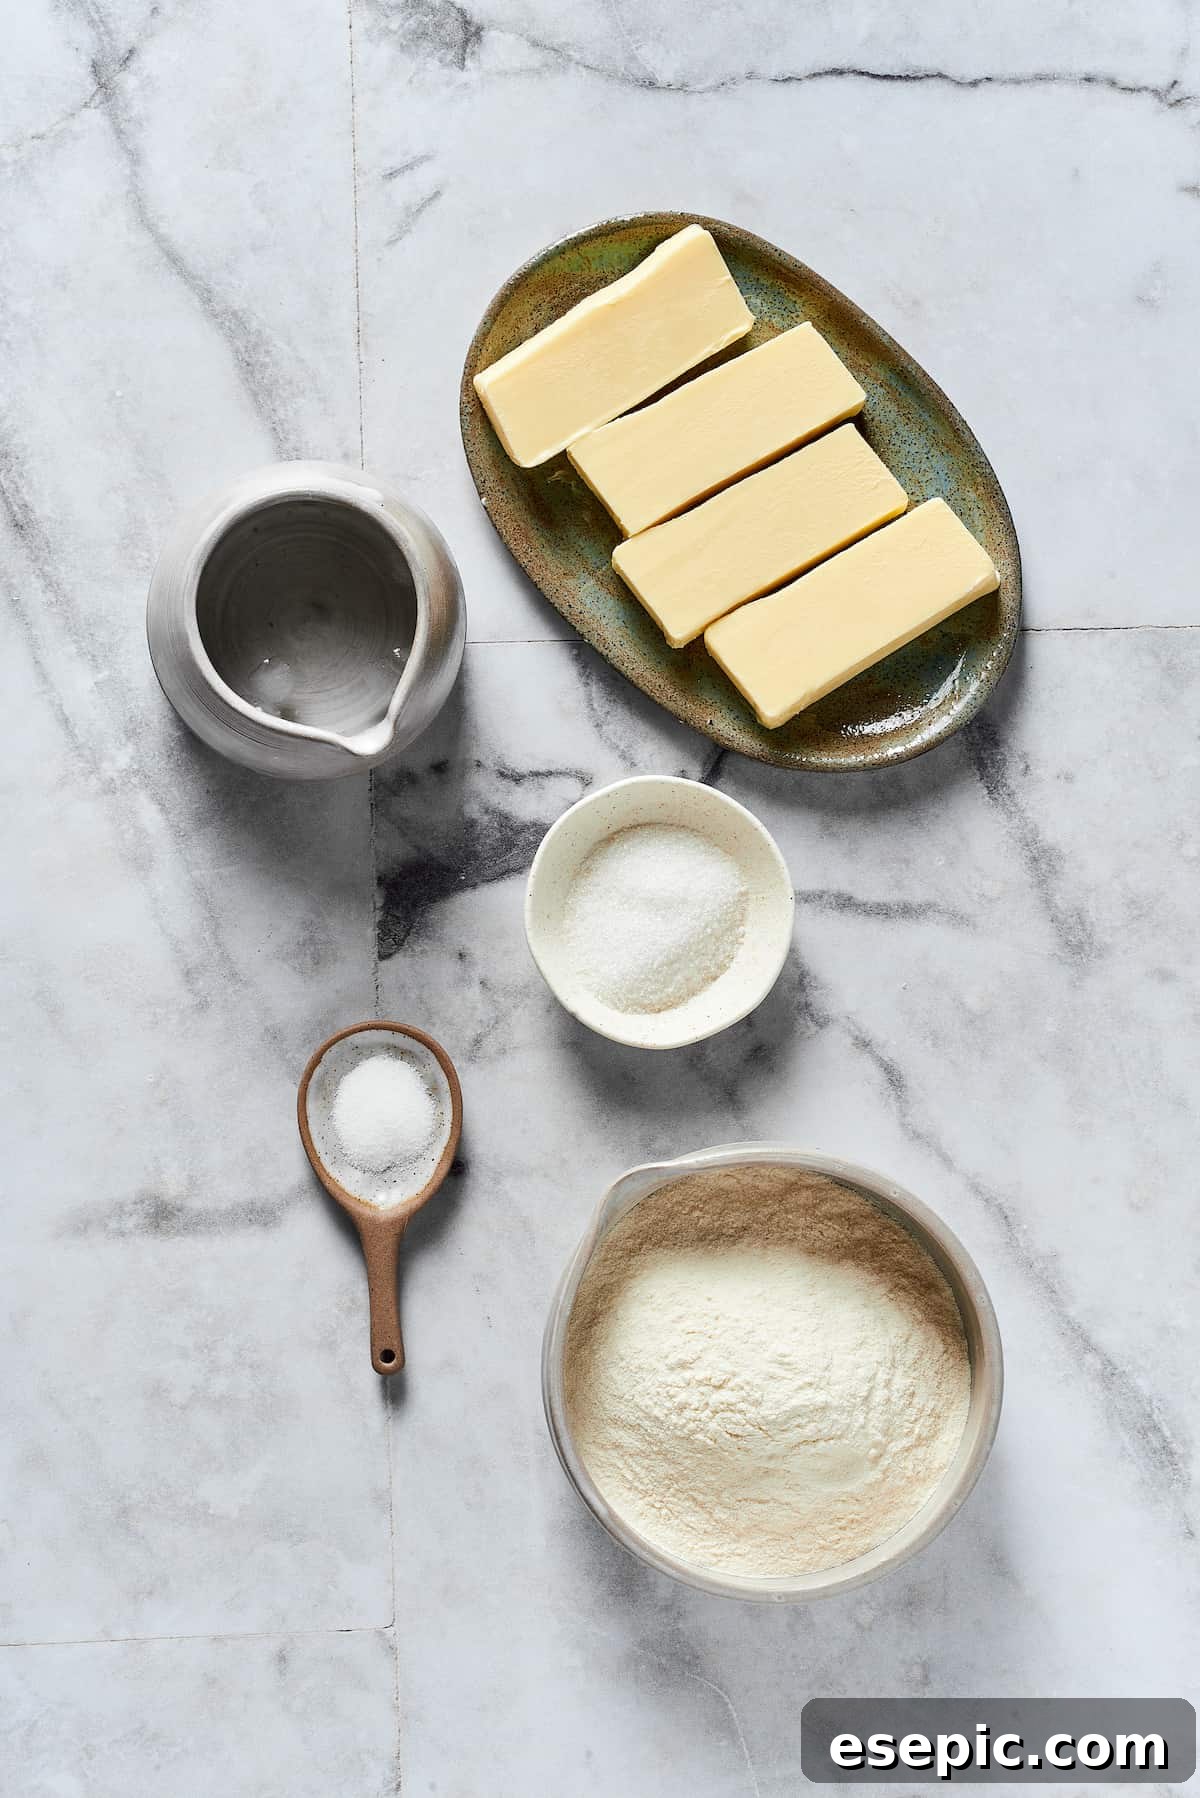
The Simple Ingredients Behind an Amazing Homemade Pie Crust
Crafting a delectable pie crust from scratch requires only a handful of common kitchen staples. The magic truly happens when these simple ingredients are combined with care and attention to temperature. Here’s a closer look at what goes into my foolproof recipe:
- All-Purpose Flour: This is the backbone of our crust, providing structure and texture. All-purpose flour is versatile and readily available, making it perfect for this basic recipe.
- Granulated Sugar: A touch of granulated sugar adds a subtle sweetness and helps with browning, contributing to that desirable golden finish. While regular granulated sugar is ideal, you can experiment with other types if you wish, but be aware that coarser sugars might not distribute as evenly throughout the dough.
- Salt: A crucial ingredient, salt enhances all the other flavors in the crust. I prefer sea salt for its clean taste, but any fine salt you have on hand will work wonderfully.
- Cold Butter: This is arguably the most important ingredient for flakiness and flavor. The butter must be kept exceptionally cold and diced into small, even pieces. Cold butter prevents overworking the dough and ensures those crucial pockets of fat that create steam and separate the layers during baking.
- Ice Water: Just like the butter, the water needs to be ice-cold. This prevents the butter from melting prematurely and inhibits excessive gluten development, which can lead to a tough crust. Using ice water helps bring the dough together without compromising its flaky potential.
Step-by-Step Guide: How to Make Flaky Pie Crust from Scratch
Making homemade pie crust is a straightforward process, but it hinges on two golden rules: always keep your ingredients chilled, and handle the dough as little as possible. Adhering to these principles ensures a light, tender, and beautifully flaky crust every single time. Let’s walk through the process:
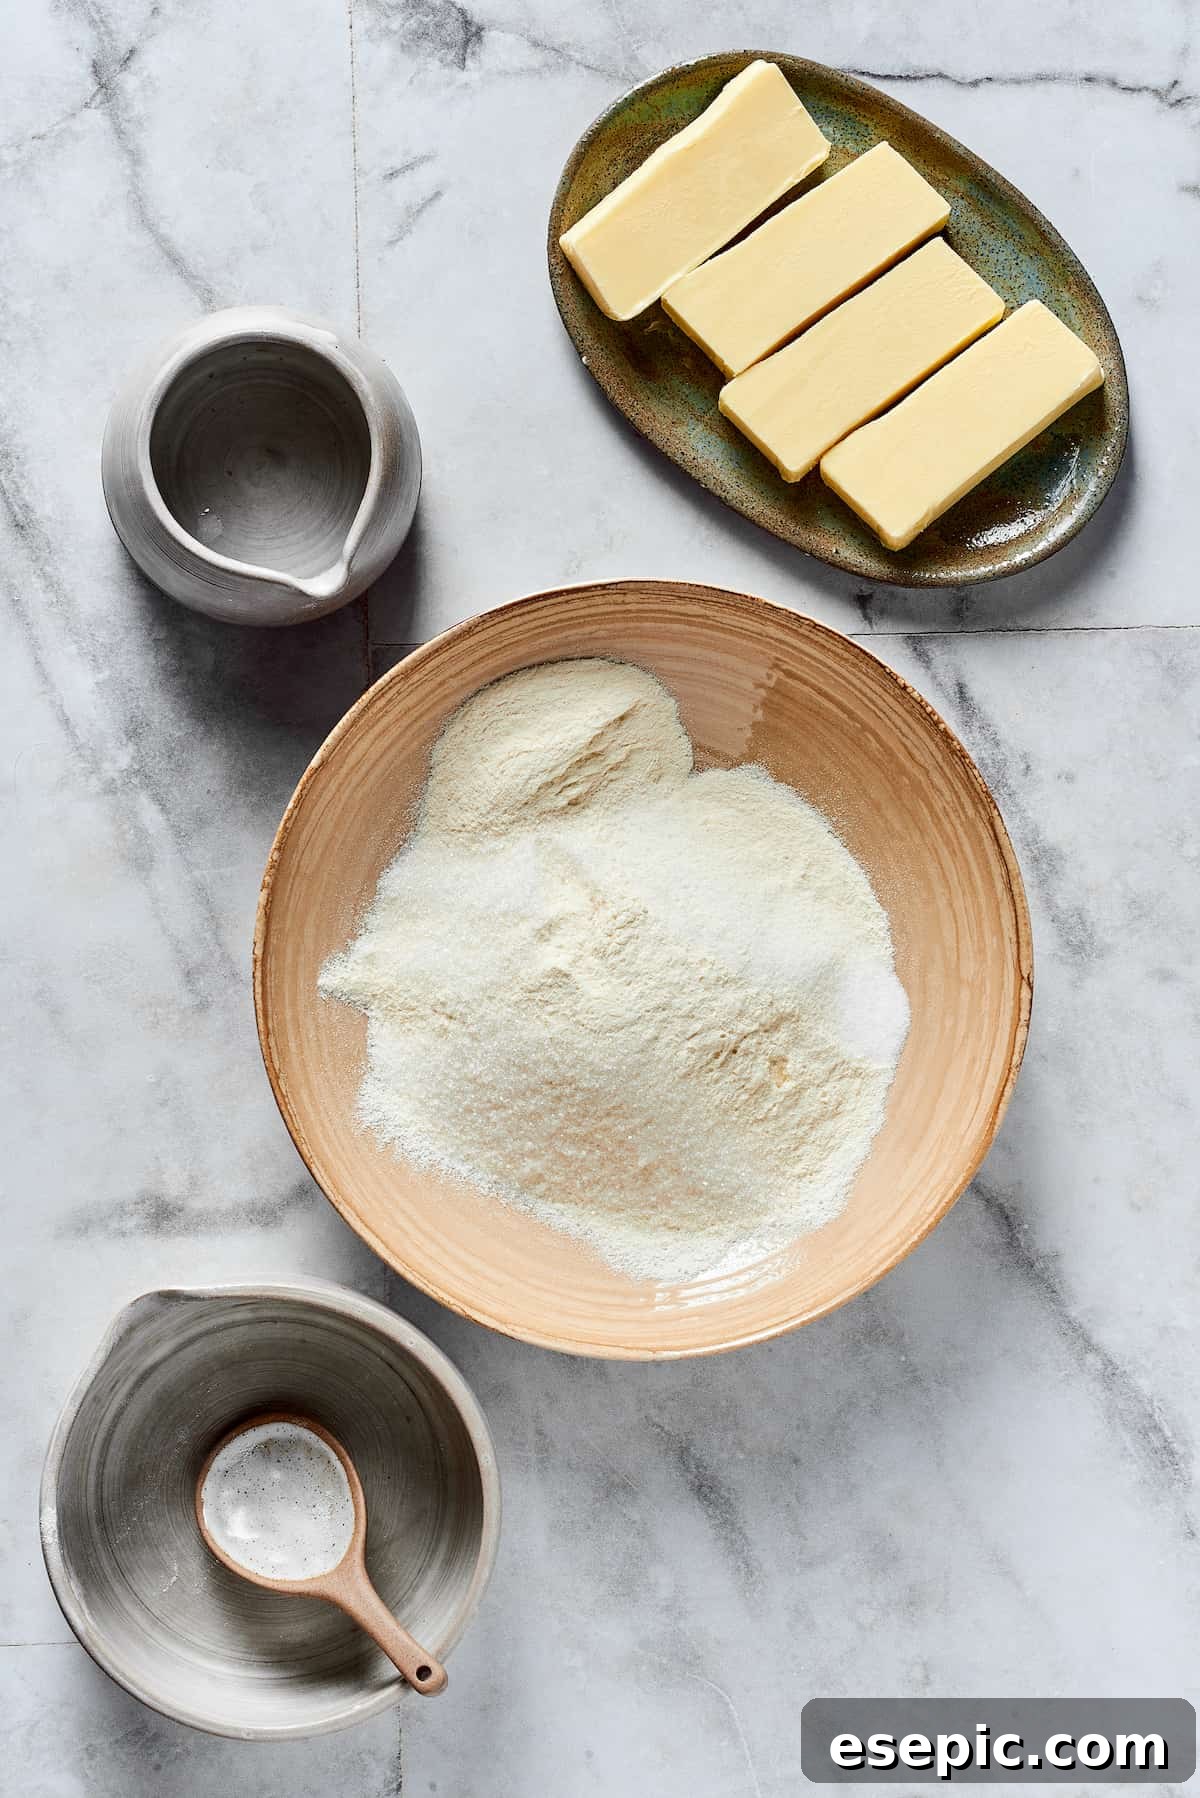
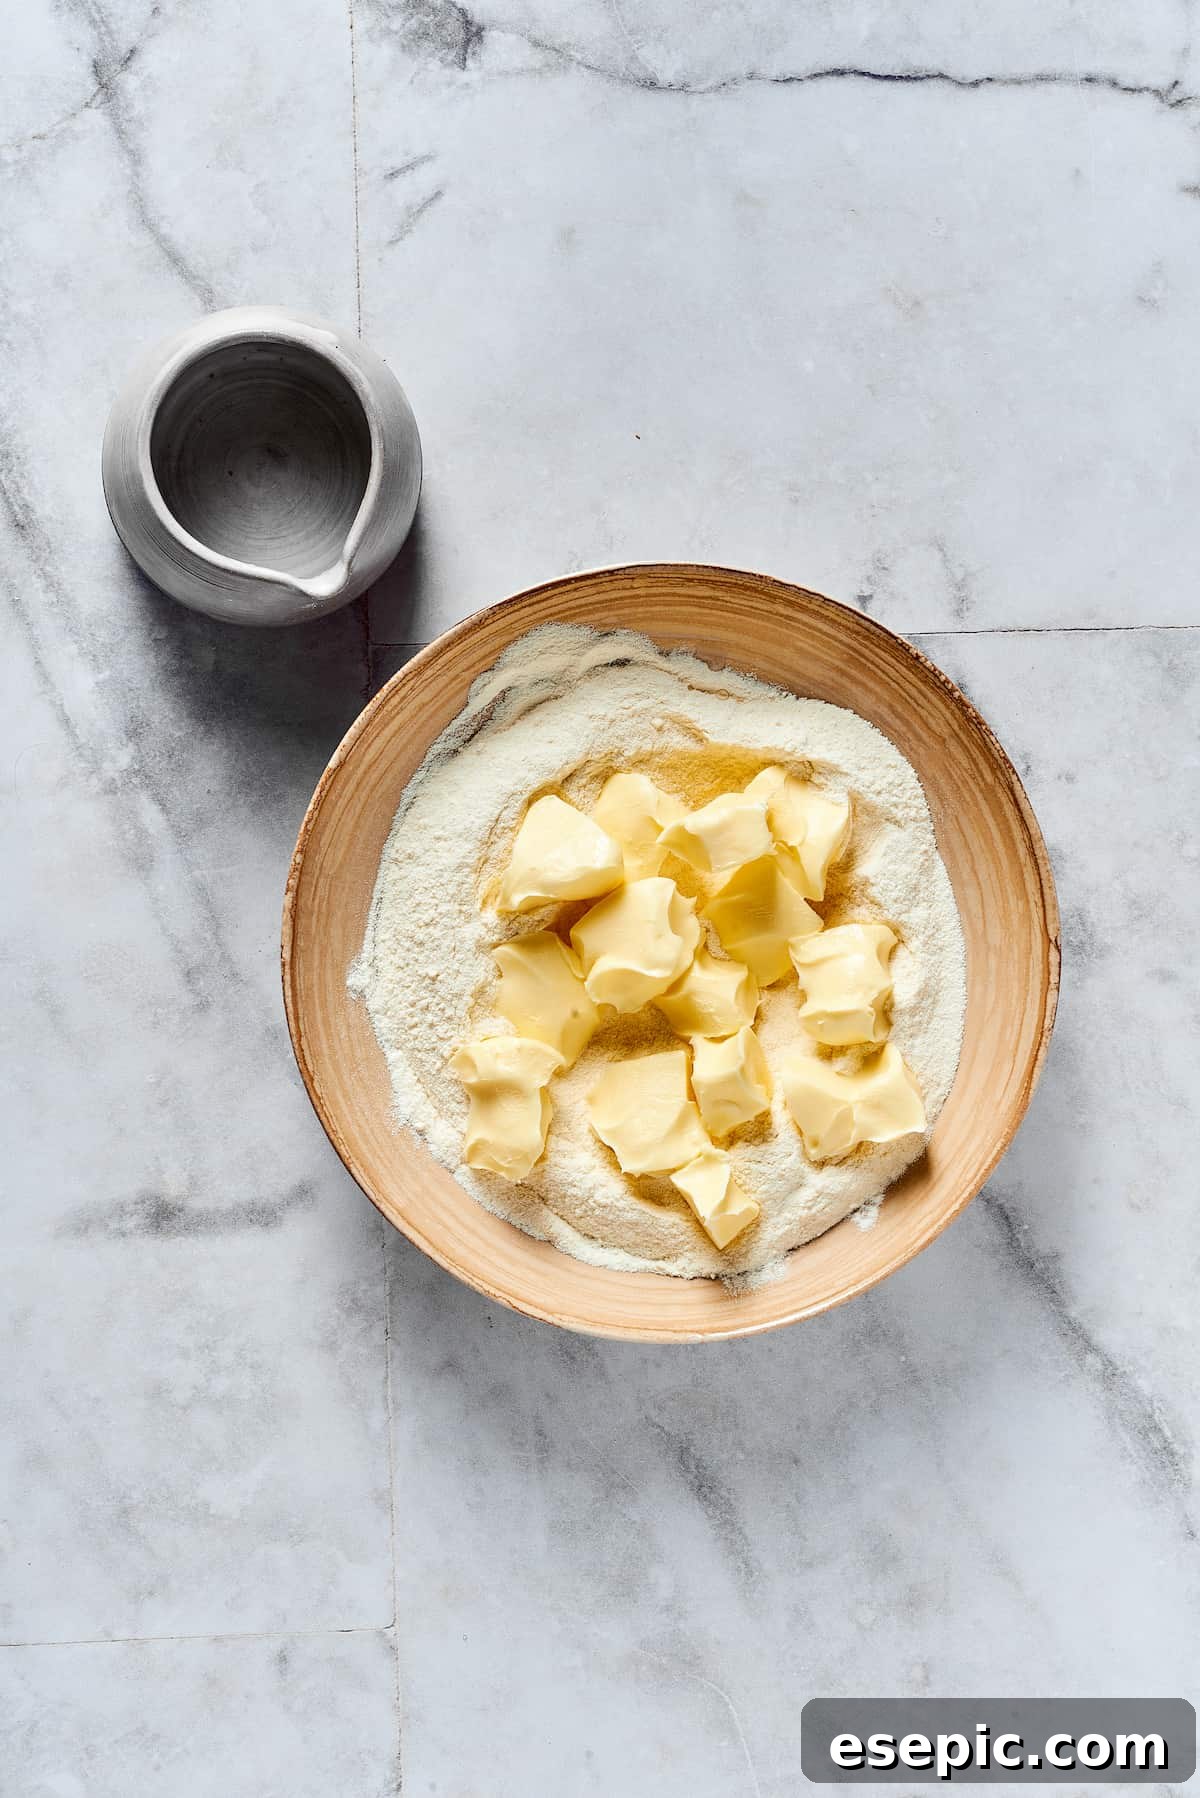
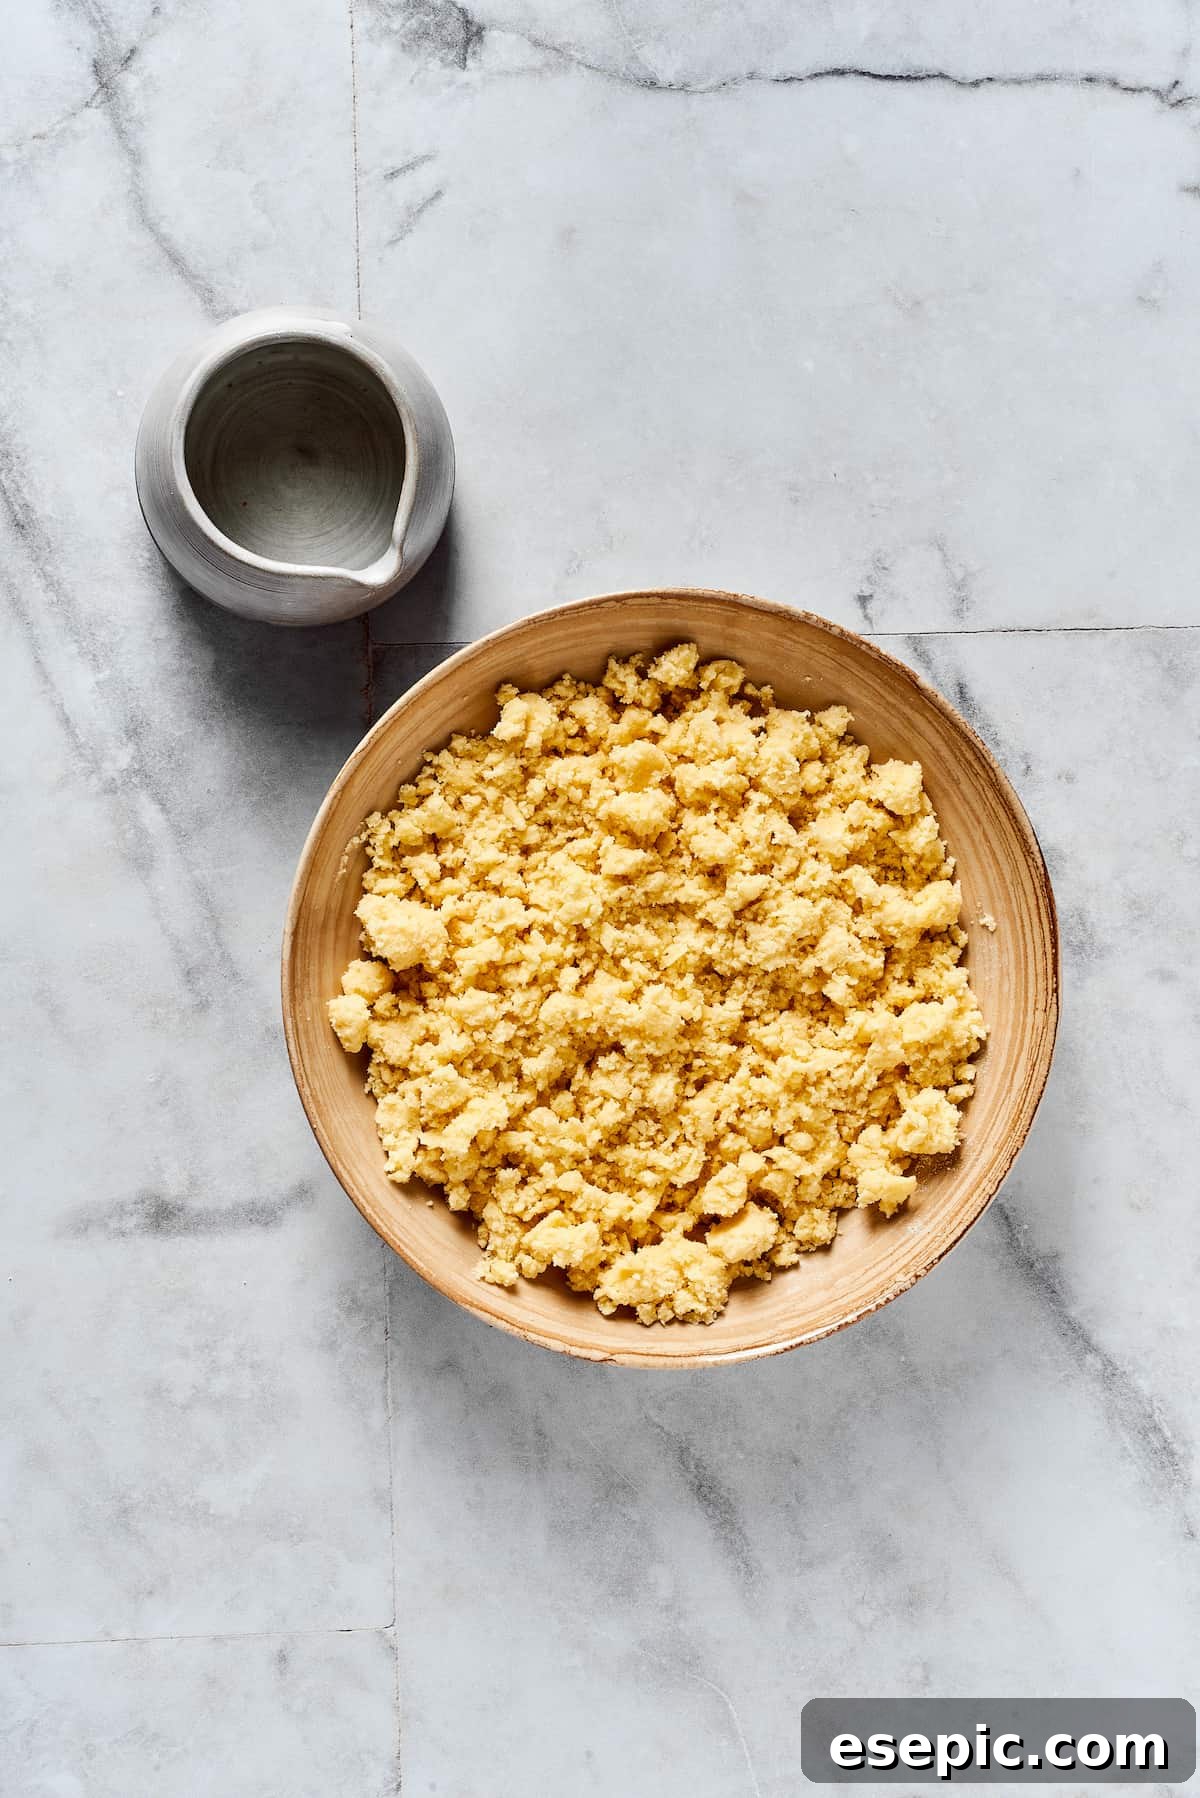
- Prepare Dry Ingredients and Incorporate Butter: In a large mixing bowl, whisk together the flour, sugar, and salt until well combined. Scatter the pre-diced, very cold butter pieces evenly over the dry mixture. Using a pastry cutter, your fingertips, or even a food processor, work the butter into the flour until the mixture resembles coarse crumbs with some pea-sized pieces of butter still visible. The goal is to incorporate the butter without fully blending it, which is essential for flakiness. Work quickly to keep the butter as cold as possible.
- Gradually Add Ice Water: Begin to drizzle ice water over the dough mixture, one tablespoon at a time. After each addition, gently mix with a fork or your hands. You’ll notice the dough slowly starting to come together. Avoid adding too much water, as this can make the dough tough and gummy. Stop adding water once the dough is just moist enough to hold together when squeezed, but still looks dry and shaggy – it should not resemble soft cookie dough. Do not knead the dough at this stage.
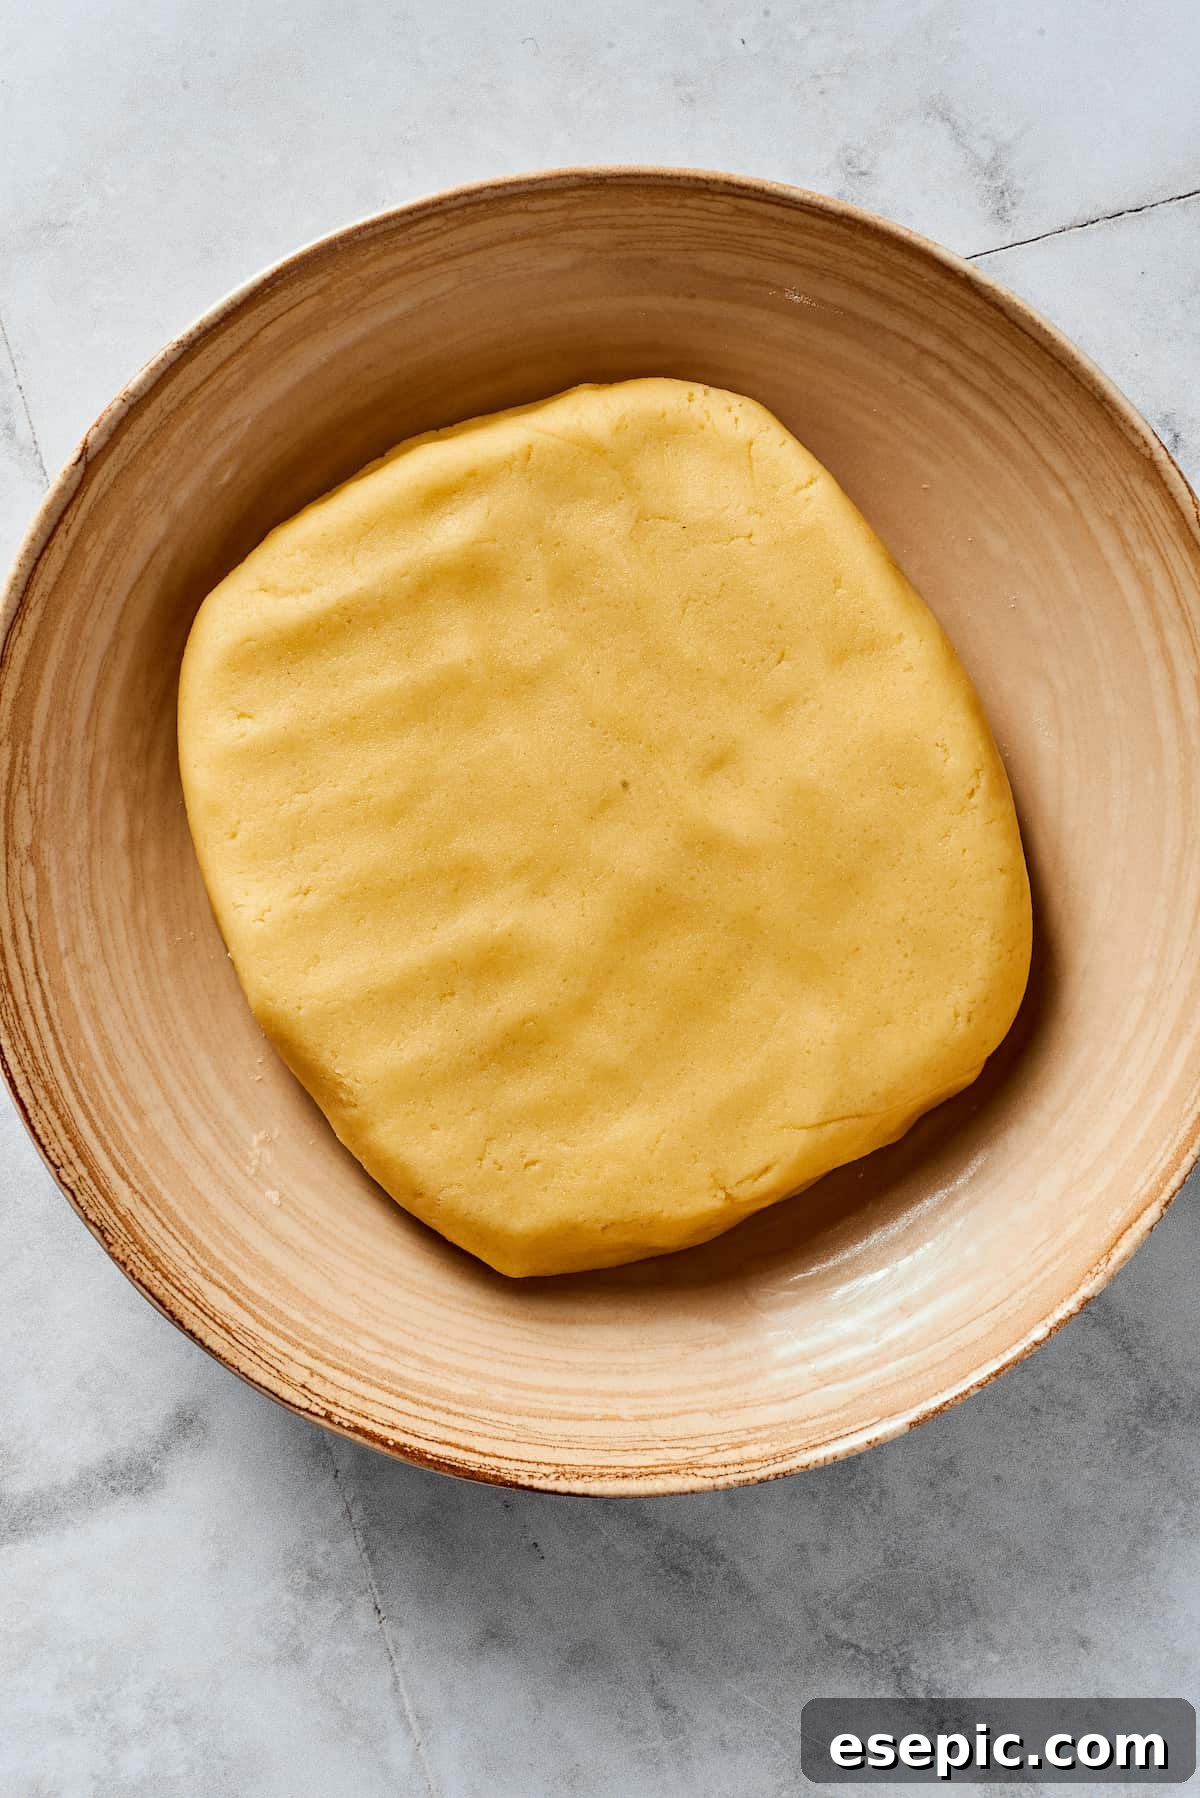
- Chill the Dough for Optimal Texture: Once the dough has just come together, gather it into a ball and gently flatten it into a disc. Wrap the disc tightly in plastic wrap or foil. Transfer it to the refrigerator to chill for at least 45 minutes, or up to 2 hours. This chilling period is crucial for allowing the gluten to relax and for the butter to firm up again, making the dough easier to roll and ensuring a flaky crust.
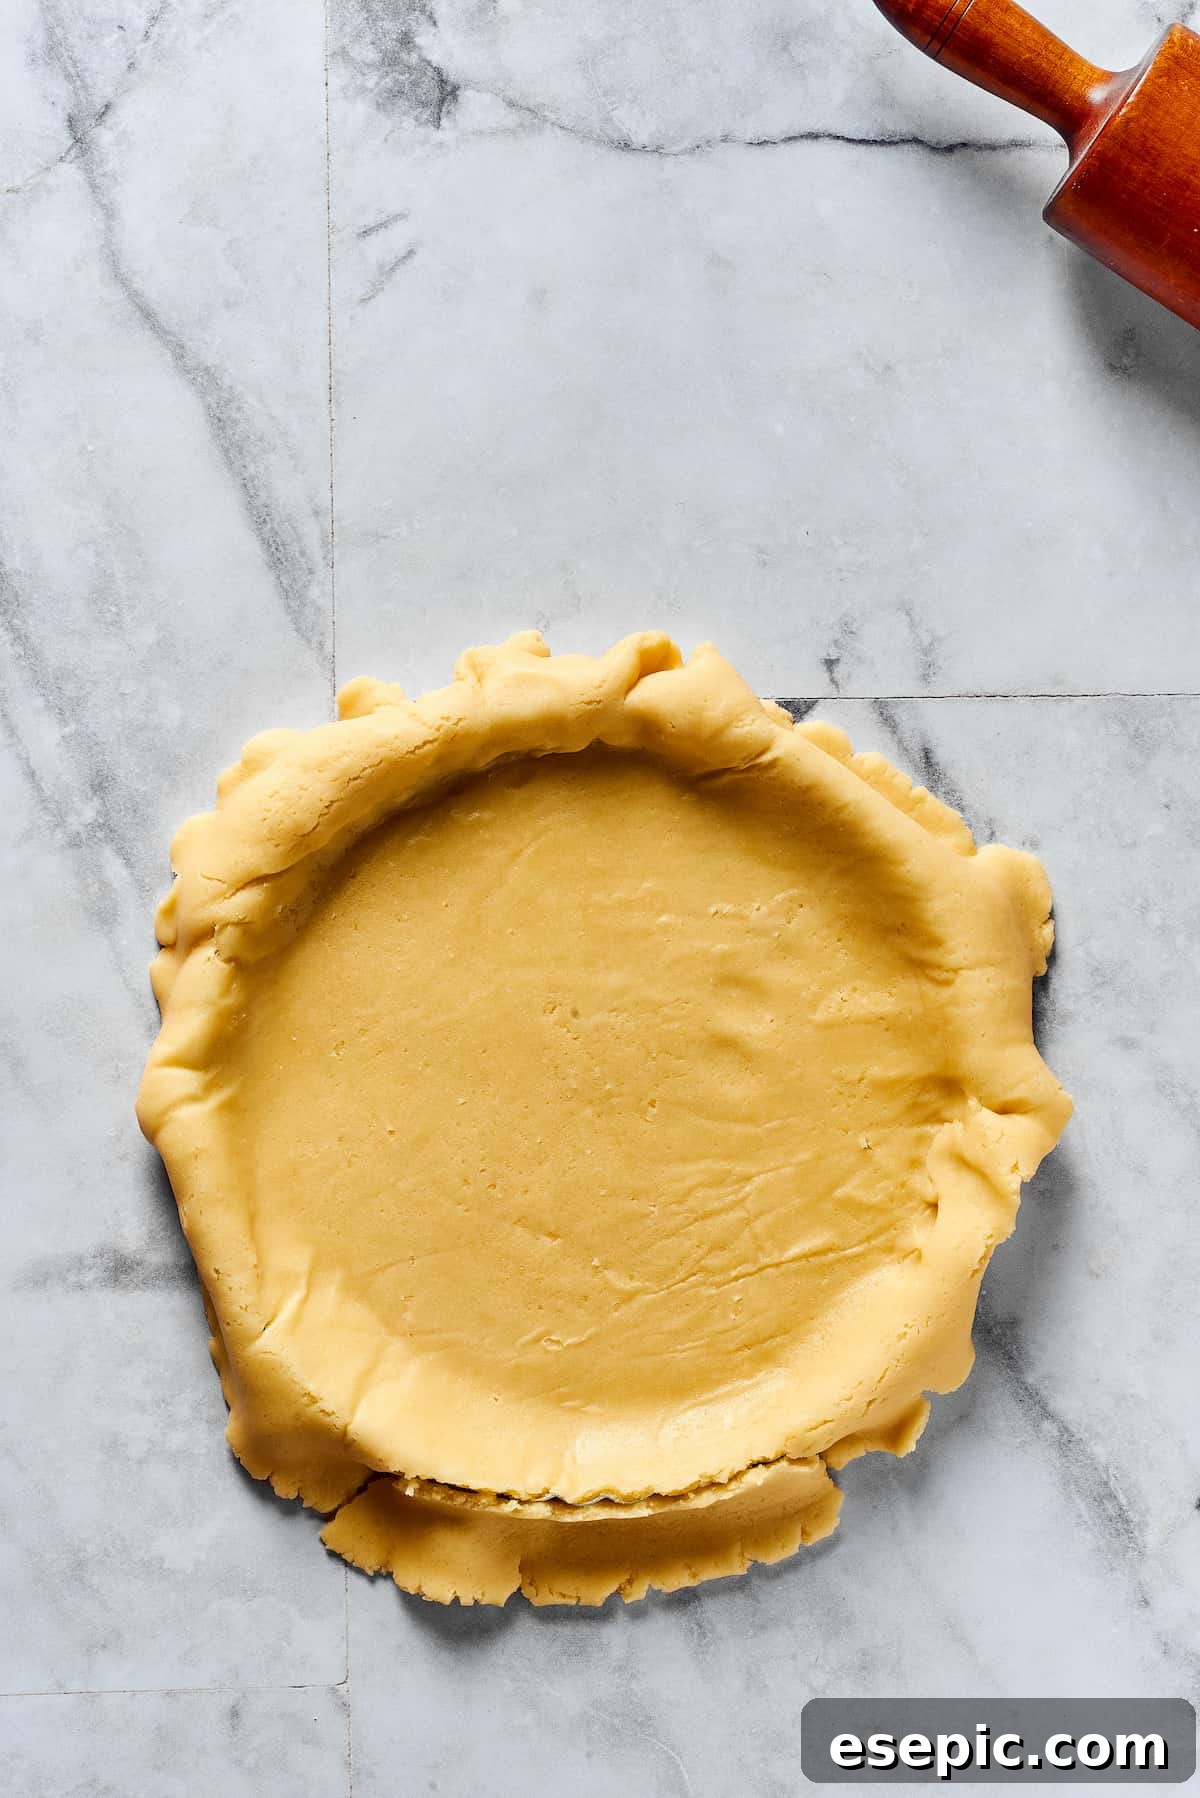
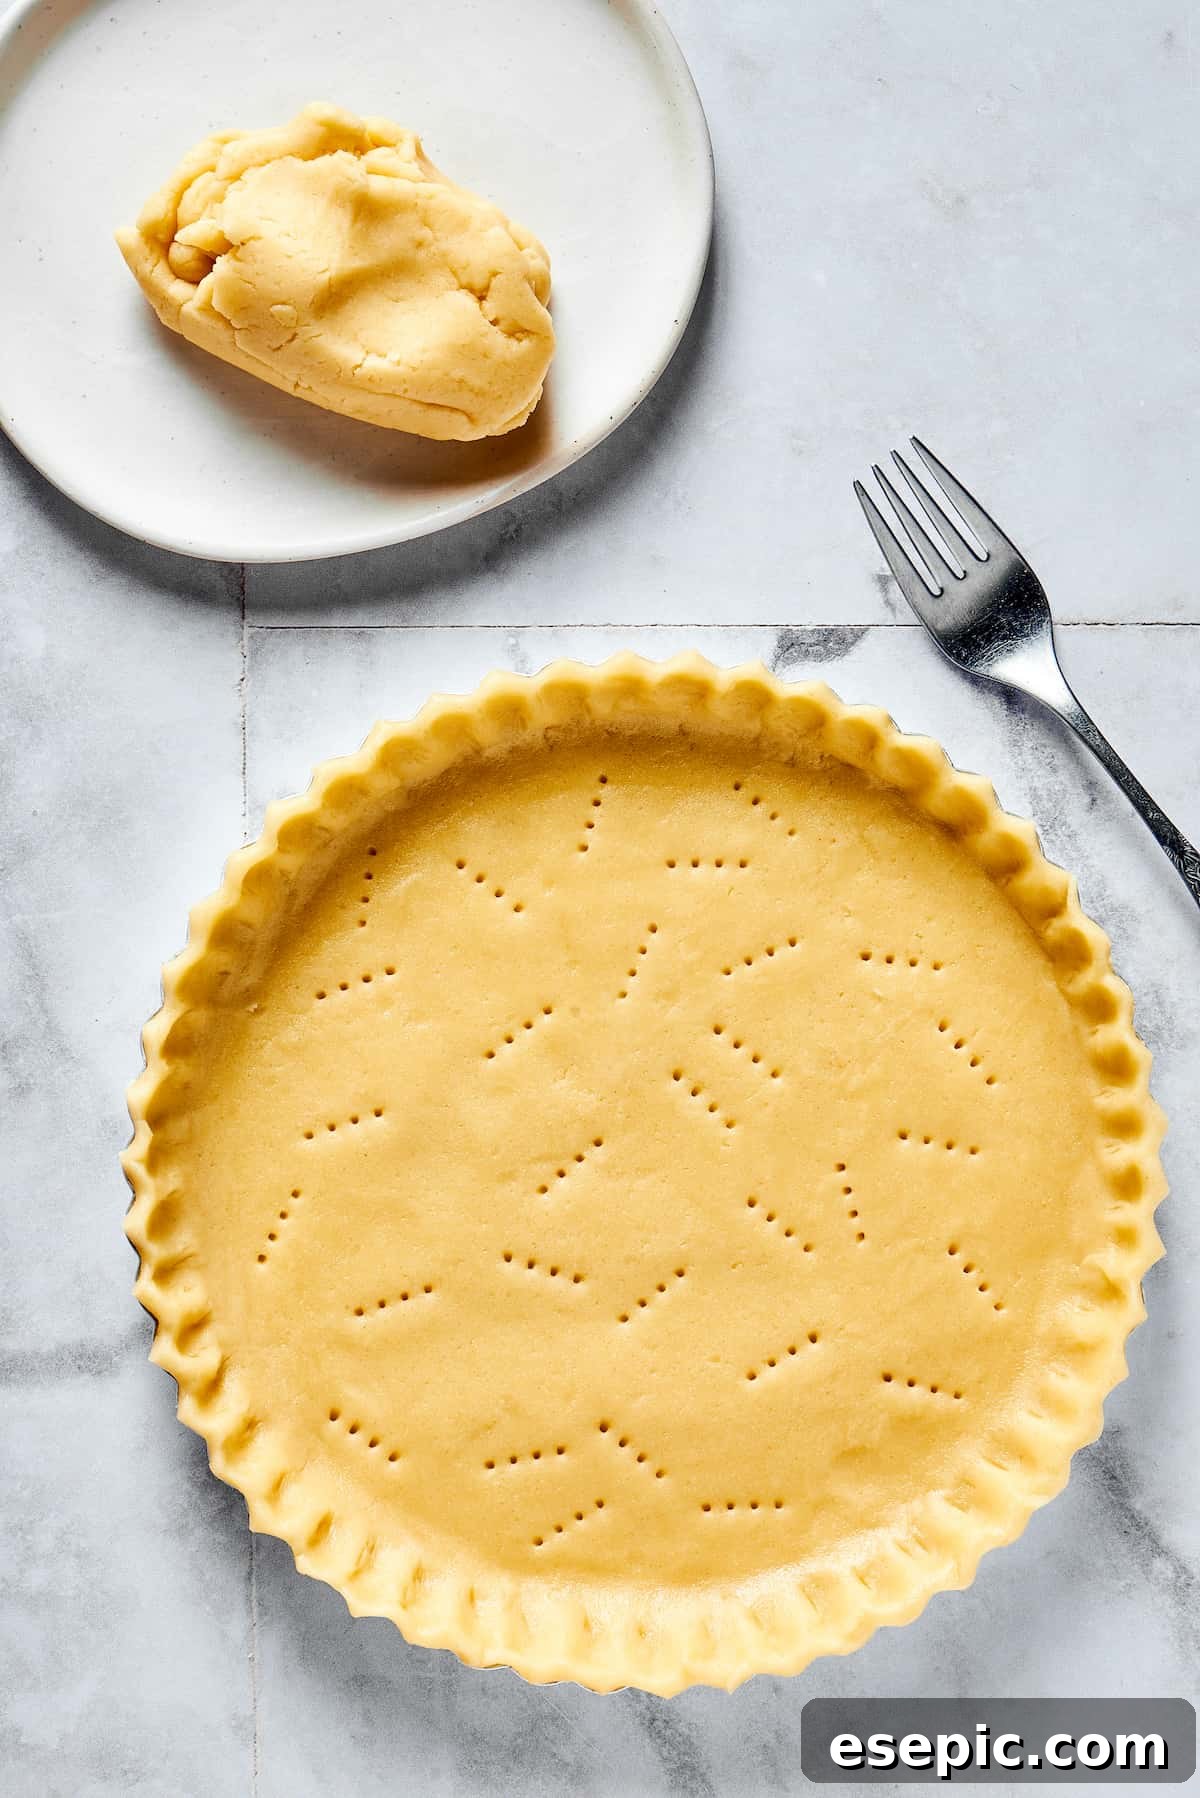
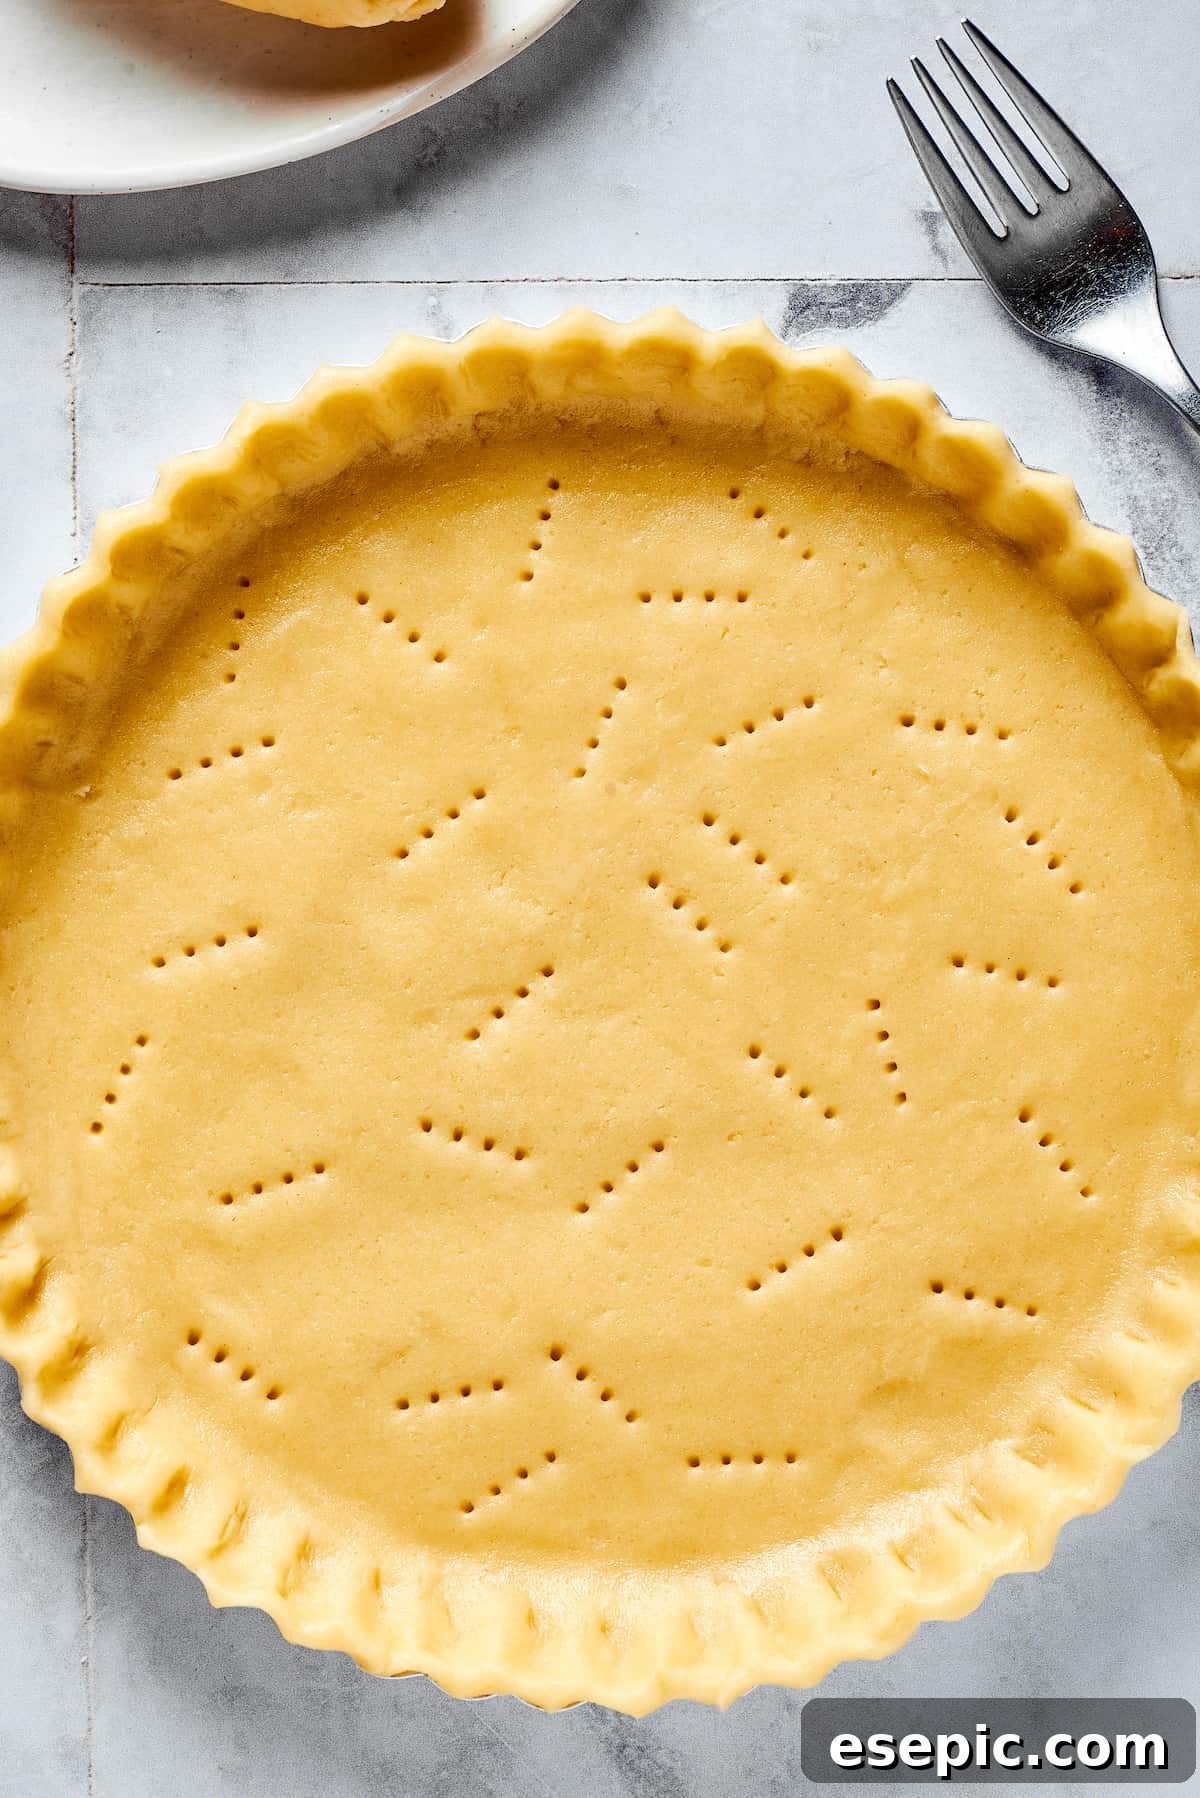
- Shape Your Pie Crust: After chilling, remove the dough from the refrigerator. Lightly flour a clean work surface and your rolling pin. Roll out the dough from the center outwards, rotating it frequently to prevent sticking and to create an even circle approximately ⅛ to ¼ inch thick. Carefully drape the rolled-out crust over your pie dish, gently pressing it into the corners and up the sides. Trim any excess dough from the edges, leaving about a 1-inch overhang, which you can then crimp or flute for a decorative finish. Prick the bottom of the crust with a fork in several places to prevent it from puffing up during baking.
- Use Immediately or Store: At this point, your homemade pie crust is ready to be filled and baked according to your pie recipe. Alternatively, you can store the prepared pie crust (in its dish) in the refrigerator, tightly covered with plastic wrap, for up to two days before baking. For longer storage, refer to the freezing instructions below.
Essential Tips for Pie Crust Success
Making your own pie crust is an incredibly rewarding skill, and with a few key tips, you’ll be baking like a pro in no time. Everyone adores a homemade, flaky crust, and this recipe makes it wonderfully achievable. These pointers will help you master it:
- Accurate Flour Measurement is Key: An overly dry crust is a common pitfall. To avoid this, measure your flour correctly. Gently fluff the flour in its container with a fork or spoon, then lightly spoon it into your measuring cup. Level off any excess with the back of a knife, ensuring you don’t pack the flour down.
- Be Judicious with Water: It might feel counterintuitive, but a few tablespoons of ice water are often all it takes to bring the dough together. Resist the urge to add more too quickly! Adding too much water can quickly turn your dough sticky, gummy, and tough. Add it one tablespoon at a time, mixing gently after each addition, until the dough just barely holds together when squeezed.
- Food Processor for Efficiency (Optional): If you prefer a hands-off approach or want to speed up the process, a food processor can be a fantastic tool. It’s highly efficient for cutting cold butter into the flour mixture and incorporating the water. However, it’s not essential! A good old pastry cutter or your own cold hands will yield equally excellent results.
- Don’t Overwork the Dough: Handling the dough too much develops the gluten, leading to a tough, less flaky crust. Work quickly and gently at every stage, from incorporating the butter to rolling out the dough.
How to Store Your Homemade Pie Crust
Once you’ve lovingly prepared your pie crust, you have a few excellent options for storage before baking. If you plan to use it within a couple of days, you can store the unbaked crust directly in its pie dish, ensuring it’s completely wrapped in plastic wrap. This tight seal prevents the dough from drying out and absorbing any unwanted odors from your refrigerator. Place it in the coldest part of your fridge.
Can I Freeze This Pie Dough?
Absolutely! This recipe is perfect for making ahead and freezing. You can freeze the unbaked dough in two ways:
- As a Disc: Wrap the flattened dough disc tightly in several layers of plastic wrap, then place it in a freezer-safe bag. It will keep well in the freezer for up to three months.
- In the Pie Dish: If you’ve already fitted the dough into a pie dish, you can freeze it directly in the dish. Cover the dish tightly with plastic wrap, then an additional layer of aluminum foil to prevent freezer burn. This is a great option for grab-and-bake convenience.
Before you’re ready to bake, simply transfer the frozen dough (whether a disc or in a dish) to the refrigerator and let it thaw overnight. Once thawed, proceed with your pie recipe as usual.
Troubleshooting Common Pie Crust Issues
Even experienced bakers encounter challenges. Here are solutions to common pie crust problems:
- Tough Crust: This is almost always a result of overworking the dough or adding too much water. Remember to handle the dough minimally and only add enough water for it to just come together. Toughness means too much gluten has developed.
- Shrinking Crust: If your pie crust shrinks dramatically during baking, it’s likely due to insufficient chilling time. The dough needs to relax fully in the refrigerator before rolling and baking. Always give it at least 45 minutes to an hour of chill time.
- Soggy Bottom: A soggy bottom crust can be prevented by blind baking (pre-baking) the crust before adding the filling, especially for liquid-heavy fillings. You can also brush the bottom with an egg wash before baking to create a barrier. Ensuring your oven is hot enough also helps the crust crisp up quickly.
- Cracked Edges When Rolling: If your dough cracks a lot when rolling, it might be too cold or too dry. Let it sit at room temperature for 5-10 minutes, or if it feels dry, you might need a tiny splash more ice water next time you make it, ensuring you don’t overdo it.
More Great Pie Recipes to Enjoy
With your newfound pie crust expertise, you’re ready to explore a world of delicious pies! Here are some fantastic recipes that would be perfect for your homemade crust:
- Southern Buttermilk Pie
- French Silk Pie
- Dutch Apple Slab Pie
Homemade Pie Crust Recipe
If you are looking for an easy way to make real Homemade Pie Crust, look no further! This all-butter crust is flaky, easy, and perfect for any pie filling you like.
- Prep Time:
- 20 minutes
- Chill Time:
- 45 minutes
- Total Time:
- 1 hour 5 minutes
- Servings:
- 1 Pie Crust
Ingredients
- 1¼ cups all-purpose flour
- 1 tablespoon granulated sugar
- ½ teaspoon sea salt
- ⅔ cup cold butter, diced
- 3 to 5 tablespoons ice water
- 2 to 3 ice cubes (for keeping water cold)
Instructions
- Combine flour, sugar, and salt in a large bowl. Add the diced cold butter pieces to the dry ingredients. Using a pastry cutter or your hands, quickly rub the butter into the flour until the mixture is crumbly with some small, pea-sized pieces of butter still present.
- Drizzle the dough with ice water, one tablespoon at a time. Mix gently with a fork after each addition until the dough just comes together when squeezed. Avoid kneading the dough.
- Form the dough into a ball, then flatten it slightly into a disc. Wrap the disc tightly in plastic wrap and refrigerate for at least 45 minutes to allow the dough to rest and chill thoroughly.
- Once chilled, turn the dough out onto a clean, lightly floured work surface. Using a lightly floured rolling pin, quickly roll out the dough into a circle about ⅛ to ¼ inch thick, being careful not to over-handle it.
- Carefully transfer the rolled dough to your pie dish and gently shape it to fit. Trim any excess dough from the edges and crimp as desired. If not using immediately, cover the pie crust in the dish with plastic wrap and store in the refrigerator for up to 2 days, or wrap and freeze for longer storage.
Nutrition
Nutritional info is an estimate and provided as courtesy. Values may vary according to the ingredients and tools used. Please use your preferred nutritional calculator for more detailed info.
- Serving: 1 pie crust
- Calories: 1700 kcal
- Carbohydrates: 131g
- Protein: 17g
- Fat: 124g
- Saturated Fat: 78g
- Polyunsaturated Fat: 5g
- Monounsaturated Fat: 32g
- Trans Fat: 5g
- Cholesterol: 325mg
- Sodium: 2143mg
- Potassium: 204mg
- Fiber: 4g
- Sugar: 12g
- Vitamin A: 3782 IU
- Calcium: 63mg
- Iron: 7mg
Conclusion: The Reward of Homemade Pie
Baking a pie from scratch, starting with a homemade crust, is more than just cooking; it’s an act of love and a tradition passed down through generations. This all-butter, flaky pie crust recipe is designed to demystify the process, making it accessible and enjoyable for everyone. The unparalleled flavor, delicate texture, and profound satisfaction you’ll gain from serving a pie with a crust you made yourself are truly worth the small effort. So, roll up your sleeves, embrace the simple elegance of cold butter and ice water, and get ready to create pie memories that will last a lifetime. Happy baking!